

Last week, I completed the 1st and 2nd pieces in the collaborative series. I did the 2nd one first — the larger one — and all of the binding was done by hand. The 1st one — the smaller one — I couldn’t bear to hand stitch the binding. I had too many holes in my hands. I just couldn’t do — so I did something I’ve only done once before. I machine stitched the binding.
I drew out the outline of the final boundaries on the top. Then I stitched on top of that outline using a yellow bobbin. Then I turned it over and used the yellow line to show me where to machine apply the binding. Once it was on (and the top edge of the sleeve), I cut off the excess.
There is a lot of plastic on the top of this one so I had to be very careful with this next step. I love using Sharon Schamber’s trick to hold the binding in place with water soluble clear Elmer’s glue that has been pressed with an iron — but doing this meant folding the binding to the top and pressing right next to the plastic without melting it with my iron. It had to be hot enough to engage the glue to hold — but not hot enough to melt the plastic underneath. I was “pressing” my luck but I did it anyway and it worked well enough. I then used a machine blanket stitch to attach the binding to the front.
I’ve been surprised over the years that — the only other quilt I’ve done this with — I have hanging in my living room and I truly forget that the binding was attached differently. Looking at it very closely, I prefer it the other way. If the final stitches are on the back, any irregularities are on the back — but my hands had to have some time to heal. I think it turned out fine. I still had to hand stitch the sides and bottom of the sleeve and the corners of the quilt — but there wasn’t a lot of that.
My typical process after finishing a piece is to block it, photograph it, and then post a new page for it on my website. Leisa and I both agreed not to completely block these pieces — although I did spray the binding with water and, on the small one, I pinned it to the ironing board and soaked the binding only in an effort to make the piece hang straight.
I photographed the 2nd one with no issues. The 1st one cannot be photographed using my traditional methods — the plastic across the front on top of the black causes too big of a glare. After spending time reading about this, I think I’m going to have to built a light diffusion box just for the purposes of getting a good picture — so there is a future project.
Leisa has asked that we not debut the final pieces until they are exhibited all together in (hopefully) late 2015. Therefore I will post pages for them without final pictures — only a notice of exhibition. This was a hard decision for me but I agree that seeing all of the pieces together creates an impact that would be diminished by individual publication.
I have been thinking about a portrait for competition — what needs to be my next piece — but I’m still in the idea stage so I started prepping #3 for quilting yesterday. Like #1, it has plastic on it — so it can’t be pin basted — my usual method. It would have to be spray basted — but it’s quite a bit larger than #1 so I jumped on the internet for some help and came up with the following plan.
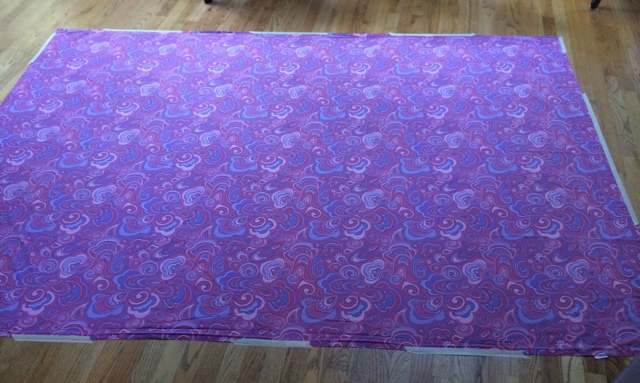
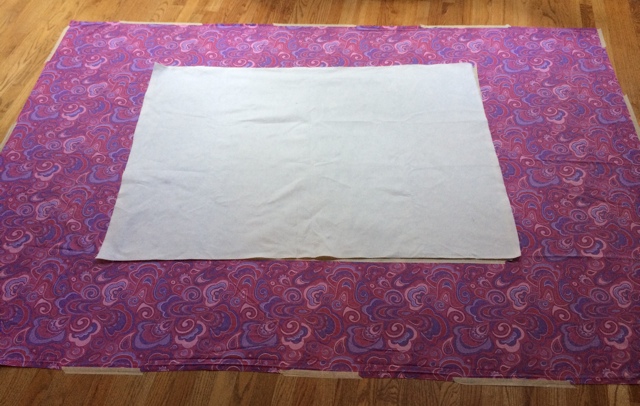
First, I laid down a sheet on the wooden floor in my kitchen. (Yes I know it’s hideous — it was bought years ago for one of my girls. Makes it perfect for this.) I taped down the edges. The intent is for this to catch all of the overspray. When I’m done, I can just throw it in the laundry.
Then I tape the backing fabric face down onto the sheet.

And then I lay the batting on top of the backing.
I fold half of it back . . .
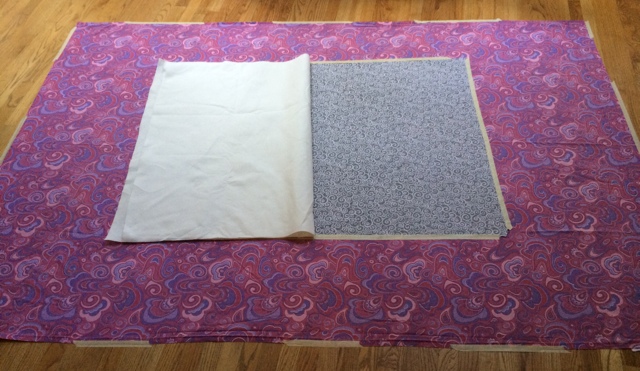
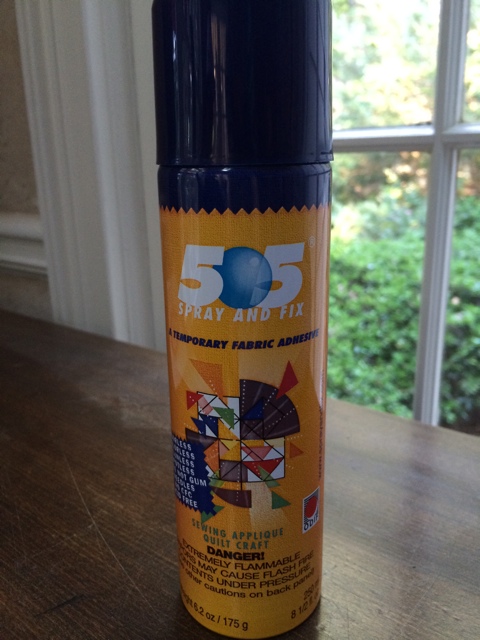
and I grab this can of 505 Spray and spray the BATTING that’s been folded back. I then fold it back onto the backing making sure that it’s smooth. If there is a wrinkle, I can lift it, move it, and then press it back together. Then I do the same thing with the other side. I fold the batting over at the halfway mark, spray it, and then smooth it back onto the backing fabric.
Once that’s done, I do the exact same thing with the top — except I still spray the BATTING.

It took me half an hour to do this, and at the end, my fingers didn’t hurt. I was at the end of a can and it started spraying out white goo — which thankfully didn’t transfer to the quilt. It just stuck to the can. I luckily had another full can to finish the job.
I should consider doing it this way more often. Even better, I realized this morning that I can draw out some intricate shapes on the top this morning without worrying about pins getting in my way. I know you’re supposed to do all of your drawing (if you’re going to do that) before you baste it, but my process is more organic. I add to the piece what it needs as I go along.


I promised to share the pics that Beth Buchweitz made of me last week (week before? Time just flies by sometimes). I had SAQA ask for a headshot for the new juried member announcement — and I didn’t have anything in my arsenal that I could use.
For several days, I pondered doing this myself — setting up the camera on the tripod, using the remote — but in the end I decided it would take way too long and probably not look very good. Beth has a good eye and I trusted her to do it right. She said that she tried to do this for herself once and it was a disaster. You end up trying to smile at nothing and the final pic looks phony.
Beth is a great photographer. Even though it was a very bright day, we moved into the shadow of a building and still had good light. This was one of the first ones she took.

She insisted that I laugh and have a genuine smile and wouldn’t take no for an answer.

I ended up liking this one — the last shot. There is no gap in my jacket and I’m more relaxed than the earlier ones.

I cropped it down for the final pic to send to SAQA.

It was a little shocking to me to do this. We all have an image of what we look like in our mind’s eye, and the camera doesn’t always show us that person. I’m not in the selfie generation — so I don’t take many pictures of myself — and as a mom, my job is always to take pictures of other people. As time passes, you don’t realize that you barely have any photographs of yourself — until you do something like this.
When I set up for this shot, I automatically put on a suit. I have two Masters degrees — in my mind, a professional headshot should be in a suit. After the pictures, I realized that this may seem unusual to other artists. Many of them wear more casual and colorful clothing for their head shots — but I suppose this is truly me. Me in a dark suit.


(I have reposted this blog post from 8/29/14 that appears to be lost due to a technical issue between my database and WordPress. If and when is recovered, I will delete this copy.)
Last week, I had SAQA inquire about a headshot of me to include in their announcement of new Juried Members. I gave them what I have used as a professional headshot — but unfortunately, they wanted something not just for the internet but also for print publication to send their galleries. I put it aside for the weekend and hoped that I had something in my arsenal of pictures.
But you know, like most moms, I don’t have many pictures of myself because I am almost always the one taking the picture. I tried really hard to pull something out of thin air — but it just wasn’t there. So I went back and asked when they had to have the picture. End of the month. A week away. Oh wow.
I spent a day or two fooling myself into thinking I could do it myself. I have all of the equipment — but I knew in my gut it wasn’t the right thing to do and it would take a lot of time if I did it all by myself.
In the end, I did something that I have a hard time doing — I asked for help. Beth Buchweitz is a counselor at my daughters’ school and both of our daughters have taken lacrosse together for the last couple of years. We both take team pictures. So I asked her — and yesterday, she took time out of her crazy schedule to set me down in the shade and take pictures of me in a suit.
I don’t have them yet — I’ll share them when I do — but they came out really well. She asked me to stick out my chin and then dip my head down to create a shadow along my chin — I’ve not been asked to do that before but it made perfect sense. She fixed my hair when it was out of place — and best of all, she refused to accept a plastic smile. I had to carry a natural smile and chuckle under my breath and it made a big difference.
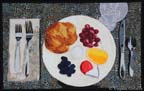 I heard this week that my piece Dolce Far Niente was accepted into the International Quilt Festival special exhibit What’s for Dinner? 2014. This exhibit consists of 36 quilts to be debuted at the International Quilt Festival in Houston in October/November — and then it will travel to other IQF shows around the US. I’m honored to be included.
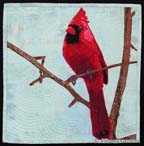 I shipped off The Cardinal — IQF asked me to donate a piece for their auction and given how kind they were to purchase The White Raven from me as well as to grace me with a prize last year in World of Beauty and to include so many of my other pieces in their wonderful exhibits, I was happy to send them something. It will be available in their silent auction at their Houston show October 30 – November 2, 2014.