Virginia Greaves
(7 comments, 341 posts)
This user hasn't shared any profile information
Home page: http://www.virginiagreaves.com
Posts by Virginia Greaves
Book Cover
0I forgot to write about the book cover I finished recently. There was a great article in Quilting Arts magazine about making one, and I needed a small project and wanted to play with some new ideas. That is what started me tea & coffee dyeing.
I laid the strips of fabric into an overlapping grid onto fusible interfacing — and then fused it to stay together. I then stamped on the fabric with metallic paints, covered it with some strips of lace and a bronze polyester organza, and then quilted it with a bronze polyester thread.
Then I got out my embossing tool — which is really designed for scrapbookers but works great for melting manmade fibers like polyester — and proceeded to melt the organza. It doesn’t melt completely but draws up around the stitching.
I scorched it a little in the middle so I covered that area with lace and stitched it down. I love how the organza tightened up around the stitching but was less please with the crispy areas I got where the organza had been without stitching. Next time I will probably cut the organza from the blank areas first.
And thanks to permission from Pokey Bolton, editor of Quilting Arts, I can share the final book cover with you.
I added a lace edge, wrapped it around a book, and tied it with thick cotton drapery cord that I had covered with thread and ribbon. I then added beads and pearls.
Looks old, doesn’t it?
It’s All About Me
1I haven’t written in while since I got the news that we will be moving. I have been in the same house for 10 years and have found that I have roots that are difficult to move. I was much more agile in my twenties and always moved at the drop of a hat. Even as a child, my parents moved me around at a fairly steady rate and we rarely stayed in a house five years. I suppose that as we grow older, we become more settled and resistant to change — which is an odd feeling for me since I have always considered myself akin to a chameleon.
I have been working on a Tshirt quilt. It is made from Tshirts and baby blankets from the daughter of a friend of mine. She died at the age of 6 about a year and a half ago, but we still think of her and miss her.
She had a lot of pink so I asked her mother if I could go with the pink and brown color scheme that is so popular now. Although I’ve never been a fan of brown, it has lately started to grow on me. I even painted my bedroom a cafe au lait color. I love the way that the chocolate sets off the pink in this quilt.
Now to figure out how to quilt it. It is very large — over a queen size but not quite a king — and was difficult to hang for a picture. I would throw it on my Hinterberg frame, but I had to take it down to declutter the house. I’ll have to think on this one.
I have also been working steadily on my next portrait quilt. I have had many requests to follow the creation of a portrait and will post progress soon.
Quilting – The Blank Page
3One of the most intimidating things about drawing is the blank page, and to the same degree, I face some of the same fears when I go to quilt a piece. Sometimes, areas of the quilt will almost quilt themselves. In the I Am the Vine quilt, the tree was a no brainer — I outlined the tree and the inner motifs. The problem came when I was faced with the black background. It was very empty.
When I’m stuck like this, I flip through Quilting Arts magazine & books looking for inspiration. In this instance, nothing spoke to me — so I went back to the original photograph.
The church in the background — well, suffice it to say that we left that church and currently attend a church that doesn’t have a building. I have many hurt feelings over that transition but decided that using the building in the background was actually a good metaphor for my feelings. To use it as a motif in the quilting makes it ephemeral while the tree is truly alive. I’ve always felt closer to God in nature and the tree embodies all of the body of Christ. The building is only that — background.
Probably more than you wanted to know — but that became my focus for the quilting. There are other quilters that pick the quilting in the beginning or as they are designing the quilt, but I design the quilting when I am getting ready to quilt it.
The more that I quilt, the more able I am to quilt without a rope (so to speak), but the panic that I feel at the blank canvas is only overcome — for me, anyway — by taking out a water soluble white pencil and drawing. I draw until I get what I want, and sometimes, I draw off a section that I know I will fill with a freestyle design — like the bushes.
I first drew the horizon line along the bottom of the wall and the bottom of the plant bed. Then I drew in the rest of the wall, sectioned off the bushes, and sketched in the door.
In the end, it didn’t take me all that long to complete. I used Superior’s clear MonoPoly thread for the tree and smoke MonoPoly thread for the quilting on the black.
Tea & Coffee Dyeing
0
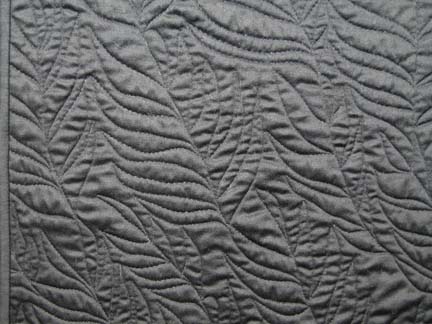
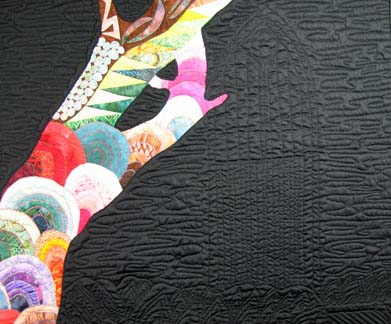
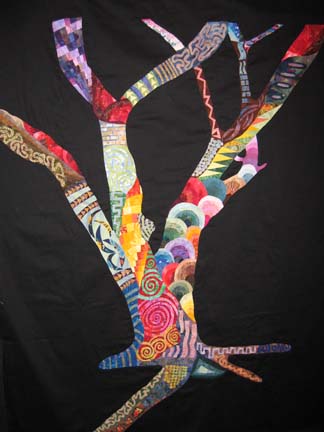
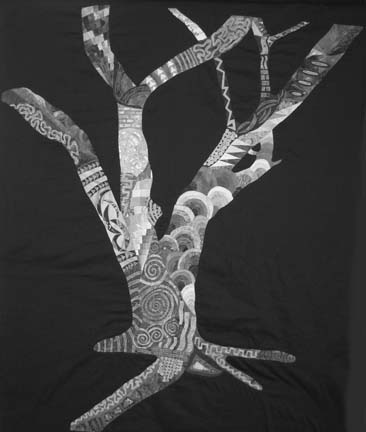
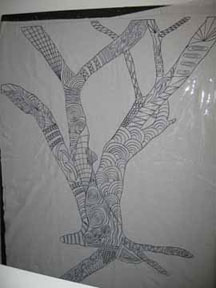
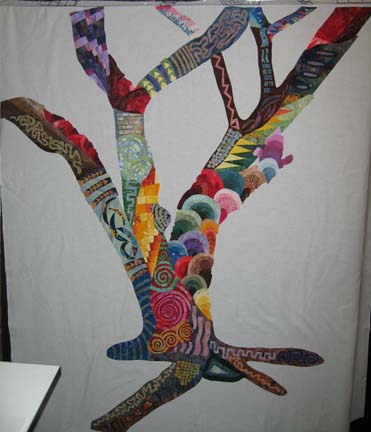
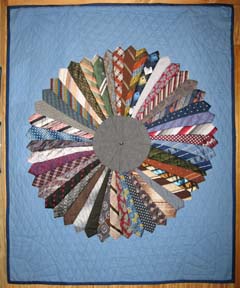
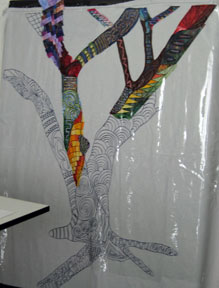
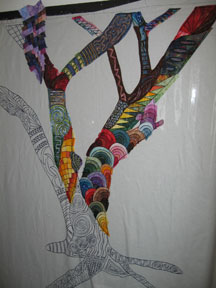
I have finally finished quilting my “I Am the Vine” quilt. I am always intimidated by all of that blank space and usually end up scribbling on it with a water soluble pen for inspiration, so when I’m done washing it, I’ll take pictures and talk about the quilting. I am finishing the binding today — I’ve never been a fan of the handwork and I usually have to have something else going on at the same time. So yesterday, I started tea & coffee dyeing.
I was really intrigued by the article on book covers in the latest issue of Quilting Arts. I decided that it would be interesting to make a white on white book cover — but I needed the correct materials first. So I brewed up some Red Zinger and instant coffee and threw in some fabric.
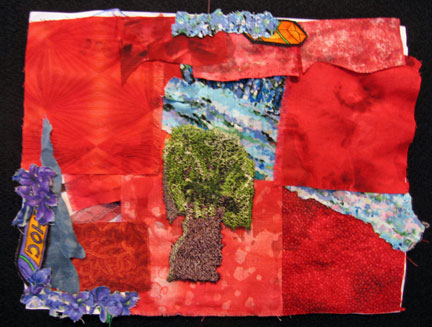
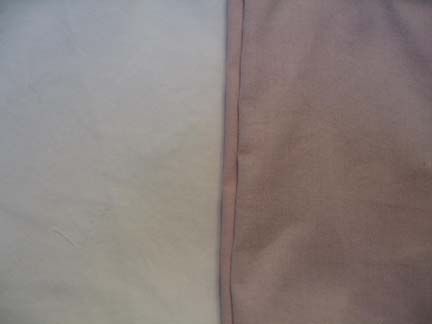
I actually started with Red Zinger and used some fabric that my mother-in-law gave me when she cleaned up her sewing room. I have no idea what the material is — well, after dyeing it, I can guess.
The original fabric, which is a little yellow, is on the right. The strip on the left was dyed in Red Zinger for an hour and I used vinegar as a mordant. It was the most beautiful blush color before I put it in the vinegar. I actually did strips of this twice. The first time, I let it steep in the tea for an hour, hang dry, and then rinsed it in vinegar and water. All of the color came out. I was crushed. Then I remembered that I needed to iron it after it dried on the line — and then rinse in vinegar. So I did it again — and again, most of the color came out. I am fairly certain that this is a poly cotton blend — and I have no idea if it has been pre-washed — and it probably hasn’t. I think that there might also be a finish on the fabric resisting the stain. It looks like it didn’t take any color, but comparing it to the original fabric, it is more grey now than before.
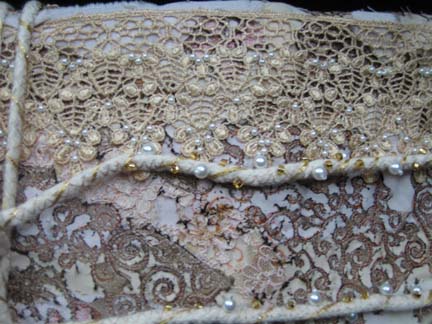
Knowing that I had instant coffee granules on hand and some lace in the drawer, I batched up coffee and threw in the lace.
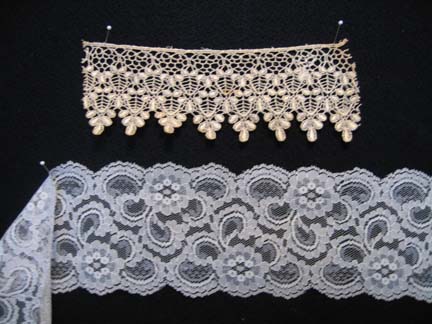
Neither of these are cotton laces. The one on the top came out beautiful. It started off very bleached white and turned a soft caramel color. However, the one on the bottom did not work as well. It also started off white and the coffee stained it beautifully, but most all of the color came out in the vinegar and water — in fact, I did this one twice also, which unfortunately did nothing to improve its appearance.
I ran out of Red Zinger, as did my local Wal-Mart, so I raided my daughter’s stash of Raspberry Zinger in order to dye some white Kona cotton (at least I knew the fabric content of this piece of fabric & suspected that it would take this technique better than the polyester blends). This time, rather than make my strips and then dye the strips, I got smart and dyed a bigger piece. When I get ready to use it, I’ll rip it into strips. Much easier to work with. I’m not certain why this didn’t occur to me in the first place.
The one on the left is the white Kona cotton, and the one on the right is the beautiful raspberry that I got.
Not a great picture — but you get the idea. The color changed significantly & gave me a wonderful blush color.
I had to buy some polyester organza, so while I was at the store, I also bought some cheesecloth and some lace that was on the clearance table. I dyed both of them in the raspberry and coffee.
This is the cheesecloth. The original white is in the middle, the raspberry is on the left, and the coffee is on the right.
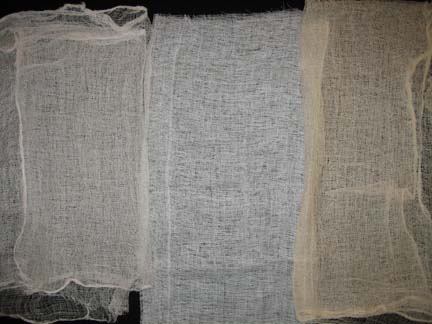
The raspberry cheesecloth was disappointing. It lost most of its lovely color in the vinegar & water. The coffee worked very well.
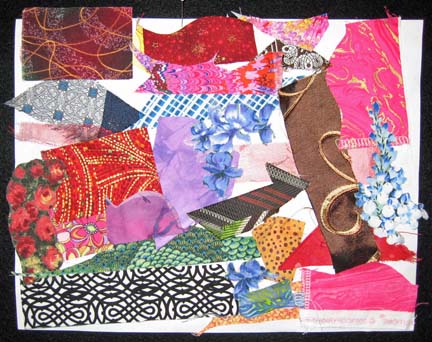
This is the lace — I have no idea of its fabric content, although I doubt that any of it is cotton.
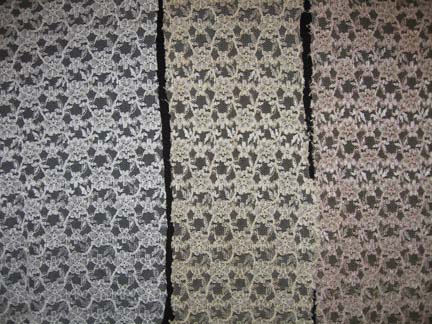
The panel on the left is the original white, the middle one is the coffee, and the one on the right is the raspberry. The coffee was wonderful but mellowed to a soft yellow in the vinegar and water — and the raspberry was the most wonderful surprise. The netting is a soft beige-y brown and the roses are light pink.
I read somewhere that pomegranates can be used, and I got some good hints from the QuiltArt list today — may try that tomorrow.
Surprises are part of the fun. I now have wonderful inspiration for a book cover.
Color and Value
0I have finally finished the machine applique process. I use a tight zigzag with a 1 mm length and 2 mm width which takes some practice to run smoothly since it is so small. I catch myself leaning in closer and closer to the machine, and sometimes, afterwards, my back hurts. Maybe my eyesight is changing.
It was seeing a quilt by Ricky Tims a couple of years ago that led me to use complementary colors for the thread. It gives an energy that wouldn’t otherwise be there. The only place I didn’t do that was on the small circles. I tried complementary color thread in a free motion circle around the outside edges — and I didn’t like the way it looked. Then I tried the same thread with the zigzag and it still didn’t look right. I finally decided that the shapes were so small that the zigzag was ruining the shape of the applique if used in a contrasting thread color — so for the two areas of the quilt with small circles, I used the zigzag with a matching thread color.
The interesting part of this experiment is that this picture is not altogether different from the picture of the quilt without any applique thread on it. It is more of a secret surprise for those that care to inspect the piece up close.
A year or so ago, someone on the quiltart list suggested taking final pieces into Photoshop and removing the color to view the color values. Although it looks like I have been working in color, all along I have been playing with color values — and it is interesting to see the piece without color.
It is always surprising to me how design is affected by value. It is true that value does all of the work and color gets all of the credit.
Isn’t vinyl just for records?
1I have had so many people ask me what the vinyl is for so I decided to explain the set up in a little more detail.
I print out a full size of my pattern. I used to go to a drafting store — but I found that my local store was unreliable and began to charge me for all of their mistakes. Then I started printing it off my computer and taping the pieces together. I take the rough draft in Photoshop, flip it so that I get a mirror image of the piece, and then print it out. (I’m moving my process to CorelDraw since it does this part so much better — but I’m still in the learning mode at the moment.) This gives me what I need for tracing onto WonderUnder — which is my current fusible of choice.
Once it is all taped together, I turn it over and trace the back — which is really the front since what I printed out is the mirror image. I lay vinyl on top of this and, using a black permanent marker, trace the design onto the vinyl. I try to buy vinyl that is a medium weight — not too thick, not too thin.
Then I take white muslin for my base and sew the vinyl to the front of it using a teflon foot. If you use a metal foot, it will stick to the vinyl. When I first tried this method, I just pinned the muslin to my design wall and then pinned the vinyl on top — but as you work along the top edge, you have to flip the vinyl over and it gets out of alignment with the muslin.
At this point, I have the vinyl sewn to the muslin on my design wall.
I then take my printed pattern (on the side I printed out), trace WonderUnder pieces from it, fuse to fabric, cut along the lines (leaving overlap in some places), and place fused pieces between the vinyl and onto the muslin, ironing as I go. In this piece, there are a few areas that are paper pieced and then fused as a group onto the muslin.
The vinyl is a placement tool. It tells me where to place each piece. There is a point, however, with the portraits that I take off the vinyl, study the original photograph, and make adjustments off the pattern. It is my piece, and I’m allowed to change things if I want to. I changed a branch on the tree, but mistakes can always become design opportunities.
I Am The Vine . . . continued
5Although life keeps trying to get in the way, I have managed to make some headway on my latest quilt, “I Am the Vine . . . You Are the Branches.” I managed to complete the fusing a couple of days ago which is always bittersweet because I am ending a large part of the design process — and although I have degenerative problems in my thumbs from so much cutting, I miss when I have to put the scissors down.
At this point, I’m going to perform magic and change the background to black. I don’t start with black because I don’t want black shading my fabrics any darker than they all ready are — so I fuse to white and then add black. In this case, I’m going to reverse applique the tree to black fabric. This is where I take a leap and break a few rules.
First, I take the vinyl off the front of the tree. Then I put water soluble thread in the top and black thread in the bobbin of my sewing machine. Keeping an eye on where I want things to be, I free-motion stitch around the tree.
Then I take a piece of black sateen (which I love if I can find it) and place it face down on my cutting / design table. I clamp it and/or tape it down so that it is perfectly flat. Then I lay the tree on it wrong side up, flattening it out. At this point, I add anchoring pins around the outline of the tree with some pins in the tree. This is very similar to pinning the quilt sandwich, but I am only anchoring the black to the front of the tree.
Back at the sewing machine, I load black thread in the top and bobbin and sew on the black lines I created on the first pass. Then I lay the entire piece black side up on the cutting table and cut away the black from the inside where the tree pieces have been laid.
When I am done cutting, I have cleaned up all of my outside edges and the tree really comes to life.
The outside of the tree has rough edges that are only held down with a single line of stitching. The very next thing that I do will be to cover those edges with a tight zigzag. Then I will go about covering all of the applique edges inside the tree. I usually use a matching thread, but I have been thinking about a piece at Houston done a couple of years ago in which the artist used contrasting thread for all of his machine applique. I have a day or so to decide, but I may do it that way.
Found Treasures
0Yesterday, an artist friend of mine asked if I wanted to join her & her friends to visit another artist — a sculptor. So we loaded up in her convertible Volvo (she let me drive which was great fun), and we headed into the countryside in search of inspiration.
When I was younger, I always wanted to “make good time” and I always took the highway — but in recent years, I have found great joy in learning the back roads of our beautiful country. Although at times I hesitate to mention that I live in Alabama given how rural it is and how much it lacks cosmopolitan appeal — there is nothing that beats a drive through the countryside of our fair state. Blue sky and light and cool breeze — and four crazy artists in a convertible looking for trouble.
We had a wonderful time and found several treasures — including a very large piece of PVC pipe I hope to use in the near future for shibori — but while exploring the house that the artist built with her husband, I found this quilt:
It was created by Ruth Roswal, the owner’s mother-in-law. I have made several pieces from men’s ties — a portrait quilt with the ties framing the face, at least 5 pillows, a tie purse — and I love the look of the silk and the masculine, rich colors. I have never seen a quilt constructed in this way — designed to show off the beauty of each of the ties, preserving the tie points. It is hand-quilted with quarter fans in the four corners. Beautiful.
For the Love of Fabric
1My daughter had a friend stay over last night, and at about 10 o’clock — when I was getting bleary eyed and ready to fall asleep — our little guest discovered my sewing room. I found later that she had taken some of the leftovers and placed them on the tree I have been working on — and when I found her, she was squealing over my garbage can. Both her & my daughter had taken scraps and were gluing them to paper — to make a “quilt”. I immediately pulled out more scraps of fabric & ribbon, and they had so much fun. Both of their personalities shone through in their final pieces, and I found them both so inspirational, I decided to share them here.
The tree on this one was a threadpainted piece that I made for a quilt and then decided to not use. It ended up in my scraps and she claimed it.
I Am the Vine, You Are the Branches
0I started this blog to journal my ongoing work — and it has been harder than I thought. When I work, I crawl into my head (so to speak) and forget about everything else. My mother, a painter herself, used to talk about it — so perhaps I have inherited this from her.
I spent most of last year working on portraits in single colorways — very instructive — but I have found a desire for lots of color and knew that I needed to take a break and do something more freeing. I happened to have a drawing on my design wall that has been there for a couple of years — and over that time, several people have seen it — and many of those people have recently inquired as to why I have done nothing with it.
When my children returned to school in August, I made the design larger and transferred it to vinyl. There are other ways to do this, but I find that fusing with this method allows a lot of spontaneity. Before I could really start, though, I had to have a color palette:
I went through my fabric stash and laid it out on my cutting table. I covered most of it — so that I have had to push it around in order to make templates from the design I have underneath it. Also, as I have been working, I have started pulling more and more fabric from my stash — my hidden goal may be to use a small piece of everything — but I love the flow of the color through the piece.
This is what it looked like September 6th:
and this is what it looked like this morning:
I have started on the left most branch and am about halfway down. It is fascinating to see it develop. When I am done, I plan to applique black onto the background — and I may discharge the black — I haven’t definitely decided yet.