Posts tagged portrait
Not At Houston
0Years ago, I had the privilege is attending the AQS Quilt Show in Paducah. There were miles and miles of the most extraordinary quilts I had ever seen. Every time I came to the end of a row, there was another one, each quilt more breathtaking than the last. I marveled that anyone could jury awards and somehow discern the placement of one over another.
Although I don’t enter Paducah anymore because of their size restrictions — this is how I imagine the International Quilt Festival in Houston to be like — probably larger. I have had the honor of having many quilts there but have not been able to visit myself. At this time of year, the blog posts from friends attending makes me wish I could hop on a plane. I’ll get there one day.
I have one quilt in the invitational exhibit Pets — Unconditional. This is a piece I created several years ago and shows the unconditional love that my mother’s Brittany Spaniel has for her. Given the popularity of the animal pieces that I have done, I should really make more of them. They are much more marketable — portraits of people are much more personal to the subject — although I do not use marketability often in choosing a subject for a piece — no more than I use exhibit themes as guidelines for ideas. I like to create pieces that are inspirational to me — although I can appreciate that that is not always the most marketable decision.
I also have two pieces at the same show in the World of Beauty Exhibit — People, Places, & Figures category. I confess I don’t actually know if they hang the exhibit by category — although it makes sense that they would.
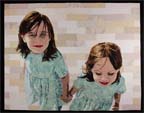
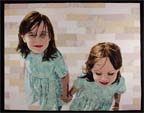
The first is Beach Guardians, a piece I made last year based on my children when they were younger. I love the perspective of looking down on them from above.
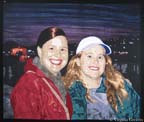
The second piece in the same exhibit is called A Walk in Twilight created earlier this year. It is about friendship and the joy that we share in each other’s company. Sometimes we just need to remember to take our friends along to make the journey more enjoyable.
These were the first two pieces I made with multiple subjects — although you could argue that Amelia Earhart had two subjects — Amelia and her plane. I still struggle with backgrounds and deciding whether more complex is actually helpful to the piece or not. Sometimes I think something simple is best — you don’t want to detract from the main subject — but other times, a complex background adds to the story of the piece and still enhances the portrait.
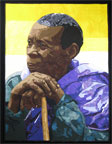
I have also been privileged with winning a first place ribbon from the La Conner Quilt Festival in the Open: Fiber Art Quilted category for Bukonyan Elder. This is my first year to have entered this show and I was thrilled to place. Their Top Honors Exhibit will extend until the end of the year and will be available for viewing at the La Conner Quilt & Textile Museum in La Conner, WA.
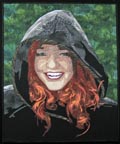
Lastly, my piece Celtic Woman is being included in a book to be released this coming April. I have not been published in a book before so I can’t wait to receive my copy. I will give more details on this publication at a later date.

Finito
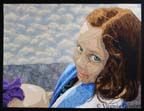
1I have finally finished my latest piece Laura Margaret. It is going immediately into a private collection. With any luck, it will be a complete surprise. I loved working on the eyes in this one. I put a lot more detail into them than I have in the past. I took some liberty over-highlighting the rim under the eyes — but I think it makes the piece more striking.
I’m not certain about what I’m going to do next. I am mulling over a few ideas and will hopefully decide soon. I don’t have a lot of time in November and December because of school holidays — but hopefully I can finish a small piece between now and the end of the year.
My piece Bukonyan Elder won first place in the Open: Fiber Art Quilted category at the La Connor Quilt Festival in October and will be held in their extended Top Honors exhibit until the end of the year. I also received exciting news that Celtic Woman will be highlighted in a book being published in April — more details to come later. Finally, my piece Unconditional was invited into a special exhibit called Pets at the International Quilt Show in Houston this November.

Working With Color
2Working with color can be very confusing — almost as difficult as working with values.
Since my last blog post, my figure was complete, but she needed a space in which to inhabit. She is holding up an iris on the back of her hand — so in adding color to the piece, I have a wonderful deep purple to add to the green in her eyes.
I also decided to pull the green down into the sliver of her shirt that is just peeking out from the towel draped around her shoulders.
And then this is where things got interesting. At this point, I had not added color to her mouth. I was ignoring that for the time being and trying to decide on a good color for the stripes in her towel to alternate with white. The actual photograph was a pink — but that didn’t seem to add to the piece for me. It seemed too close in color to purple.
According to the color wheel, if you have purple and green — then you need orange — so I went headlong into orange for the towel. I also added color to her mouth in rusty orange tones. I tried pinks and reds in the mouth and they all ended up looking like lipstick — so I went with something closer to browns.
It’s not that the orange in the towel is wrong — but it is too much. You no longer look directly into her beautiful green eyes. I kept this on my design wall for a while. It just didn’t look right to me.
So I switched to this cooler color of blue. Now you see her eyes first and the piece is in greater harmony. I still have the orange in her mouth to go with the purple and green. I think this composition of color works much better.
I did make two other adjustments. The water is a smoky blue with hints of purple so the iris melted into it. All I had to do was add a small border of a lighter value around the iris where it touched the water fabric. Now it stands out.
I also darkened the light spot on her nose just a little. It was too bright before and didn’t look natural.
Why did I choose what I did for the water and sky? I didn’t want anything overly complicated to compete with the figure and her engaging gaze so I originally planned to have just one fabric in the background. I had nothing in my stash and the only thing that I found in the fabric stores was the smoky batik. I decided that the pattern gave the impression of reflections on water and would be great. In reality, it overwhelmed the piece. I used a sky piece that I had on hand for the top part.
Strictly speaking, I should have used the rule of thirds when deciding on the horizon line, but I broke that rule. I liked it much better when the horizon line brought the viewer’s eye across to the bottom of the figure’s eye.
Her eyes are what is important in this piece, and visual cues like color and line bring up the supporting cast in the overall design.

Green Eyes
1Now that we’ve covered drafting, it’s time to move on to my favorite part — cutting the fabric.
Using the back side of the pattern — the reverse — trace shapes with a Sharpie onto Wonder Under and fuse to the back of fabric. Then cut out shapes, peel off the paper, and fuse to the muslin using the vinyl overlay as a guide to where to place the shapes.
This shows the first three values in the face of my newest piece. I know — not much to look at yet.
But just adding the next layer gives us an idea of the outline of her face.
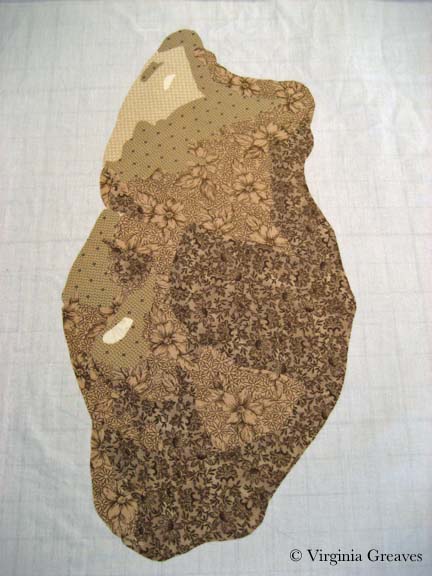
Then the fifth value shows us the rest of the face. Obviously the light sources comes from the left side — so the right hand side of her face is in shadow.
The sixth value shows us more of her personality.
Wow! And those eyes. I have added a seventh value — not much — just a little — but it adds a little more pop. I have exaggerated the outline of her eyes — it makes then read well at a distance.
At this point, I’m leaving her mouth alone. I experimented with adding some color but it detracted from the focal point of her eyes. I may just need something closer in color to her skin tone. I’ve set that aside for now.
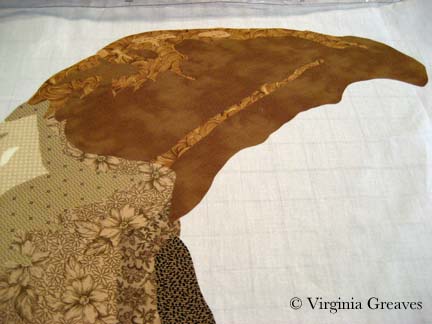
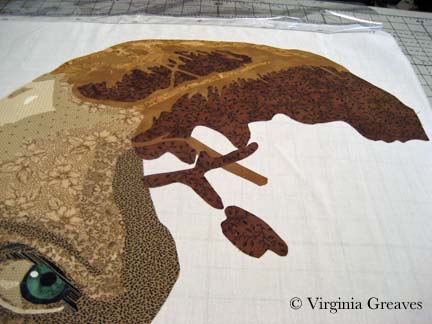
And then I started on her hair. She’s a brunette, but I’ve learned from experience to start much lighter for highlights. Using the yellow bin and the brown bin, I can get a great range of values.
This shows the first two values in her hair.
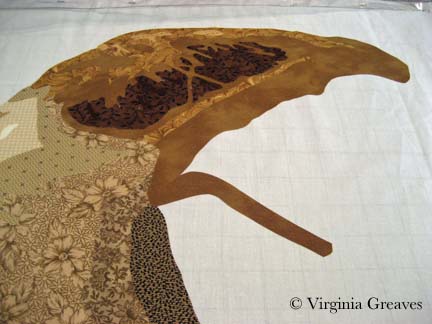
And this shows her third value. It does worry me a little at this point — whether the end result be brunette — because this looks really blonde.
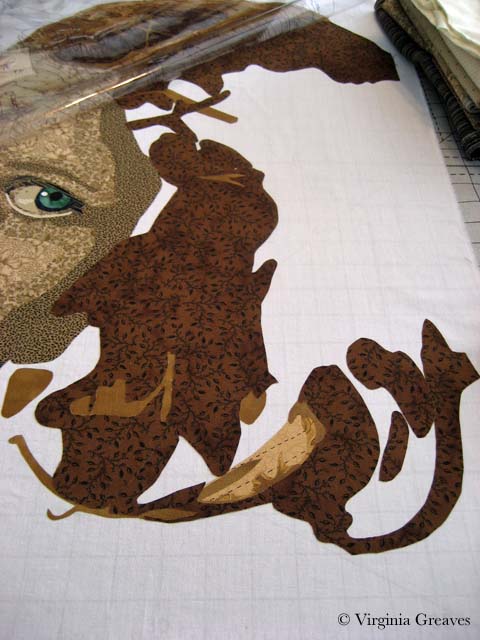
I start adding in the fourth value — which goes into brown — to the left of her part.
But then of course I realize I need to start working to the right of her part.
And of course I’ve forgotten her blonde values in the lower section of her hair below her chin.
I then go back and start filling in with the fourth value.
This is the Wonder-Under’ed fabric for value 5. It’s really intricate. I wonder if I’m a glutton for punishment. I have to remember — I have to cut this out — and I’ll eventually have to sew it.
But doesn’t it look good on.
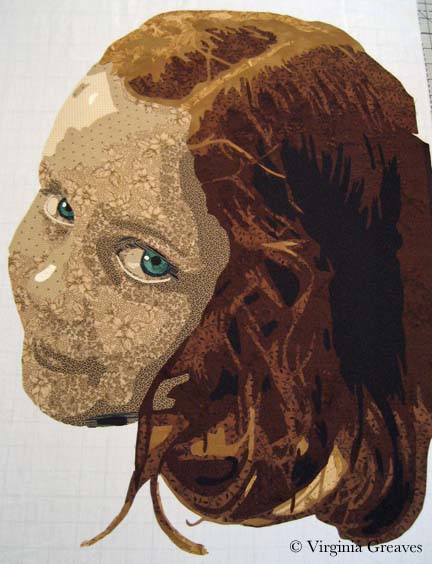
My final value is black — which is a great way to end a value range and pull one last value out of the stack.
I think she definitely reads as a brunette — and the blonde highlights give her a range that makes her face pop. And those eyes! I think they turned out well — if I do say so myself.

Drafting, Drawing, Sketching, & Photoshop
1I am always asked about how I draft a pattern. Yes — I start with a digital picture. Yes — I use the posterize tool in Photoshop. And yet — if it were that easy — everyone would be doing it. Beyond the mechanics of the process — it’s a skill. The truth of the matter, as any good photographer will tell you, is that cameras lie. The more pictures you take, you’ll begin to see why. They don’t have the ability to record things in the same way as the human eye.
So my starting point is the photograph — but making the pattern believable requires some drawing. The eyes and the mouth are always wrong. The chin is rarely defined. The dimples that create character in some people’s faces are easily obscured in the light. And Photoshop isn’t perfect either. I use the information I receive from posterizing to start a value painting, but when you posterize, you often lose details that you want to keep and you have to add those back in. This usually takes me 3-4 days.
I have a Wacom tablet — not a big one — it’s the 2nd smallest — and I pick up colors and use the electronic pen to draw in Photoshop. I have the original picture in another layer that I can use for reference.
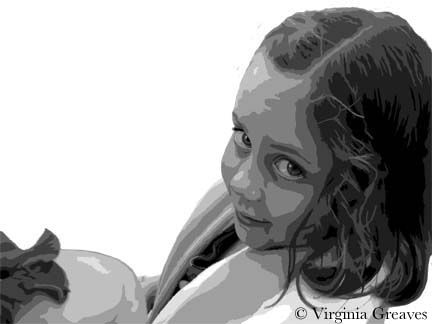
This is my latest piece, a small girl holding up a flower on the back of her hand and looking up expectantly. The important shape here are her eyes — and I’ve exaggerated some of the detail in them for that reason.
The value painting isn’t really my pattern — but it has everything I need. I used to take my value painting, export it as a BMP, pull it into CorelDraw, and then create my drawing in CorelDraw by drawing lines around all of my closed shapes. Then I would tile print it. It looks very professional when it’s done — but it does take longer than my Sharpie method.
I still export the file from Photoshop to a BMP file — and then I pull it into PosteRazor (which is shareware). I make it the size I want it, and then tile print it. (Tile printing, by the way, is sorely lacking in Photoshop.) At that point, I have to start putting the puzzle together.
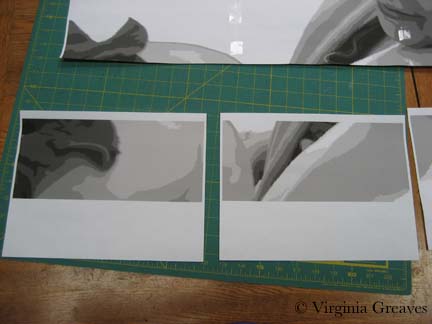
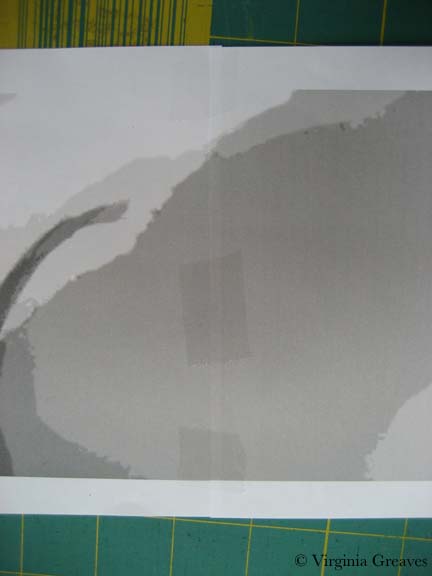
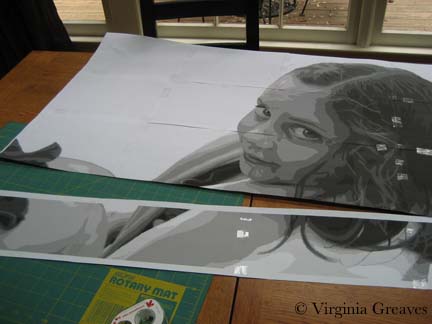
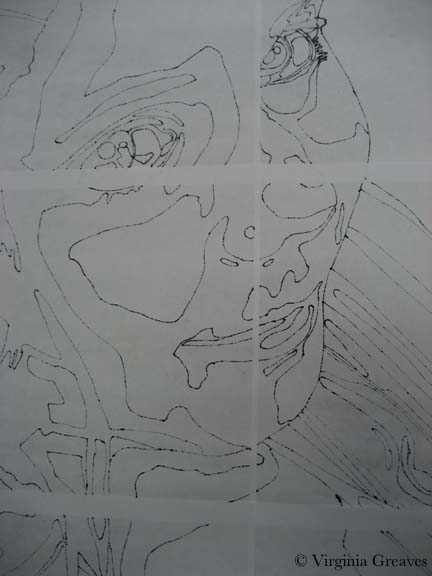
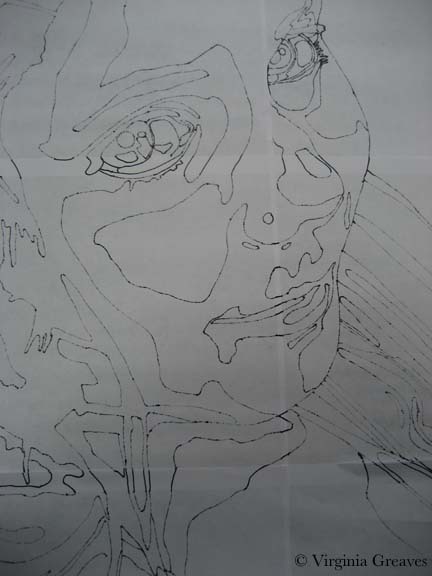
This shows 2 sheets of the bottom left that need to be joined.
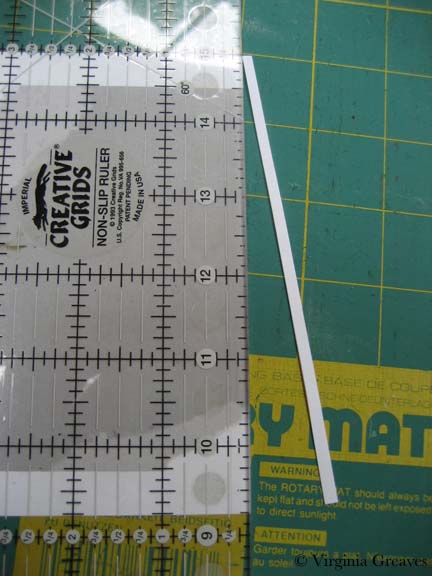
First I take off the right hand side of the first sheet (starting from the left) — and using a rotary cutter and a ruler, I take off the white strip that is not part of the pattern. (I also crop the bottom a little. If this wasn’t the bottom row, I would take off the white strip of the bottom as well.) I always take off two sides — the right and the bottom — so the pieces will fit together with overlap.
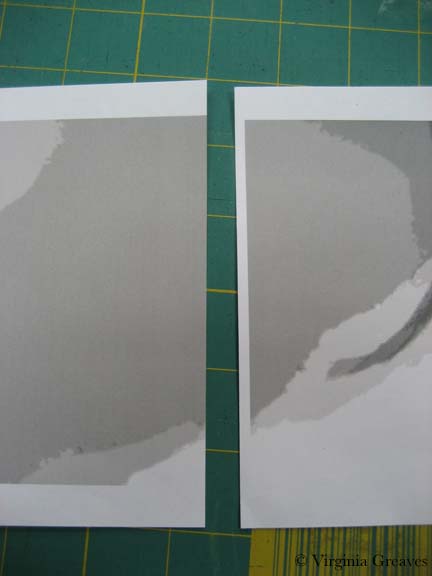
Now I can take the first piece and lay it directly onto the second piece.
Once I tape it, it’s seamless. Use clear tape and keep the tape within one value if at all possible. If you cross over values, your Sharpie won’t touch the paper and the ink won’t be visible on the other side of the paper.
The trick comes in putting it all together. I used to not be very good at it and my pattern would ripple with my mistakes. Don’t worry if it does. Retape it. You probably won’t lose much of a shape. But if you cut out the overlap carefully and tape it together carefully, you’ll have a flat pattern when you’re done.
You don’t want seams to fall in complex areas like the eyes. One reason I printed this out in landscape rather than portrait was to avoid that.
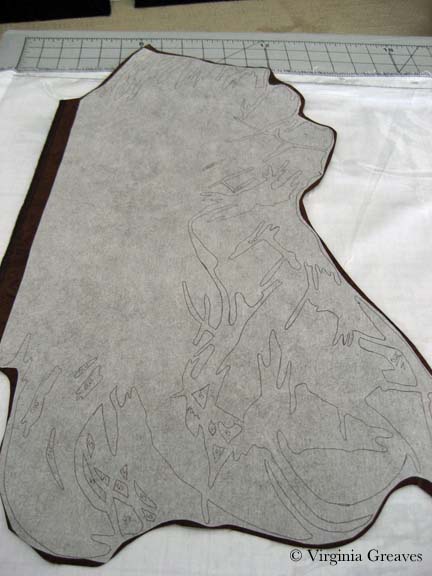
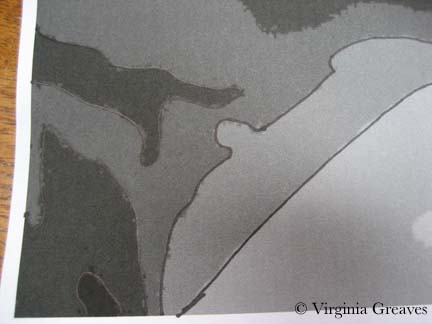
Once that’s done, outline your shapes using an ultra thin Sharpie.
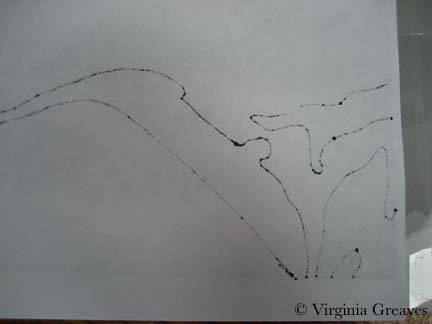
This has the added benefit of creating the reverse of the pattern on the back — so from one tile printed & taped pattern — I get a front (used for the vinyl overlay) and a back (used for the Wonder Under patterns).
You can see here that this works great — except for the joins where the paper comes together.
Just grab a lightbox & draw in the missing lines. If you can’t see it, you can flip the paper back.
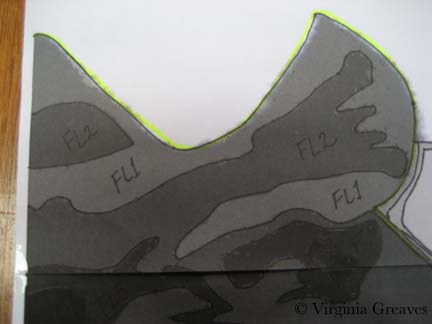
And finally, go back and label everything with value numbers. I always number the face F1, F2, etc. and then think up other prefixes for other things. In this drawing, FL stands for flower. And then grab a highlighter and mark the lines between areas — like the face, her shirt, her hand, the flower.
And since this is a value painting, you’ll find that your value shapes won’t always stop between objects. You have to go back in and add those lines yourself. I use a pencil until I get the lines where I like them — then go back over them with a Sharpie.
And — then you’re almost done — you flip the pattern back to the value side and tape vinyl over it and trace it out. Then you’ll sew the vinyl onto white fabric (using a Teflon foot that won’t stick to the vinyl). The fabric acts as your canvas, and the vinyl overlay is your road map showing you where to fuse your shapes.
Then flip the pattern back over to the back side — where there is no value distinction other than the letters & numbers you assigned to shapes — and you’ll use this to start tracing Wonder Under shapes.
That’s a lot of work before you even begin to look at fabric — but it’s time well spent. Keep in mind that whatever you draw, you have to be willing to cut it out and sew around it. Sometimes, you can use patterned fabric that will do some of the work for you. Often I draft tiny pieces that don’t end up in the final piece. And I’m always ready with a pencil to draw out changes at the last minute if something isn’t working out. Just because it’s been inked doesn’t mean it’s written in stone. If it’s wrong, change it. Sometimes you won’t see it until you start doing it. In this particular piece, one of her eyes was clearly wrong — and I sketched out my changes with a pencil and kept moving forward.

The Finish Line
0I am embarrassed to say I realized the other day that I had not written a blog post during the month of August. My only defense are deadlines. I have been writing several proposals — I’ve been entering more shows — and I spent a frantic two weeks (once school had started back) finishing my piece for the Fiber Art Fusion show. We hung it on Tuesday at The Art Place in Marietta, GA. I will post pictures of the show later. The artist’s reception will be on the 13th at 7pm — and it runs through this month only.
I have two pieces in this show — Arminta Patterson and my new piece, made from men’s ties, The Ties That Bind Us.
I have had one piece juried into the La Connor Quilt Festival in La Connor, WA– Bukonyan Elder. It will be on display in October.
I have had two pieces juried into IQA Houston’s World of Beauty show — Beach Guardians and A Walk In Twilight. They will be on display in November.
Interestingly, there was quite a bit of debate when the acceptance letters for Houston went out. It used to be that you’d receive a fat or skinny envelope and share the results on QuiltArt (an online forum that works on email) — but technology is speeding us forward. Now many of us have a presence on Facebook, a blog, a website — and we post pics of our work.
The debate is over whether that is fair. IQA judges felt that seeing work online before judging would affect their decisions — so they asked that all pictures of work accepted into the show be removed from the internet.
Which on the surface sounds reasonable. They want only virgin art in their show.
My first argument against this is that seeing a picture of a piece online and seeing it in person are two different kinds of experience. One enhances from the other — it doesn’t detract from it.
My other argument is how much it destroys creativity. My blog & my website are my creative endeavors. If I can’t show a piece that I intend to enter into a virgin show — my blog goes away. Most of my blog shows in process — none of that would then be possible.
I would also be holding pieces for as much as a year before I could publish them on my website — for a show that I might not get into.
IQA does not currently HAVE this rule — they are considering it. Quilt National has this rule — and they are biennial — which would mean that I would hold pieces as long as TWO years before I could publish them on my website.
Virgin rules would effectively take away my ability to interact with the world through my blog and my website — if I choose to enter them. It is my choice to enter them or not. I hope that IQA doesn’t add the virgin rules — because then I choose — my blog or their show.

Running Through Mud
3One of the hardest things for me is trying to contain my creativity during the summer. I typically am not able to accomplish anything — although I usually take on some projects that are more pool or kid friendly.
But this year was going to be different. My children are older — I reasoned. I would have some time — at least, I though so — until I adopted a puppy.
I’ve been house training her — but I’ve had to spend a lot of time outside — and I can’t get much of anything done outside — although I did drag out a folding table one day and use it for some drafting.
My Fiber Art Fusion group has a show coming up in September — the theme is Artifacts. I really struggled with this one. I don’t like to work in themes — I think it takes away from inspiration — but in fact, over the last couple of years, it has pushed me to do things that I otherwise wouldn’t have done — which has created growth in my work.
I was really confused about how to integrate the theme of Artifacts into my work. I make portraits and I want to continue with that body of work. And then it occurred to me — I have a large collection of men’s ties.
I first used them in pinwheel blocks around my first portrait — Ama. After that, I made many pinwheel pillows as gifts and on commission. I found that even unappealing ties — ones from the seventies with strange colors and polyester material — when used with a lot of other ties and placed on black — can look really rich. So when someone in the family passes, I typically ask for the tie collection. I also have many from my husband and I have bought them at yard sales and thrift stores.
So I decided to try to use ties to make a portrait. I had no idea if it could be done. I haven’t seen it done before — but I think that if you use the right values, you can collage just about anything into a recognizable form.
Ties are tricky to work with though. After my first selection of a color palette, I began to realize that the sheen of some of them affected their value. Working with cotton all the time, I wasn’t prepared for that. So I took a lot of trips to a local thrift shop.
I couldn’t find a white tie — although I tried hard. I finally decided to use a white lining fabric that I had in my stash. Its pattern is reminiscent of a tie pattern. The yellow gold that comes after it is the lightest tie I could find. I suppose that men need ties that will hide stains — although this one very clearly has a lipstick stain which I left to emphasize the character of the materials I’m using.
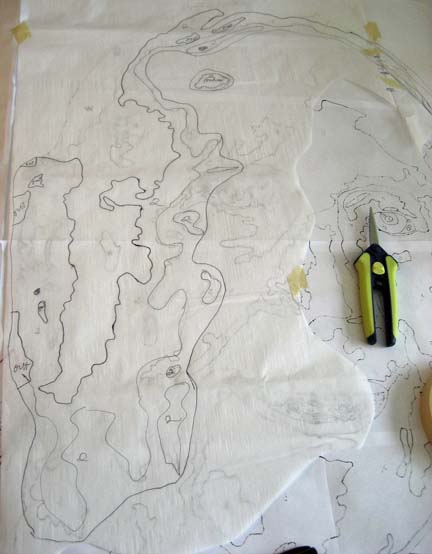
It’s when I went to my next value that I began to realize I had another problem. Below is the drafting of the wonder under– and there is no way that that is going to fit on one tie without it being broken up. I had to develop a system for cutting the wonder under in some places & putting it back together with overlap.
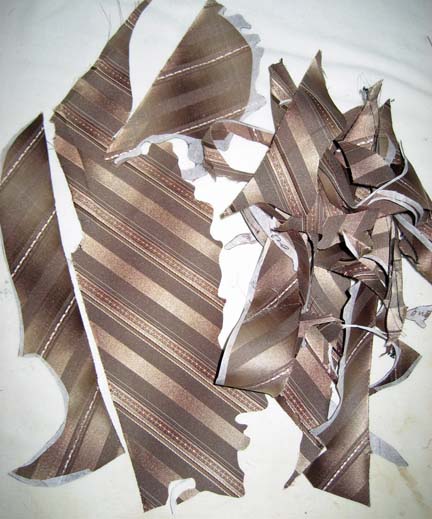
There was practically nothing left of this tie when I was done.
Reassembled, it isn’t so terribly obvious that I had to make some splits.
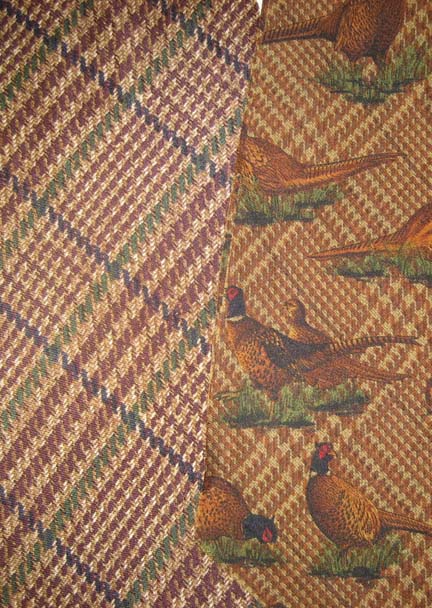
However, the next value not only required that the pattern be split but I also needed more fabric than was available on one tie. The one on the right was my original tie — the one on the left is one I found to go with it.
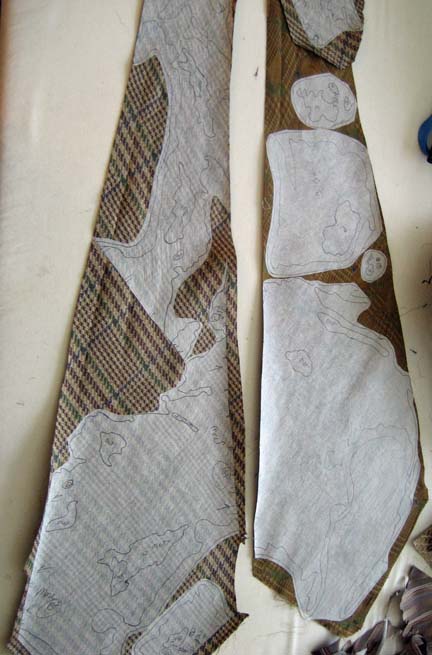
As you can see, I used up most of the large spaces on both of these ties.
I think the only obvious demarcation is along the forehead but I think that it will become less of an issue as the rest of the layers are added.
This shows the fourth layer. Again, there were two ties used with a similar pattern.
And this shows the final value.
I still need to add detail for the eyes and the mouth. I’m not certain I can use only ties for the eyes — and I know I’ll have to use cottons for the whites and grays needed in the mouth. But I’m happy with what I’ve been able to do thus far.

Georgia Artist’s 2012
1Last night was the reception for the Georgia Artist’s Exhibit in Sandy Springs, GA. I rarely get to openings of my shows, but this was near to my home and is sponsored by my own Fulton County.
Both Beach Guardians and Amelia Earhart were in the show. Beach Guardians was in the front of the exhibit and was one of the first pieces you’d see as you walked in the door.
One of my daughters attended with me — I wondered if anyone would realize that the model was at the show. She was probably four or five in the photograph and she’s twelve now, but she still looks the same to me.
I was so stunned when I placed in the show! This is the first time that I’ve placed in an all art show — and my work was the only fiber in the show. I was so excited at how accepting most everyone was to include fiber. Omar, in fact — the gentleman to my left who won Viewer’s Choice and Best of Show — was so excited about my work that he insisted that we be photographed together in the winner’s circle. I was very flattered.
I received third place with an orange ribbon — which was quite a show against my purple dress!
And Amelia Earhart took the ribbon. She was placed on a back hallway — and although I think the majority of attendees were most taken with Beach Guardians, Amelia captured the eye of the judge.
This is Omar Richardson’s wonderful piece — My 2 World Look Deep, Lyns? As I mentioned, it took Viewer’s Choice and Best of Show.
I also had the opportunity to meet Penny Beasley, a wonderful artist that works in my area. This is her piece — Untitled. It was hanging next to Beach Guardians, and I didn’t realize it at first, but it has almost the same color palette as my piece. They made a wonderful complement to each other.
Her friend took a picture of us together in front of our works. I hope to see Penny again.
It was a great show. Several of my friends showed up — and a good time was had by all! The show will be on view from now until June 15, 2012 at the Abernathy Arts Center.

Reception Tonight
0I have two pieces, Amelia Earhart and Beach Guardians, in the Georgia Artists exhibit being shown at the Abernathy Arts Center in Sandy Springs, Georgia. The reception is tonight 6:30-8:30. I am honored to be included in such a wonderful show. The talent of the other Georgia artists is incredible. Last year, my favorite piece was a bronze sculpture of a huge wing that sat on a pedestal & could be rotated. I can’t wait to see the work included for this year.

Quilting Conundrum
0I don’t tend to show a lot of my quilting on my blog. I don’t know that I consider myself all that competent at it — there are certainly better machine quilters out there — and I’m not a master at feathers and curlicues. I tend to either follow the contours of a shape or use abstract designs that add texture to the shapes. Also, I have worked on a frame before — and now I use just a home machine and my hands. Quilting is a more difficult proposition at this level than when the quilt is stretched out on a frame that the machine hovers over.
But making a complex piece like this creates some problems for quilting on a home machine without a frame — and since I’ve made a few mistakes of my own, I thought I would walk through the steps that I used on this quilt to address issues before they became problems.
Everyone is told by the quilt police that you quilt from the inside out. So you start in the middle of the quilt, and any ripples that form as you go along get pushed out. This is particularly a problem with dense quilting. I quilt about 1/4″ apart — and even though I use a 70/30 cotton/poly batting with a scrim to keep it from stretching — it still happens.
If you have more than one figure in your piece, however, you are working from more than one focal point. I typically quilt the face first, then the hair, then the clothing, and finally the background. With two figures, as I found in Beach Guardians, you can end up with a lot of fabric left to distribute in the space between the two figures if you aren’t careful.
I started by taking the black and white picture of my design and drawing on it with pencil. It does look a little spooky — but it gives me a plan of how I want my quilting lines to go.
Since I haven’t quilted in a while, I pulled out my erasable blue pen (it comes out with water) and marked my beginning lines. It gives me confidence when I feel unsure about starting. This is the first figure’s face completely quilted.
And this is the second figure’s face completely quilted. When I was done with her face, I then quilted her scarf, then her jacket within the line of the purse strap, and then the rest of the jacket. I did her hair last.
The picture below is to give a reference point. I’ve done both faces — as well as the entirety of the figure on the left. I would normally want to work on one thing at a time — all of the jacket — all of the water — but I have to split it up for this to work. At this point, I need to worry about the space between their faces and make sure that I can distribute the fabric as evenly over the space between the faces as I can.
This is a closeup of the water and cityscape between the two heads. I used metallic threads for the water and jagged black lines — avoiding the white lights — for the cityscape.
I then quilted the left side of the hair of the figure on the right. It seems elementary — but trust me — there is method in the madness. I suppose I could have taken it farther & not quilted the face of the person on the right until after this stage — but old habits die hard and I really want to concentrate on the faces first since they are the focal points of the piece.
Below the hair is the left side of the jacket — which came next.
Then I moved to the right to quilt her shirt.
And then her collar on the right hand side.
At this point, instead of working on the rest of the jacket, I switched over to the right side of the hair. I used long wavy lines to show the texture in her hair.
Then below her hair — still on the right hand side — I quilted the lines of her jacket.
If you look at the top of the picture above, there is a small piece showing the fingers on the shoulder of the jacket. Again, I used my erasable pen to make a few guidelines before I started.
The only part left on this figure is the hat. I tried to take one picture of the hat, but because most of it is white and the inside of the brim is dark blue, I couldn’t take one picture that successfully showed the quilting lines on both sides.
This, then, is the white part of the hat.
And this shows the inside of the brim.
At this point, I’m left with the background on the right and left sides. I work on the water on the right hand side first — using metallic threads in a wavy line. I used a traveling stitch at the top. At first, I thought I should cover that with a solid line at the top — and finally decided that it looked more realistic like this. I like the traveling lines as they are — so I left them as they are.
Then I completed the water on the left side of the piece.
Staying on the left side, I then quilted the small section showing the concrete railing that the figures are leaning against. This is just below the water.
And then I had to think about the cityscape above the water. This area on the right side is full of white lights but otherwise signifies buildings going up a cliff. I chose a jagged line in black thread — avoiding the white lines and thus making them even more prominent.
The left side is the same — except for the stone arches which I worked on in rust colors.
The only thing left at this point was the sky. I used a gray purple in the purple areas and a dark blue in the blue areas — and used a water puddle design. The thread matches so well that it is really hard to show it well in a picture. Trust me — it works. It covers the area without distraction — the quilting stitches create the harmony that is felt in the bleeding colors of the sky.
My point is that quilting can be a puzzle. Quilting from the inside out is a good rule of thumb, but when you have multiple complex structures to quilt, you need to logically consider how they relate to each other and how you’re going to address fullness created in the quilting process.
After quilting, it’s time to add the binding. Maybe I’ll document that one day — but not today. I used my signature black on the binding and a busy black & white print on the back with a matching sleeve. I don’t usually enjoy handwork, but the handwork on this piece coincided with some needed stress relief — and I was glad to have it to work on.
Then I had to soak it. I use a clear glue in the binding to help me get it into place perfectly (thank you Sharon Schamber) so I have to soak it in water to disintegrate the glue as much as possible. I filled my washing machine with cold water (warm water or even soap could set the erasable blue pen marks permanently so be careful) and left the top open so it wouldn’t spin. Then I folded the quilt with the top facing outward — and this time, I put a dye magnet sheet on each of their mouths. If you remember, on my last quilt, the red in the mouth bled onto other white parts of the quilt — never to come out. I wasn’t taking a chance this time. I laid it in the water, making sure all of it soaked well — taking care to keep the mouth from touching anything other than the dye magnets. After about an hour, I let the machine take it through a slow spin to wring out the excess water.
When I pulled it out — no crocking of color this time. I’ll have to remember that trick next time.
And then I laid it out on one of my design walls. This one has started to bend from the water that seeps into it when I block on it. In my previous home, I could pin right into the rug — but I have looped carpet now so I don’t have that luxury. I keep this wall for blocking — another for photographing. I didn’t realize at first that the water was warping the Celotex — it really messes up photographs. It took me a while to realize it was a warp in the board.
One final note — how I did I decide how much sky to add? I spent quite a bit of time thinking about that. I think that most people would cut the line just above the heads and consider the sky empty space without design details. However, it is much better that the horizon line (which I see as the median line of the tops of the cityscape) fall at 2/3rds — which brings the golden ratio into the composition. I end up with quite a bit more sky in the piece, but even though it isn’t full of appliqué details, it brings an overall harmony to the piece that it wouldn’t otherwise have.
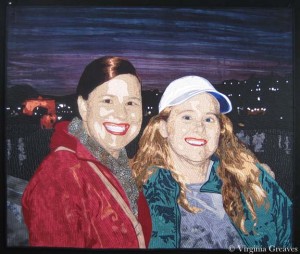
I’m still working on a name for this piece — I’ll post a page for it when I’ve made a decision.