

Opportunities
I have been quilting the third abstract in the car wash series — having fun with it. I eschewed my usual contour quilting for feathers, flames, & fronds. I love the way it’s turning out. I’m also using the thread to pull colors across applique boundaries — and playing with thread choices. I even coaxed a metallic thread to free motion into feathers.
But I only worked in the studio a couple of days this week. I have a friend that’s been giving me scoping work. I hope to get back in the studio tomorrow.
I would like to say that I’ve been working on another portrait for the National Portrait Gallery competition — but inspiration hasn’t struck. Right now I am in the flow with abstract and I have not been successful in changing my direction.
 If you read my Facebook Page, you saw me hyperventilating when I was notified that I won a ribbon in Houston again this year. It’s such a huge honor & completely unexpected. I won’t know till the ceremony at the end of October what the prize is exactly. I’m lucky that I’ll get to go to Houston again this year and actually stand in the Winners Circle.
I may even tweet the whole event like I did last year. It was such an exciting time and I loved sharing it.
For those interested in attending, Preview Night for IQF/Houston is October 30. The show is at the George R. Brown Convention Center and runs through November 2.
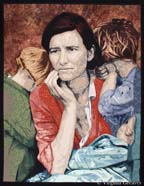
I did, in fact, come home after winning a ribbon with Lincoln last year and decided — after making animal portraits for a year — that I would make a person portrait again. Worry was the piece that I made from that decision.
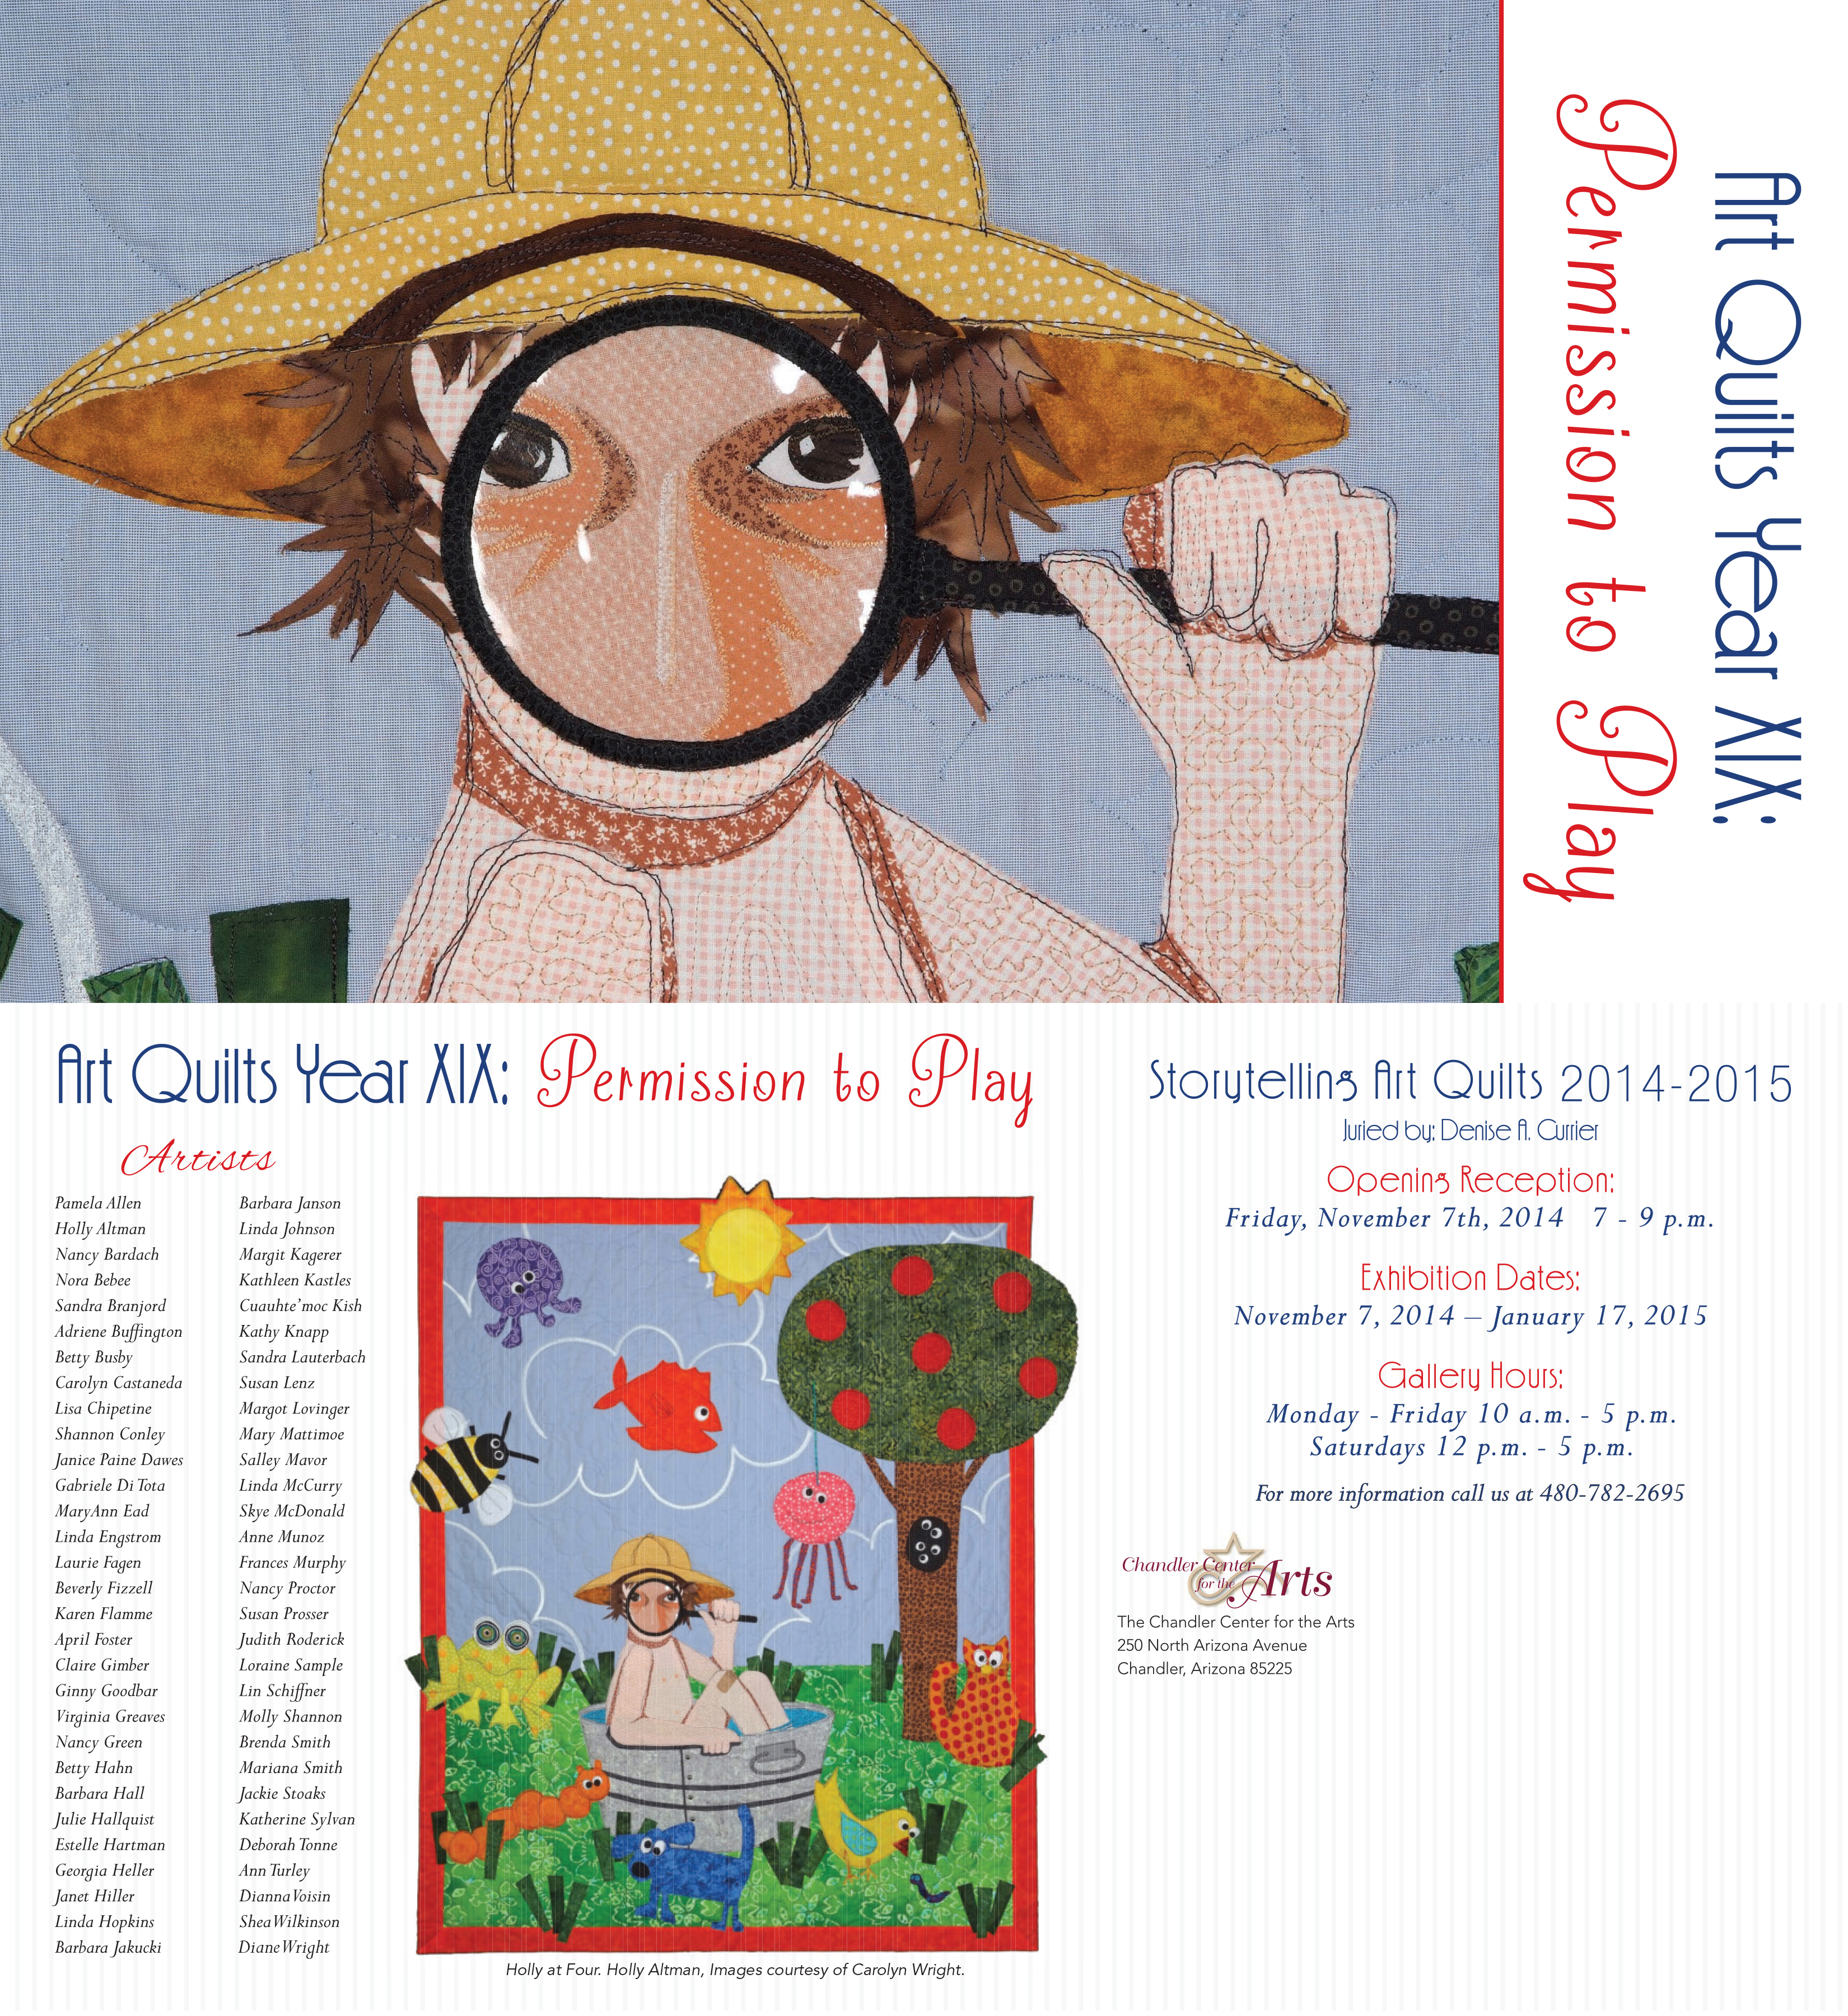
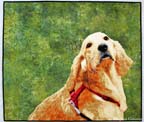 I also found at that Golden Moment was accepted into Art Quilts XIX: Permission to Play. This exhibit is at the Chandler Center for the Arts in Chandler, AZ and will show November 7, 2014 – January 17, 2015.

Wordless Wednesday

New Solutions
Last week, I completed the 1st and 2nd pieces in the collaborative series. I did the 2nd one first — the larger one — and all of the binding was done by hand. The 1st one — the smaller one — I couldn’t bear to hand stitch the binding. I had too many holes in my hands. I just couldn’t do — so I did something I’ve only done once before. I machine stitched the binding.
I drew out the outline of the final boundaries on the top. Then I stitched on top of that outline using a yellow bobbin. Then I turned it over and used the yellow line to show me where to machine apply the binding. Once it was on (and the top edge of the sleeve), I cut off the excess.
There is a lot of plastic on the top of this one so I had to be very careful with this next step. I love using Sharon Schamber’s trick to hold the binding in place with water soluble clear Elmer’s glue that has been pressed with an iron — but doing this meant folding the binding to the top and pressing right next to the plastic without melting it with my iron. It had to be hot enough to engage the glue to hold — but not hot enough to melt the plastic underneath. I was “pressing” my luck but I did it anyway and it worked well enough. I then used a machine blanket stitch to attach the binding to the front.
I’ve been surprised over the years that — the only other quilt I’ve done this with — I have hanging in my living room and I truly forget that the binding was attached differently. Looking at it very closely, I prefer it the other way. If the final stitches are on the back, any irregularities are on the back — but my hands had to have some time to heal. I think it turned out fine. I still had to hand stitch the sides and bottom of the sleeve and the corners of the quilt — but there wasn’t a lot of that.
My typical process after finishing a piece is to block it, photograph it, and then post a new page for it on my website. Leisa and I both agreed not to completely block these pieces — although I did spray the binding with water and, on the small one, I pinned it to the ironing board and soaked the binding only in an effort to make the piece hang straight.
I photographed the 2nd one with no issues. The 1st one cannot be photographed using my traditional methods — the plastic across the front on top of the black causes too big of a glare. After spending time reading about this, I think I’m going to have to built a light diffusion box just for the purposes of getting a good picture — so there is a future project.
Leisa has asked that we not debut the final pieces until they are exhibited all together in (hopefully) late 2015. Therefore I will post pages for them without final pictures — only a notice of exhibition. This was a hard decision for me but I agree that seeing all of the pieces together creates an impact that would be diminished by individual publication.
I have been thinking about a portrait for competition — what needs to be my next piece — but I’m still in the idea stage so I started prepping #3 for quilting yesterday. Like #1, it has plastic on it — so it can’t be pin basted — my usual method. It would have to be spray basted — but it’s quite a bit larger than #1 so I jumped on the internet for some help and came up with the following plan.
First, I laid down a sheet on the wooden floor in my kitchen. (Yes I know it’s hideous — it was bought years ago for one of my girls. Makes it perfect for this.) I taped down the edges. The intent is for this to catch all of the overspray. When I’m done, I can just throw it in the laundry.
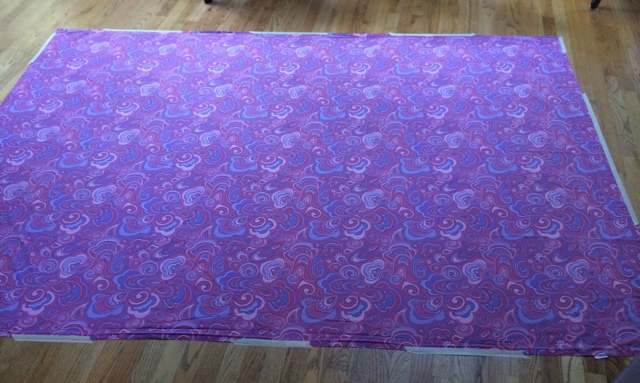
Then I tape the backing fabric face down onto the sheet.

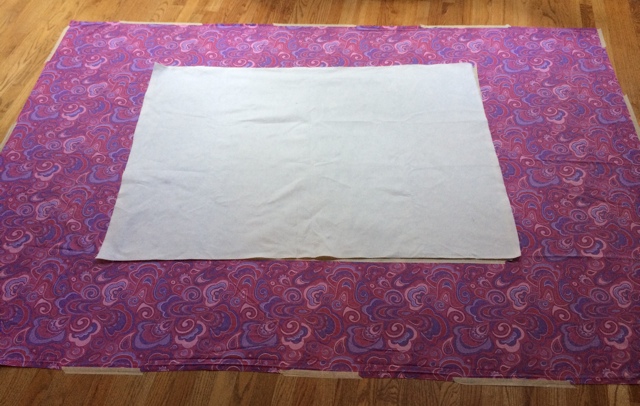
And then I lay the batting on top of the backing.
I fold half of it back . . .
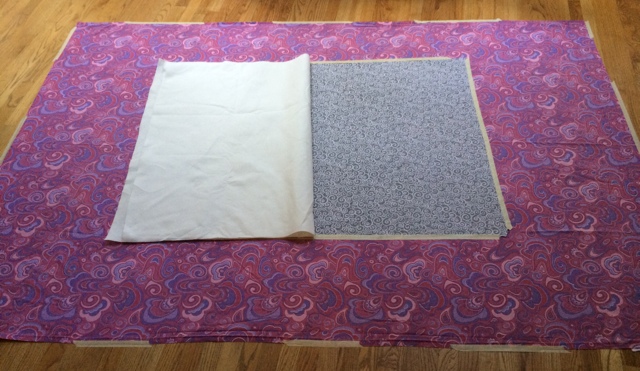
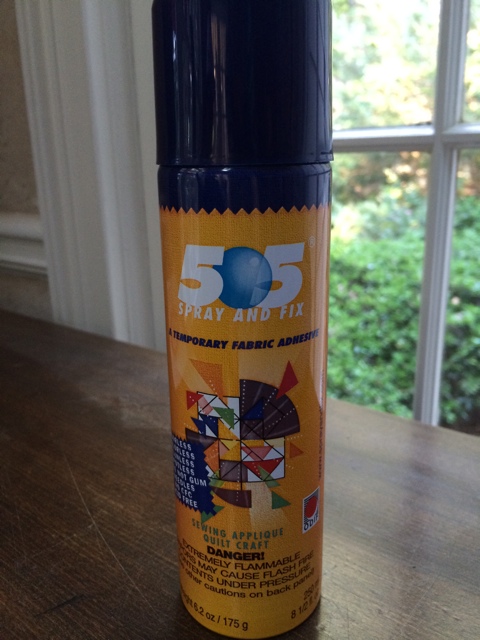
and I grab this can of 505 Spray and spray the BATTING that’s been folded back. I then fold it back onto the backing making sure that it’s smooth. If there is a wrinkle, I can lift it, move it, and then press it back together. Then I do the same thing with the other side. I fold the batting over at the halfway mark, spray it, and then smooth it back onto the backing fabric.
Once that’s done, I do the exact same thing with the top — except I still spray the BATTING.

It took me half an hour to do this, and at the end, my fingers didn’t hurt. I was at the end of a can and it started spraying out white goo — which thankfully didn’t transfer to the quilt. It just stuck to the can. I luckily had another full can to finish the job.
I should consider doing it this way more often. Even better, I realized this morning that I can draw out some intricate shapes on the top this morning without worrying about pins getting in my way. I know you’re supposed to do all of your drawing (if you’re going to do that) before you baste it, but my process is more organic. I add to the piece what it needs as I go along.

Wordless Wednesday

Fierce Fibers Reception
Last Thursday was the opening reception of Fierce Fibers at The Art Place in Marietta. It’s a beautiful show in a beautiful space.
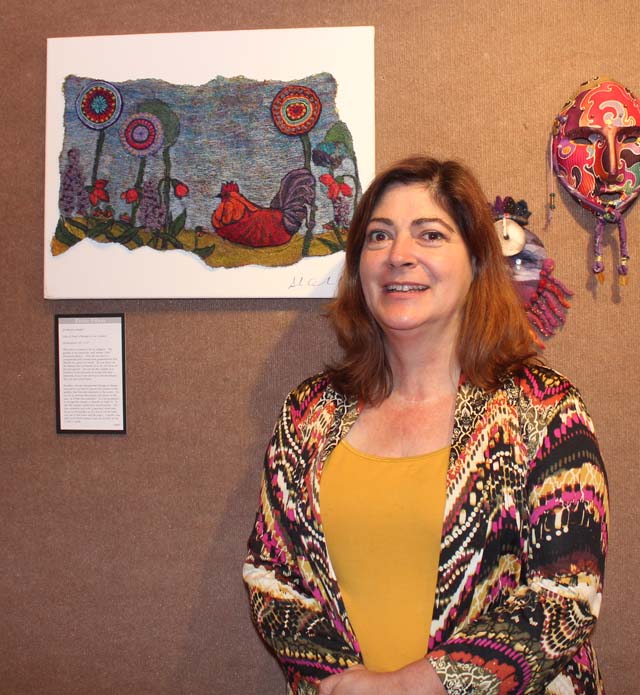
This is Sharon Ahmed with her heavily threaded piece Why Is There a Rooster in my Garden? The rooster was dimensional.
This is my co-curator Rebecca Reasons Edwards with her Mighty Women pieces. There are five of them so far in this series — women of strength in Rebecca’s life — and we hope that there are many more of them to come. (You may recognize our friend Julie Kokan in the bottom left piece.)
This is Hellenne Vermillion with three of her masks — from the left — Blue Sky Spirit Mask, Lunar Spirit Mask, and Bird Spirit Mask.
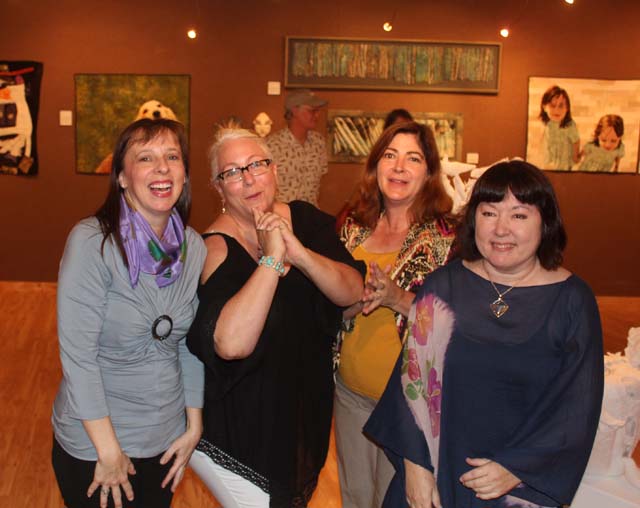
And then this is all of us having fun. The silk scarf around my neck was a present from Hellenne that night. I’m so glad she chose purple — I love it.
We had three different cameras that Rebecca’s husband was rotating through to take pictures. Thank goodness we had a patient and willing photographer. He also took some stop-motion photography of the whole affair that will be fun to watch.
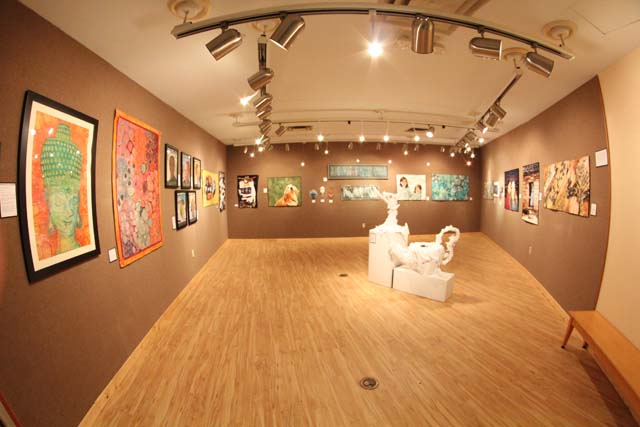
I couldn’t resist pulling out my fisheye lens to get a picture of the gallery in its entirety. There is obvious distortion but it’s fun to have a shot of everything at once. (That’s Leisa Rich’s teapot and top entitled Falling from the Nest on the two pedestals.)
Thank you to everyone that took time out of your busy lives to come to the reception. It meant a lot to see familiar faces showing up to support our art. For the artists that were not able to attend — you were greatly missed. We raise a glass to your efforts — all great artists and mighty women of Fierce Fibers!
This show will remain on exhibit through October 3rd. The gallery is officially open Monday through Thursday 10am – 5pm — but I’m told that although they don’t have official weekend hours, they’re almost always open on Saturday and Sunday.

Professional Headshot Part 2
I promised to share the pics that Beth Buchweitz made of me last week (week before? Time just flies by sometimes). I had SAQA ask for a headshot for the new juried member announcement — and I didn’t have anything in my arsenal that I could use.
For several days, I pondered doing this myself — setting up the camera on the tripod, using the remote — but in the end I decided it would take way too long and probably not look very good. Beth has a good eye and I trusted her to do it right. She said that she tried to do this for herself once and it was a disaster. You end up trying to smile at nothing and the final pic looks phony.
Beth is a great photographer. Even though it was a very bright day, we moved into the shadow of a building and still had good light. This was one of the first ones she took.

She insisted that I laugh and have a genuine smile and wouldn’t take no for an answer.

I ended up liking this one — the last shot. There is no gap in my jacket and I’m more relaxed than the earlier ones.

I cropped it down for the final pic to send to SAQA.

It was a little shocking to me to do this. We all have an image of what we look like in our mind’s eye, and the camera doesn’t always show us that person. I’m not in the selfie generation — so I don’t take many pictures of myself — and as a mom, my job is always to take pictures of other people. As time passes, you don’t realize that you barely have any photographs of yourself — until you do something like this.
When I set up for this shot, I automatically put on a suit. I have two Masters degrees — in my mind, a professional headshot should be in a suit. After the pictures, I realized that this may seem unusual to other artists. Many of them wear more casual and colorful clothing for their head shots — but I suppose this is truly me. Me in a dark suit.

Leisa’s Turn with Abstract #3
Leisa and I are having a such an exciting time with this series. It is so much fun to see what the other is going to do with the work. This is the 3rd one that we’ve done and we’re already planning #4 and #5.
I was wrong — this is not the one Leisa plans to cut into strips. In fact, she cut off all the extra yellow and black that I had added at the top and bottom and returned it to its horizontal orientation. I just chuckled. I liked it better that way too but it was her prerogative.
She free motion embroidered it like crazy, added black lace, painted it, added vinyl, and painted some of the vinyl (on the inward facing side) with nail polish. It gives it the coolest effect. (I’ll have to be careful about quilting those sections lightly though. I’m a little worried if you can needle through nail polish.)
And this is a detail shot — you can see the wandering embroidery lines a little bit better here.
It’s interesting to see the unintended forms that come out of this process. I love where this one is going. I’m going to quilt it and then let Leisa have another crack at it — she is thinking about adding handwork after the quilting.
I have finished the binding on #2 — and I’m almost done with adding the sleeve. I do think I’ll have to add another one though. It’s not straight across at the top so figuring out how to sleeve this one has been a challenge. I added a short sleeve at the very top where it is straight — I think I’ll have to add another one lower down on the other side. I couldn’t work it into the binding edge thought because it isn’t straight.
And then I need to bind and sleeve #1, the first small one that we did. I’m having to use different techniques on these. For instance, I couldn’t pin baste #1 because of the vinyl — I had to spray baste. I’ll have to do the same with #3. #1 also has a lot of vinyl on it around the edges — so it occurs to me that can’t use my usual water soluble glue trick to help me bind the edges (which thankfully are at least straight on this one).
And because of this issue, I realized that I probably shouldn’t use my usual blocking technique on these — particularly the ones with vinyl. If I soak them in water, the vinyl may inhibit evaporation and could lead to molding — a distinct possibility as I live in the Deep South — so I’m going to forego that as well. I haven’t had a waviness problem on any of them — yet — but if it becomes an issue, I’ll block them with spritzes of water — not a full soaking.
I need to make myself stop. It’s September and I would like to have a piece to enter in the Outwin Boochever Portrait Competition sponsored by the National Portrait Gallery. I need to start photographing inspiration for that one. I entered a few years ago and wasn’t juried in so I just assumed that it was a bias against alternative mediums. Completely untrue. Be careful not to create obstacles for yourself that don’t exist. Last year, the People’s Choice award winner was a sculpture made from rice, rice noodles, and glue by Saeri Kiritani — and there was a fiber finalist — Lia Cook. I can’t be accepted if I don’t enter. You can see last year’s winners here.

Hanging Fierce
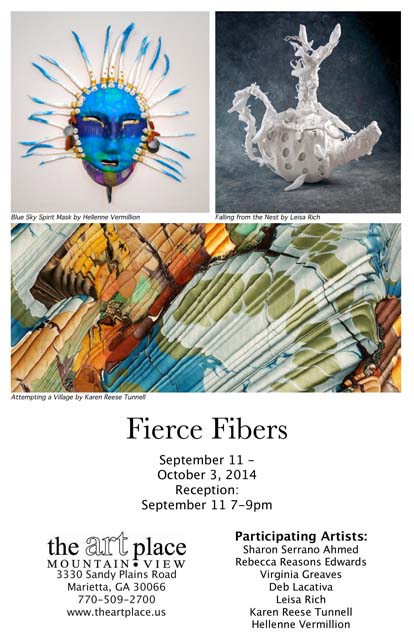
When I moved to Atlanta, I started helping Rebecca curate an annual exhibit at The Art Place in Marietta, GA. At first I just showed up and held things for her, but over the years she has taught me more and more about curating. This year, we hung Fierce Fibers, an invitational exhibit including Sharon Serrano Ahmed, Rebecca Reasons Edwards, Deb Lacativa, Leisa Rich, Karen Reese Tunnell, Hellenne Vermillion, and me.
This is the show card I created (I had great images to work with though).
Yesterday we gathered all of the work at the gallery for the hanging. Leisa came too — and she was a whirling dervish! I learned a lot from her too.
This is what it looked like with everything laid out before we started. (There are a few white circles on the wall of the two pics I have of the hanging. This was caused by the new studio lights and my camera — although they were not apparent on the wall in person.) Love the new wood floors.
This was the first time that we had too much work. It’s a much better feeling than not having enough to fill the space.

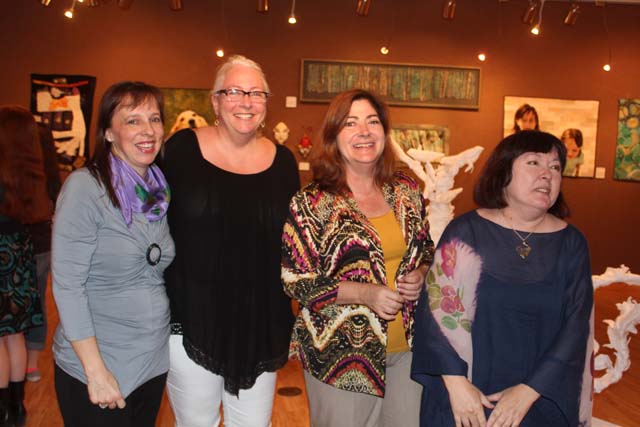
And then this is us after all of the work has been hung and arranged — Rebecca, me, and then Leisa. Less than two hours. I don’t know if you can tell but I had so much fun. To spend a day surrounded by art and then crafting it into an exhibit that people will enjoy viewing is the joy of curating.

We added the exhibit cards after this.
There are a few minor adjustments to make before the reception tomorrow. I’m still figuring out what I’m going to wear.

Third in Abstract Series
I met with Leisa over a week ago. As I last mentioned, I had finished quilting our 2nd collaborative piece and I offered it back to her for additional changes. We decided that it was done and that I would bind it — which I started yesterday. Last week, I spent a glorious week of cutting and fusing our 3rd abstract piece. Leisa was out of town and I wanted to have something to give her when she returned this week.
She asked in that meeting if we could extend out the edges on this piece. It was already drafted but after talking about it, we decided to rotate it and extend the two sides — which would become the top and bottom.
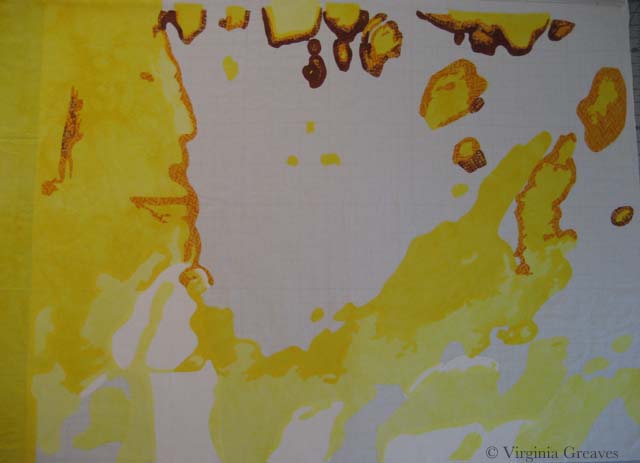
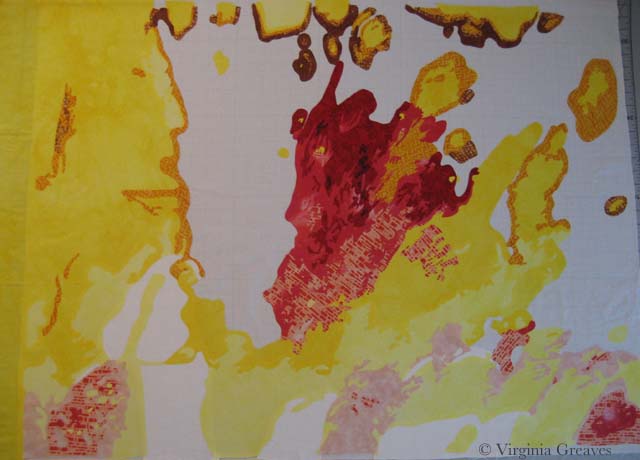
I started with the whites and yellows. In retrospect, this piece has a lot of yellow and I wish I had toned it down. This is its original orientation. It’s on my drafting table that’s covered with an ironing mat. I have to stand on a ladder and hold the camera above the piece to attempt a picture. Moving it to the design wall doesn’t work well for my process.
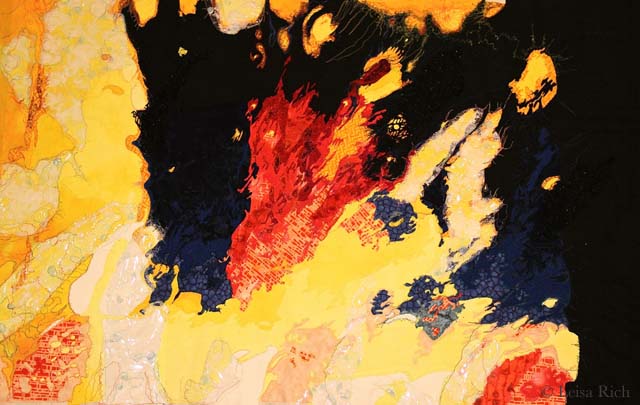
Then I added the reds.
And then the blues. I rather like it at this point.
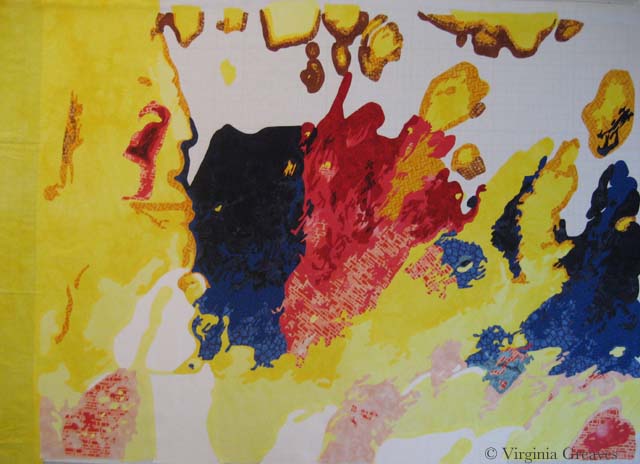
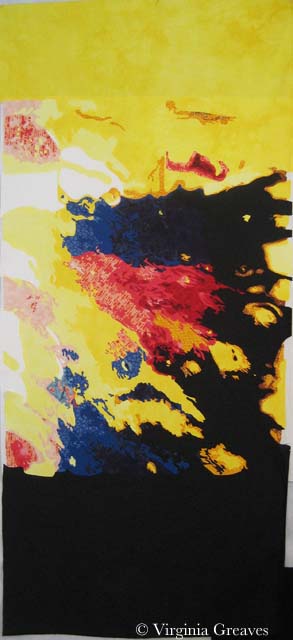
Then I added the black and changed the orientation. I’d be lying if I didn’t say I was completely flummoxed. There are several things that changed in the piece when I changed in the orientation — some of the shapes began to take on new and unintended meanings.
My first reaction was to take off the black and replace it with something else — but Leisa wants it just like this. I hope she paints it. I know she intends to cut strips in the bottom — maybe also the top. It’s just very striking color wise. Maybe that isn’t such a bad thing. It still has a lot of transformation until it becomes its final self.
ad;lkfja;skdjf