Inspiration

We the People

4

In the past year, I’ve started to show my age. I’ve spent time looking through photo albums, archiving pictures in digital form, researching relatives (with the help of DAR, I’ve gone all the way back to the late 1700’s) — I’ve wanted to know where I came from. And part of that journey has been looking at how my lovely country developed — why our founding fathers here in America made the decisions that they did. Probably my best exposure to the Constitution, however, was provided by School House Rock.

So I’ve been considering this lovely document — hand written by our founding fathers — created at a time in which typewriters had not yet been invented. There is some beautiful calligraphy for the titles, and the majority of it was transcribed by James Madison’s cursive script. Cursive is a personal thing, unique to each individual. I’ve heard that there are some schools that have stopped teaching it — a shame. It is a beautiful and artistic expression.

All of this finally came out this past week — my kids went back to school and I had time on my hands. I also have the unique opportunity to include the piece in my local group’s art show — but I have to work fast. I only have a couple of weeks.

So this is where my muse led me — running at an insane pace.

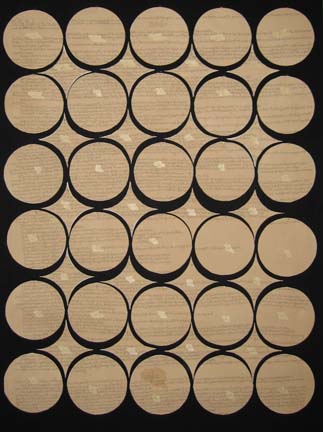
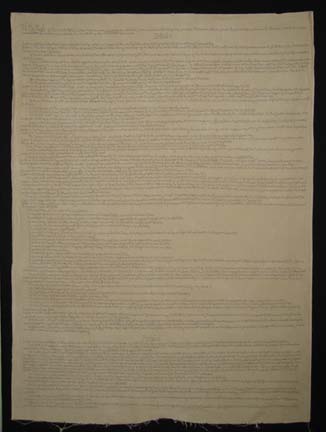
I took white muslin & dyed it overnight in coffee. Coffee gives such a wonderfully rich color — very antique. I did not completely wash it out — I wanted to be able to add water stains to the piece to add to its age & make it look like old parchment.

Did I mention it was a lot of muslin? One & 2/3 yards. I thought that that would do it. Oh naive. For some reason, I thought that I could fit the Constitution on this. Well I was wrong. But I did fill it up with as much as I could. I tried to follow the calligraphy, but the rest is my own dear cursive hand writing. Did I mention that my hand cramped a lot? I forgot about that part of hand writing. But I kept going. I got through Article II Section 1 (although the final piece won’t show all of Section 1 because of how it’s cut out).

In copying it, I was struck by the number of capitals, the most wonderful of which is People. We the People — we are capitalized, just like President. We are important and have a soul in this document. It felt so beautiful and empowering. It is a document for us — We the People.

I decided to use Peltex for the inside — which was challenging. This is a large piece and required a lot of Peltex. It was my intention to quilt it after I sandwiched it with Peltex — what was I thinking? My domestic machine was no match for this. No — I would have to cut it up before I could begin to quilt it.

And did I say something about cutting this up? I’ve developed an interest in deconstruction — a fact that disturbs my DH — but I find fascinating. The Constitution is a living document that we have been amending — or deconstructing & rebuilding — practically since it was written. I wanted to make this hard edged piece fluid.

I started by marking my pieces on the top — I was lucky & found the perfect circle to use that would cover the entire width in exact repeats — and then I added tape numbers — because once this is cut up, putting it back together could be tricky. The circle seemed the perfect shape to me.

It was so large, I had to cut half of it on the floor — and I’m very sore today. You wouldn’t think that crouching on the floor would use muscles that you don’t usually use — but it does. After I was half done — it was small enough, thankfully, that I could finish at a table.

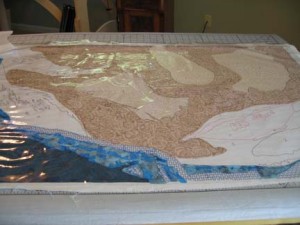
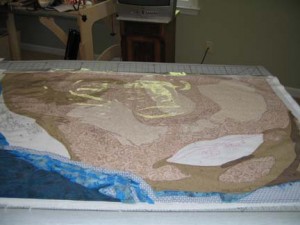
My first thought was to only use the circles, but now, looking at it on the design wall, I think I’m going to keep the diamond intersections.

After I took this picture, I sprayed it carefully to create more water marks.

My next move will be quilting each piece — and then the difficult task of edging each piece with thread — and when that is done, I have to think about hanging it. I’m still mulling it over in my mind — but the circles will hang horizontally, each from the piece above it — and the diamonds in a similar way but at an offset to the circles. I may use thread, I may use chain — I may add tea bags since they symbolize the freedom that we grasped by turning away from British imperialism.

It’s a work in progress — not like my illustrative work — but something the Muse commanded me to make.
Rwandan Redemption

1

One of the great things about being in the Anglican church in Atlanta is that we fall under the diocese of Rwanda. Years ago, when our priest went to Rwanda to talk to our bishop, he asked him if there was anything that he could do in return to help Rwanda in exchange for all of the blessings that they had provided him — and the bishop answered him simply “sell our coffee”.

So Jonathan started Land of a Thousand Hills which owns three coffee houses here in Atlanta & sells coffee directly to many churches in our area. It is a beautiful opportunity to provide the people of Rwanda a living wage while giving others the gift of their wonderful coffee.

Jonathan returns to Rwanda about once a year and as I was sitting in church a couple of weeks ago, he started talking about the friendship between a man and a woman — one Hutu, one Tutsi — who were personally linked through murder during the genocide of the 90’s but who now accept redemption and forgiveness — and work together in the coffee fields.

That is an amazing thing — to ask for & receive — or to give — forgiveness for murdering family members — all through the grace of God.

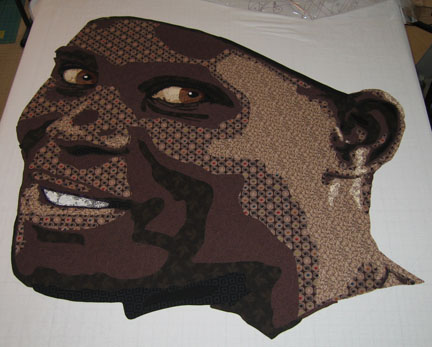
I had been struggling with my next project — which sounds like a meagre anxiety in comparison to people familiar with machetes — but it became clear to me that it was important that I make a portrait that would capture this beautiful story. Jonathan (and his coordinator Karen) were kind enough to allow me to choose one of the many pictures that he has taken on his trips. After looking through many, there was one of a woman bending over the grates, sorting coffee beans, with a relaxed and happy expression on her face — a light in her eyes.

I am Caucasian and all I’ve done in the past have been Caucasians so I was nervous about working on an African portrait — I knew that the palette would have to be different — but I surprised myself. I walked into the fabric store & came out with a wonderful value range. It was strangely easier — but I do think that my eyes are becoming more trained to see value over color. The more you do it, the more you can see it.

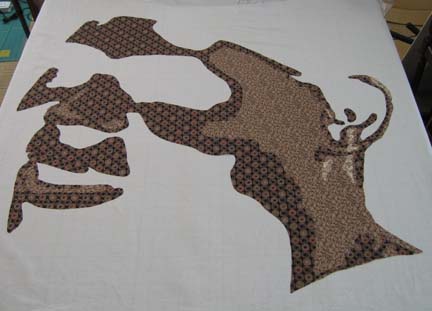
This is what she looks like with the 1st 3 values. You can’t see the outline of her face well with only the 1st 2 so I thought I would skip to the 3rd. I was really surprised at what I chose for the 3rd value. It is a dark brown with taupe circles with green, red, black, & blue in the centers. It doesn’t seem that it would work — but the print is small enough in relation to the overall piece that it does.

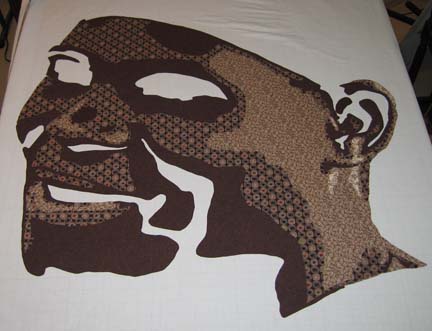
This is with the 4th value — you can really see her coming to life.

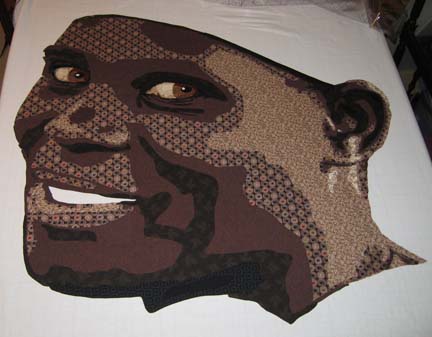
This is with all of the values — and her eyes. I will admit I had an uh-oh moment — I had 6 values & realized I needed 7 but all ready had 5 fused. The last value is a jet black — so I used a black for the 6th that has a pattern on it. Although the effect is subtle — and you probably can’t see it here — it works OK in the piece. I could have technically eliminated one of them & just used the jet black — there is only one place where they are touching — but what I did works fine.

And the eyes. Most Africans have brown irises — but with the brown skin, I thought it important to use another brown altogether. I think that the more yellow brown helps her eyes pop a little more. Also, in Caucasians, I have used the face colors to make the sclera — or white part of the eye — and it’s always worked. I’ve always preferred that to just white fabric. However, with this piece, I couldn’t re-use the face fabrics for the eye — but it was easy to see that I just had to go pull the fabrics I used in previous pieces & that would work perfectly.

The mouth was another challenge. The teeth were made the same but the color around the mouth was an issue. I realized that I had to choose something that would be darker in value than the skin tone just around it. I tried browns, reds, purples — I had half my stash out of the closet. After thinking about it for a while, I decided I needed a really deep purple — which I did have to run out & get since I didn’t have any on hand. I also shortened the mouth & used the printed black for the corner of her mouth as the purple extending beyond her gumline made no sense.

I’m really pleased with how she is turning out. Next week I will work on adding her hair turban and shirt as well as a background. In the photograph, she has an orange turban & blue shirt — but I may well change it. I’ll take this last in-process picture into Photoshop & decides what looks best on her next to her skin as I have recreated it.

Re-Connecting

0

I confess — I haven’t written in quite a while — for many reasons. I stopped most all studio work after Thanksgiving in order to prepare for Christmas. It felt good to have all of my things done & properly prepared — but I also really missed the studio. I thought about my sketch book — even carried it around — but didn’t really work in it. I’ve also been letting Facebook take more of my life than I should. I think in the new year I’m going to limit my access.

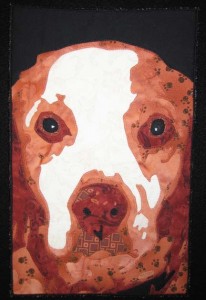
I did make a small piece for my husband as a gift — it’s made from a picture of his dog Solomon. I made one of Solomon last year and gave it away in my fiber art group’s annual 5×7 exchange — and I didn’t realize how much that bothered him until it was all ready done. So this year I tried to make it up to him by making this small piece (Solomon II):

Not easy finding commercial fabrics in rust but I think I did an OK job. I even used a print with paw prints on it — which I think works out OK given Solomon’s age. He is a Brittany Spaniel & his life expectancy was 10 — he is 19 and still going strong.

I also had the complication of a new computer — on a new platform. We had an XP PC that was over 7 years old & it was making noises like the hard drive could crash any minute. We looked at new computers — and in the end bought an iMac which is SO much faster. There are new things to learn though — and the files aren’t as compatible as I would like. Microsoft Office files ARE compatible with the Mac — but hey, not all Microsoft WORKS files are compatible. Add in the fact that the CD writer on the old PC doesn’t always work. I finally brought over all of my old pictures using an external hard drive. I also set up a wireless network. I had tried for a VERY long time to do that with a DLink router — and it never worked — but the Airport  Time Capsule  set up like a dream & works with Macs & PCs.
My last technical struggle involves software. I use Photoshop A LOT — and CorelDraw to resize my patterns — and DreamWeaver for my website. I did upgrade Photoshop on the Mac — haven’t decided yet about DreamWeaver. I’m thinking about putting my entire website in WordPress. It’s been years since I’ve changed the look of it — may be time for a change — and WP is great software.

Once I got Photoshop on my Mac — and my pictures — I could start figuring out a new piece. Hmmm — not much to work with. I really need to dedicate myself to taking more pictures and maybe taking a photography class.

I have had an idea pinging around in my brain for a while. It involves doing a portrait — and then cutting it up to make it look like a cracked plate. Can I do that? Can I cut up a portrait? After thinking about who would be cracked — I decided that the answer could only be me. Although we always talk about how crazy other people are, everything is relative to ourselves — and you can’t deny that it’s possible that everyone else is sane & I’m the one that’s cracked.

I think that I just need to move away from my comfort zone of a straight forward portrait. Test some boundaries. Something maybe realistic with the unexpected thrown in.

5×7 Is Really Small

1

My Fiber Art Fusion group has a holiday exchange in December of a 5″ x 7″ piece of art — which sounds really easy — probably won’t take a lot of time. But actually, I find it much harder to work small. When you’re used to working in a particular scale, going far from that can really throw you.

Which is to say that my first piece totally bombed. I tried to do a 4 value beach scene in black & white — three people in the surf with their backs to the viewer. I think that it is a good idea for a piece — but it really needs to be larger. Lower the # of values was not enough to make this simple. First there were too many really small pieces needed to evoke the surf — and second, all of the fabric prints had to be really small scale for it to work. I thought I had a handle on that — but I wasn’t thinking small enough. At some point I realized that I was at a point of diminishing returns and I stopped.

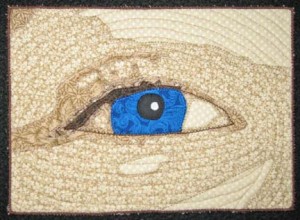
At this point, I thought about just doing an eye — it is a shape I’m familiar with and enjoy doing and its creation would help me grow in my work by concentrating on one small yet very important part of portraits.

eyeknow

It’s made me think that I should spend some more time studying just the eye. It is done differently than in my portraits and although simplified, I like the broader use of color. I may spend the time from now until the holidays working on small eye studies.

Exhibit Visit

1

As fate would have it, I was unable to attend the opening reception for Fiber Art Fusion’s Exploring Dimension exhibit. I did, however, visit it with my mother the following week. We also visited the High Museum — and although the visiting exhibit from the Louvre was good, we had seen it before — and the permanent exhibit was, in my biased opinion, not nearly as good as FAF’s exhibit.

I have received permission from some of the artists in FAF to give you a sneak peek — a small tour of the wonderful treasures on display at The Art Place.

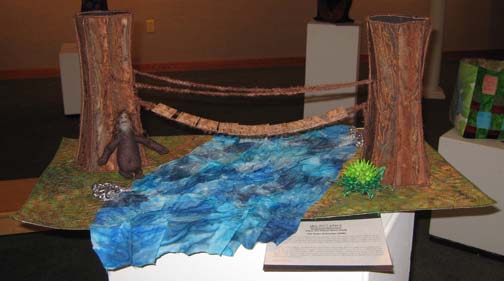
This is my piece, The Price of Passage, which I include since I added something since I last took pictures of it. Can you tell what it is?

greaves_price

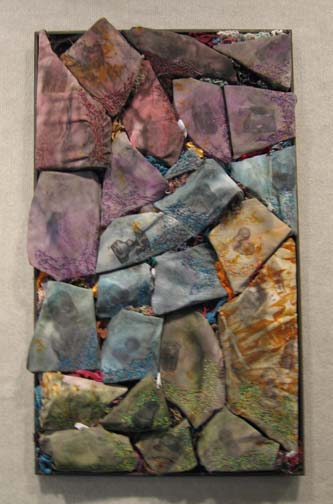
The Wailing Wall by Denise Webster – Some of the stones have photo transfered pictures on them. There are also little notes tucked into the nooks & crannies between the rocks.

webster_wailing wall

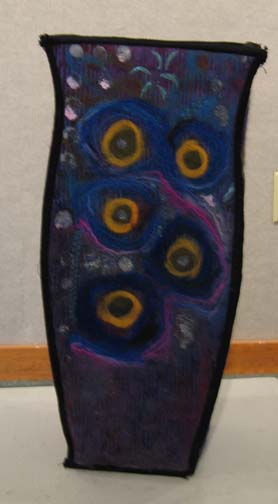
Blue Vessel by Sharon Ahmed

ahmed_bluevessel

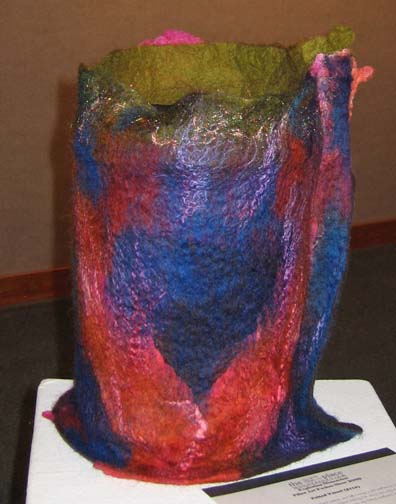
Felted Vessel by Sharon Ahmed

ahmed_feltedvessel

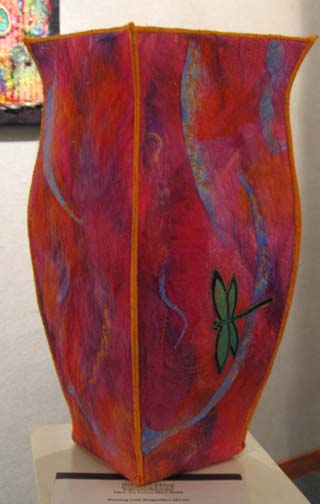
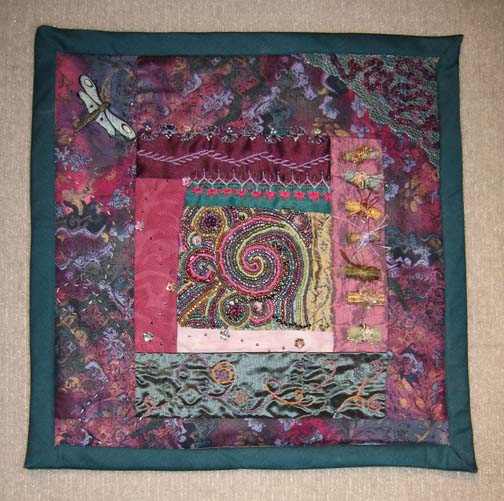
Dancing with the Dragonflies by Sharon Ahmed

ahmed_dancingwiththedragonflies

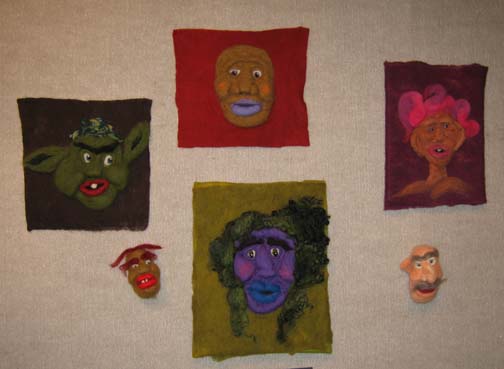
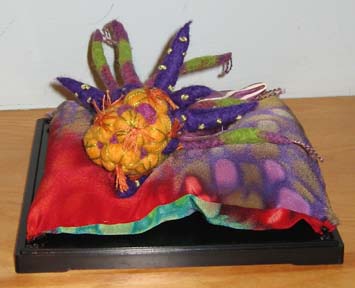
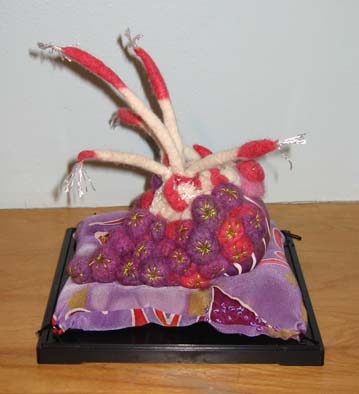
Felted Monsters by Sharon Ahmed – All of these are made with felted wool.

ahmed_feltedmonsters

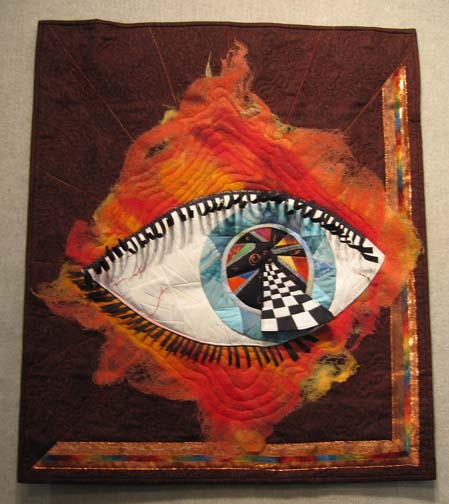
Do You See What I See? by Wendy Blanton – This is Wendy’s interpretation of a migraine headache – and the black & white road actually protrudes from the eye.

blanton_doyouseewhatisee

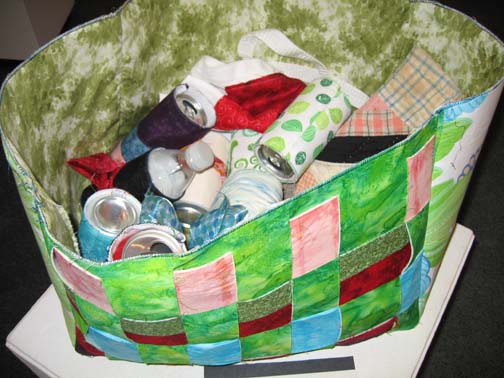
Reuse by Julie Kokan

kokan_recycling

Dragon Flight Plan by Margaret Betz

betz_dragonflightplan

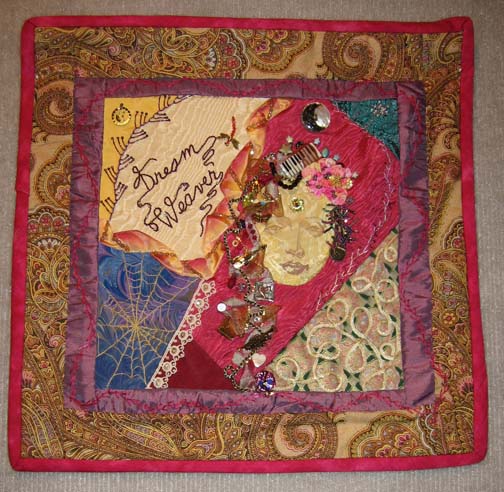
Dream Weaver by Margaret Betz

betz_dreamweaver

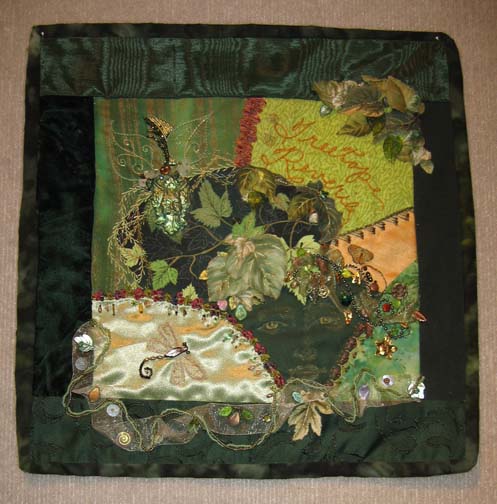
Treetop Reverie by Margaret Betz

betz_treetopreverie

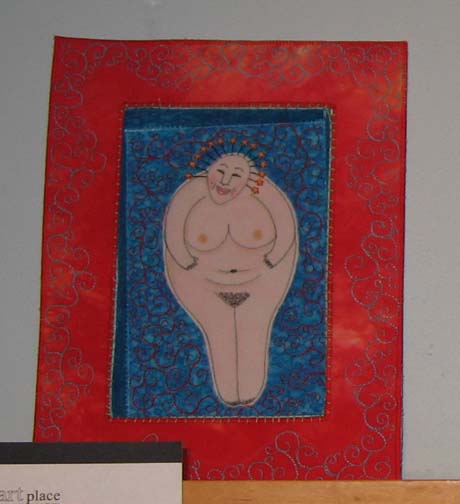
It Ain’t Over by Rebecca Reasons

reasons_itaintover

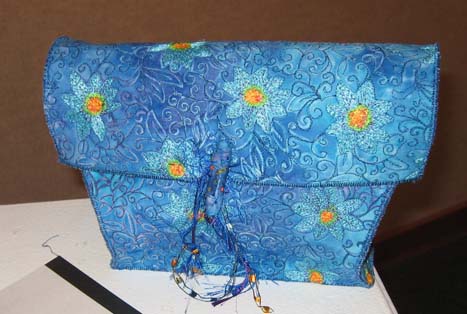
Blue Box by Rebecca Reasons

reasons_bluebox

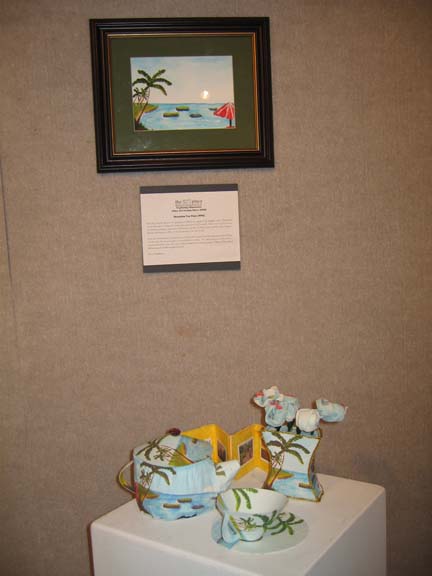
Hawaiian Tea Time by Diane Schulteiss – Diane used watercolors to paint the painting, and then used photo transfer techniques to make her own fabric which she used for the tea set.

schulteiss_hawaiianteatime

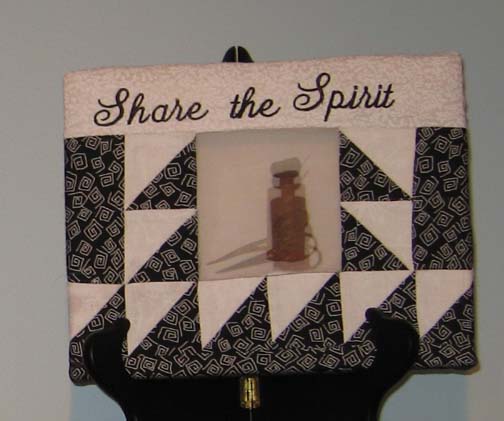
Share the Spirit by Diane Schulteiss – This one was difficult to photograph as it has the image printed on organza in the foreground and also printed opaque in the background.

schulteiss_sharethespirit

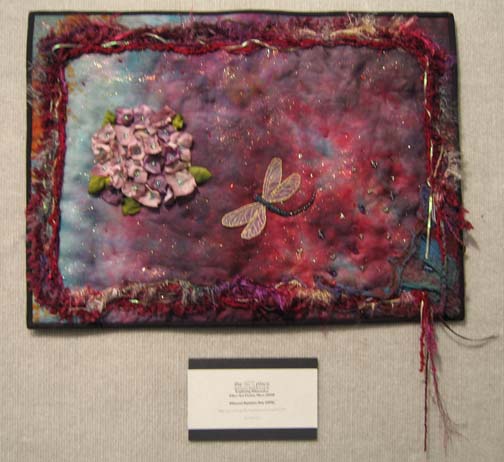
Ethereal Summer Day by Ann Quandee – This one has a lot of sparkle — as you can tell, my camera and I had a hard time taking a clear picture.

quandee_etherealsummerday

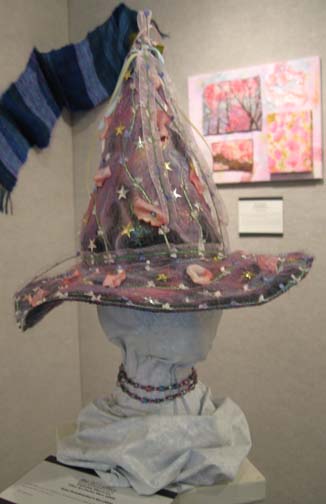
Fairy Grandmother’s Hat by Ann Quandee

quandee_fairygrandmothershat

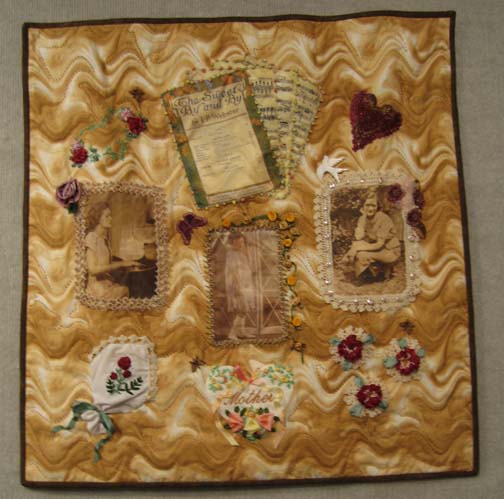
The Sweet By and By by Ann Quandee

quandee_sweetbyandby

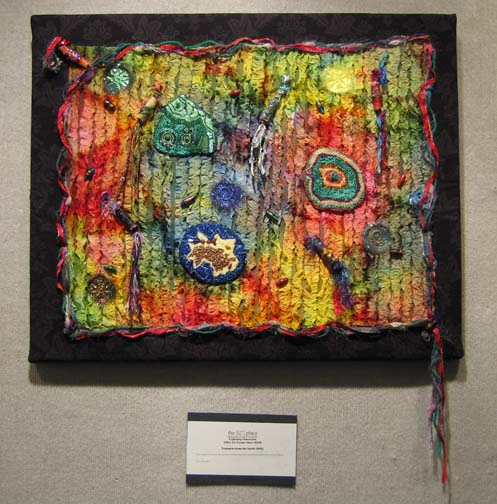
Treasures from the Earth by Ann Quandee – The amoeba shapes in the middle are heavily beaded with seed beads, and the background has handmade utee fabric beads.

quandee_treasuresfromtheearth

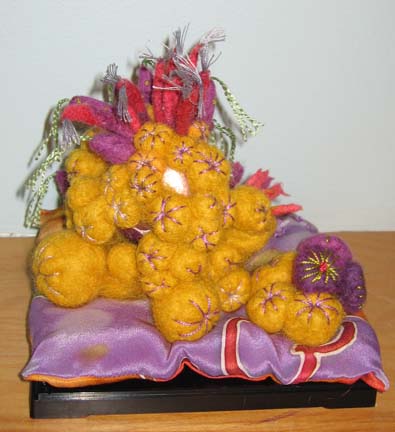
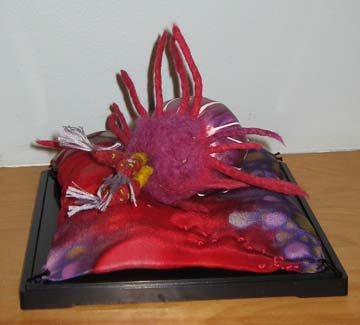
Coral Reef Sea Creatures by Hellenne Vermillion – Hellenne made these with pottery, silk, and wool roving. I don’t know that I have seen anyone else merge these kinds of elements together so delightfully.

vermillion_coral1

vermillion_coral2

vermillion_coral3

vermillion_coral4

Sea Creatures Scarf by Hellene Vermillion

vermillion_silkscarf

Twelfth Night

2

Twelfth Night — the night of the 12th day of Christmas — is the time that we celebrate the coming of the Magi to give gifts to the baby Jesus. It is the last night before the feast of Epiphany, and we use this time to — well, have a party!

As I prepare to have our annual Twelfth Night feast, I thought that I would take a little time to share what I have been doing lately.

I finally finished my latest quilt. I think I’m going to call it Sweet Dreams. You can read about it on my website here.

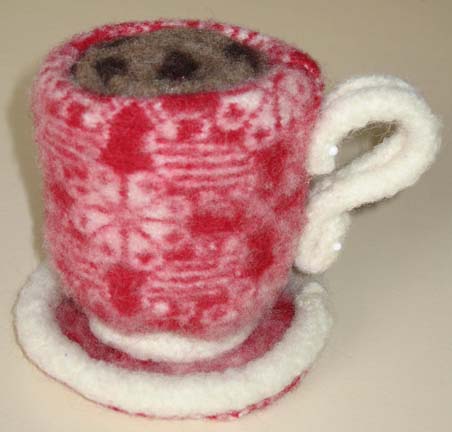
I also finished my felted teacup. I was asked to make a pincushion for a swap at my local guild. I never made it to the Christmas meeting — and only finished the teacup today. I spent quite some time trawling the net looking for a pincushion that didn’t look like everyone else’s pincushion. What was the point of spending time on something pedestrian? I finally found the felted teacup and fell in love with it — which of course led me to start searching through thrift shops for wool sweaters I could felt (which has led to some wonderful discoveries other than sweaters). I am amazed at what some thrift stores have — I bought several designer pieces with the original tags still on them.

felted-teacup

I also had great fun with the I-cord maker. This wonderful idea is from Betz White who is known for her felted cupcake pincushions.

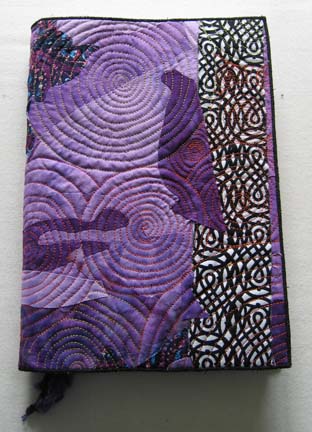
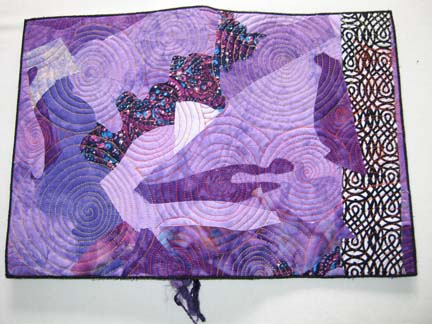
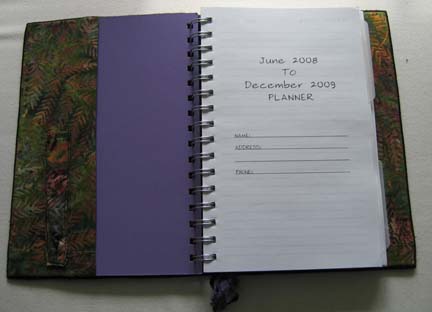
My second holiday inspiration came from my friend Rebecca Reasons. (By the way, she is the one that won the 5 x 7 of Solomon that I made for our Fiber Art Fusion Holiday gift exchange.) She is an awesome artist and just had an article published in the winter edition of Altered Couture. While I was sitting next to her at our artist’s party last month, she showed me the wonderful book cover that she had made. I loved it. Then when I went to the store to buy a new planner for the new year and couldn’t find one with a cover that I liked, I realized that I could make a cover for it. I hid away in my studio (family was home all last week) and pulled out scraps in purple hues — a little black & white — and then quilted it like crazy in yellow and orange circles. Then I added the inside tabs, a slot for a pen, and finished it in the way I make my coffee cuffs. I also added some threads for a bookmark — my only regret being that I wish that they were longer. I didn’t account enough for the ring in the binder — but I may yet tie more strings to the ends & add beads.

planner1

planner2

planner3

By the way, I am selling my Hinterberg stretch machine quilting frame.  Please email me if you are interested.


Creative Streak

5

I have had a major creative streak lately. I have several ideas in my head and am working happily away in my studio.

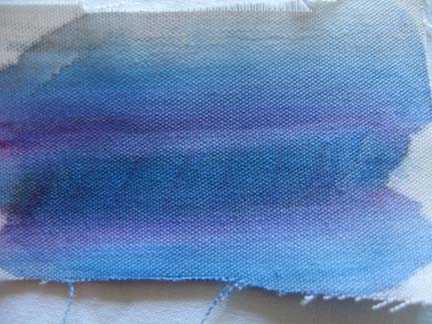
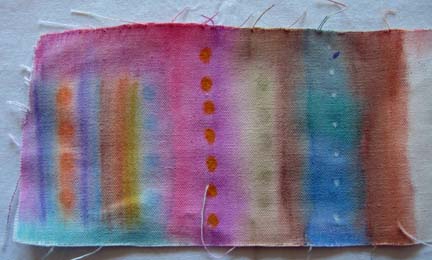
I went to visit a friend the day before yesterday — Heidi Miracle-McMahill. (You can find her work here.) I love the watercolor feel of her work. She let me play with her Caran D’Ache Neocolor II wax pastels. They are water soluble which means that they start to blend when you add water. I had brought over a set of Carb-Othello colored charcoal pencils that my mom had given me. They say that they are blendable but I didn’t find that to be the case. However, their color is very intense and work well in conjunction with the Caran D’Ache wax pastels.

I also really liked the fabric that she works with. She bought it from Fiber on a Whim. They called it Corona cotton canvas from Kaufman. It is a nice lightweight canvas — but heavier than Kona Cotton.

After we played, we went over to Dick Blick (which is just around the corner from both of us). I bought a small pack of the Caran D’Ache pastels and a nice paintbrush that I’ve been wanting. We looked at all of their canvas rolls, but they were unbleached and much heavier than what Heidi had.

When I came home, I had some cotton duck in the closet — so I thought that if I washed it, it would be close to the canvas cloth Heidi was using. It did soften, but when it was completely dry, it was stiff again. I have some Kona white in the closet. I think I’m going to experiment with that for a while. I don’t tend to paint my pieces — I am an applique kind of a gal — but surface design can be a lot of fun too.

I have not been keeping up on my blog with what I have in process. I have just laid out my latest piece. Here you can see the progress I made in the last few days:

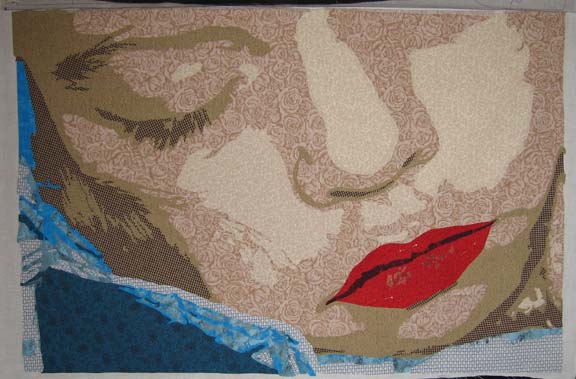
I had a fabric epiphany last week. It hit me how to use commercial fabrics to make faces. I went into my closet & found exactly what I needed in my stash stuck in my white & brown drawers. I was so excited — and knew immediately that it would work.

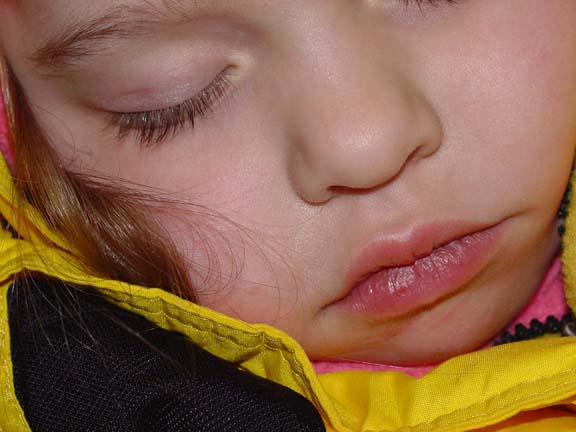
Also, this is the first piece I’ve done in which I separate the face from the clothing — and from the lips. When I start in Photoshop & reduce the picture to B&W — then posterize it — I lose definition between objects that are different colors. I transferred the picture from Photoshop to CorelDraw to make my drawing — and then printed it out. I always smooth over the lines with a Sharpie marker on the final pattern. This time, I used colored Sharpies to define the jacket and the mouth. I had to go back to the original color picture to see where the lines should be drawn.

And here it is. I thought at first that the mouth was too red, but I’ve looked at it in Photoshop and a lighter color red doesn’t work. You may  not see it in the picture, but there are supposed to be highlights on the bottom lip. I may change that.

Hmmmmm. I’m not sure about the lips. I’ll have to think about it.

I should also mention that in my last two pieces, this one and Unconditional, I was very careful with selecting fabrics. I am usually so eager to start. I love cutting up all of the pieces — I think it is my favorite part. But I have learned that making sure now will make the project so much smoother. (I have to save spontaneity for my non-applique pieces.) On pieces that I made last year, I just used my  judgment, but the truth of the matter is that it is hard for my eye to always distinguish good value changes. Batiks especially can come out lighter in value than is expected. So I have been photographing my choice of fabrics and putting them on my computer. In Photoshop, I can take out the color, and when the picture is in B&W, I can easily see what works well and what doesn’t.

Back to the studio.


Model of an Atom

0

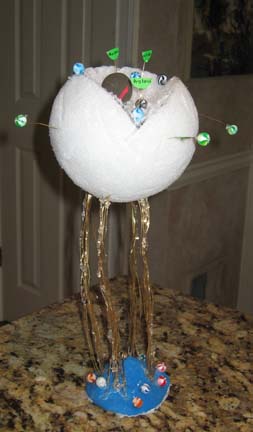
My oldest daughter asked me to take her to WalMart the other day so she could buy supplies for a school project — a model of an atom. She bought gold jewelry wire, a large styrofoam ball, beads, and air dry clay. I could see the creative spark in her so I let her have whatever she wanted. (Thank goodness she didn’t ask for a pony.)

Model of an Atom

Isn’t it cool? I was so impressed that she could dream this up in her head. She used the wires to hold up the styrofoam ball, but she ended up using hot glue to attach the ball to the wires — and then had a blast making jewelry with the wire, beads, and glue. The styrofoam has a section cut out of it. She marked it with black marker and then I cut it out using a knife — carefully. It wasn’t as easy as florist’s foam, but I marked the outside & wedged it out in sections.

She used the beads and some of the air dry clay to make parts of the atom — and then used the wires and round green circle stickers folded in half to identify different parts of the atom. I think she added the beads at the bottom because they looked good there.

I can identify with that.


Reality Bites

0

I was getting ready yesterday to write about my trip to the beach and about some books I had read recently — but I got distracted by upgrading WordPress. Sometimes those mundane tasks are comfortable and keep us from moving forward.

And then yesterday, I watched that old movie Reality Bites with Ethan Hawke and Winona Ryder — an early Ben Stiller movie. Much more serious than his later stuff.

I am a member of Generation X — and that is what this movie is about. At one point, Winona says that she was supposed to really be somebody by the age of 23 — and Ethan tells her that all she has to be is herself — and she says that she doesn’t know who that is.

Another theme in this movie is about selling out. Ben Stiller’s character (he cast himself in the movie) is Winona’s corporate boyfriend — and he has sold his soul. He takes her heartfelt documentary about her friends and their problems and changes it into a puff piece about how silly they are in order to impress the TV networks. When she finds out & gets upset, he promises to have them delete the pizza image — as if a silly fix like that would undo the damage that has been done.

And Troy, Ethan Hawke, Winona’s live-in friend who wants to be the boyfriend — he lives on the edge. He has been fired 12 times and his passion is singing nights in a band. That is the only thing he can commit himself to — unless Winona will change her mind and dump her boyfriend for him.

There is a great scene in which Winona accuses Troy of having sold out just like everybody else — except he doesn’t get paid for it.

And I think that that is what has me stumped.

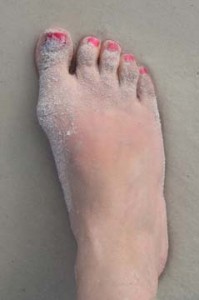
Anyway, last week we went to the beach. I took a picture of my foot:

I went to all that trouble to paint my toenails, I thought that I should preserve them for posterity. I also did my girls’ toes and intended to take pictures of their toes in the sand, but good intentions don’t usually get us very far.

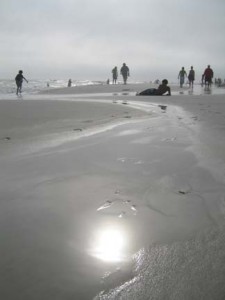
This is the view down the beach at SanDestin last week:

The first 2 days were beautiful and I burned. I always burn in Destin no matter how much sun block I put on. The last full day I spent under shelter.

I’ve been trying to improve my photography skills. I think that the hardest thing is just composition. I know my camera fairly well at this point — but the outside world is another thing. Maybe I’ll get a friend & go out one day next week just to take pictures. I could use the inspiration. I have felt burned out lately — the move took a lot more energy than I expected. I have almost all of the applique done on the cloned profiles I’ve been working on — and I finally got a good idea about setting it all together — but it will involve paint and stamps and foil and playing. I am thinking about setting it up in the garage. We don’t have a shop sink at this house, though. I didn’t realize how nice that was until it was gone. A wet studio is harder to set up than a dry one — although my dry studio is still a mess.


Epiphany

7

Epiphany is a wonderful thing. I have felt disconnected from a lot of my work for a while, probably a result of having so much trouble with my last portrait in yellow. So a couple of days ago I was looking through photographs trying to find inspiration for a new piece. I was coming up with nothing.

And then it hit me. I have a camera. Equipment. Me. Isn’t that enough?

So I set up one of the wonderful lights that I bought for photographing my work and starting taking digital pictures of myself. I turned off the flash & used one of my black design walls as a background. Well, it wasn’t working — so I moved all of the equipment to my closet (no windows) and closed the door. The only light was from my lightstand. I used my husband’s dark suits as the background. And I experimented with moving the light and taking shots of my profile (by the way, one side is better than the other). I finally took one that I knew would work — and then used it as the basis for a simplified drawing. Simple because I knew at that point that I was going to make this many times in different colors.

What I have been doing in color portraits has been experimenting with how color affects the face. I have also been reading Deidre Sherer’s book and wondering at how textured fabrics affect the face. The result of this is an experiment in color and texture and the human form multiplied out many times.

profiles in process

Now that I have done all of the basic colors, I’m thinking of inverting them — even mixing them up.

Did I mention that I’m moving next week?

I am desperately trying to make this quilt top knowing that my time in limited and that very soon, I will have no time to work on it. But it has felt wonderful to have my creative soul back.

Go to Top