Quilting
Quilting

Quilting Conundrum
0I don’t tend to show a lot of my quilting on my blog. I don’t know that I consider myself all that competent at it — there are certainly better machine quilters out there — and I’m not a master at feathers and curlicues. I tend to either follow the contours of a shape or use abstract designs that add texture to the shapes. Also, I have worked on a frame before — and now I use just a home machine and my hands. Quilting is a more difficult proposition at this level than when the quilt is stretched out on a frame that the machine hovers over.
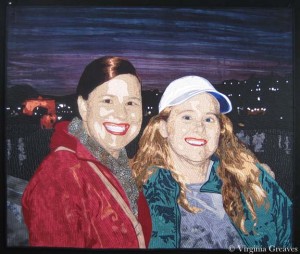
But making a complex piece like this creates some problems for quilting on a home machine without a frame — and since I’ve made a few mistakes of my own, I thought I would walk through the steps that I used on this quilt to address issues before they became problems.
Everyone is told by the quilt police that you quilt from the inside out. So you start in the middle of the quilt, and any ripples that form as you go along get pushed out. This is particularly a problem with dense quilting. I quilt about 1/4″ apart — and even though I use a 70/30 cotton/poly batting with a scrim to keep it from stretching — it still happens.
If you have more than one figure in your piece, however, you are working from more than one focal point. I typically quilt the face first, then the hair, then the clothing, and finally the background. With two figures, as I found in Beach Guardians, you can end up with a lot of fabric left to distribute in the space between the two figures if you aren’t careful.
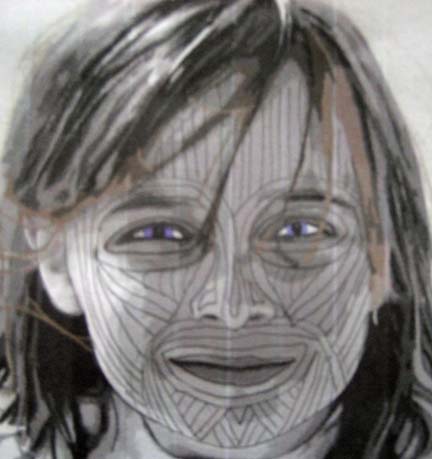
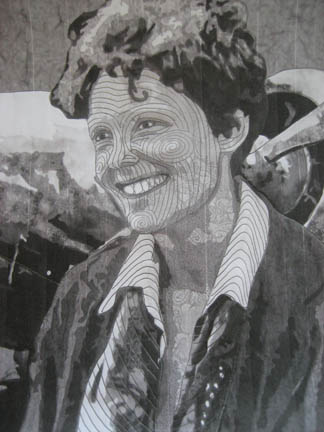
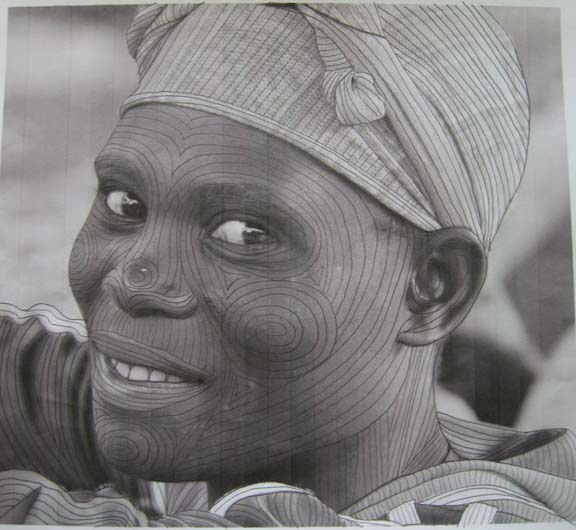
I started by taking the black and white picture of my design and drawing on it with pencil. It does look a little spooky — but it gives me a plan of how I want my quilting lines to go.
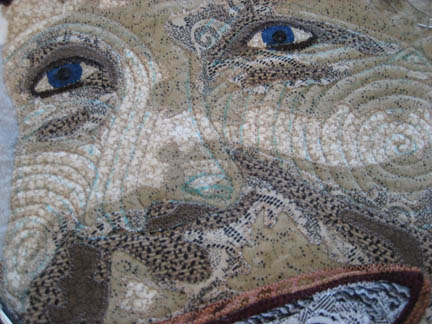
Since I haven’t quilted in a while, I pulled out my erasable blue pen (it comes out with water) and marked my beginning lines. It gives me confidence when I feel unsure about starting. This is the first figure’s face completely quilted.
And this is the second figure’s face completely quilted. When I was done with her face, I then quilted her scarf, then her jacket within the line of the purse strap, and then the rest of the jacket. I did her hair last.
The picture below is to give a reference point. I’ve done both faces — as well as the entirety of the figure on the left. I would normally want to work on one thing at a time — all of the jacket — all of the water — but I have to split it up for this to work. At this point, I need to worry about the space between their faces and make sure that I can distribute the fabric as evenly over the space between the faces as I can.
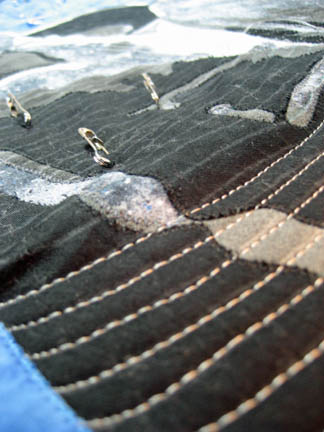
This is a closeup of the water and cityscape between the two heads. I used metallic threads for the water and jagged black lines — avoiding the white lights — for the cityscape.
I then quilted the left side of the hair of the figure on the right. It seems elementary — but trust me — there is method in the madness. I suppose I could have taken it farther & not quilted the face of the person on the right until after this stage — but old habits die hard and I really want to concentrate on the faces first since they are the focal points of the piece.
Below the hair is the left side of the jacket — which came next.
Then I moved to the right to quilt her shirt.
And then her collar on the right hand side.
At this point, instead of working on the rest of the jacket, I switched over to the right side of the hair. I used long wavy lines to show the texture in her hair.
Then below her hair — still on the right hand side — I quilted the lines of her jacket.
If you look at the top of the picture above, there is a small piece showing the fingers on the shoulder of the jacket. Again, I used my erasable pen to make a few guidelines before I started.
The only part left on this figure is the hat. I tried to take one picture of the hat, but because most of it is white and the inside of the brim is dark blue, I couldn’t take one picture that successfully showed the quilting lines on both sides.
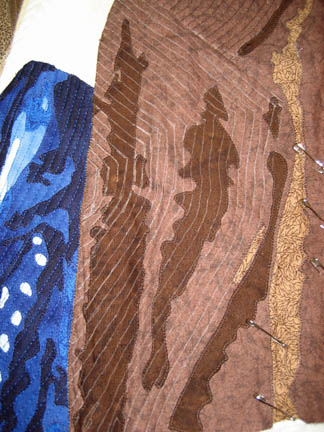
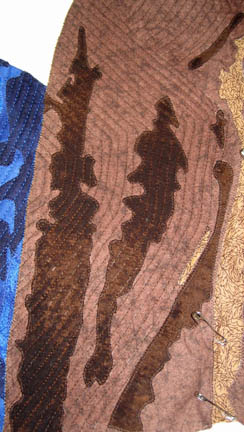
This, then, is the white part of the hat.
And this shows the inside of the brim.
At this point, I’m left with the background on the right and left sides. I work on the water on the right hand side first — using metallic threads in a wavy line. I used a traveling stitch at the top. At first, I thought I should cover that with a solid line at the top — and finally decided that it looked more realistic like this. I like the traveling lines as they are — so I left them as they are.
Then I completed the water on the left side of the piece.
Staying on the left side, I then quilted the small section showing the concrete railing that the figures are leaning against. This is just below the water.
And then I had to think about the cityscape above the water. This area on the right side is full of white lights but otherwise signifies buildings going up a cliff. I chose a jagged line in black thread — avoiding the white lines and thus making them even more prominent.
The left side is the same — except for the stone arches which I worked on in rust colors.
The only thing left at this point was the sky. I used a gray purple in the purple areas and a dark blue in the blue areas — and used a water puddle design. The thread matches so well that it is really hard to show it well in a picture. Trust me — it works. It covers the area without distraction — the quilting stitches create the harmony that is felt in the bleeding colors of the sky.
My point is that quilting can be a puzzle. Quilting from the inside out is a good rule of thumb, but when you have multiple complex structures to quilt, you need to logically consider how they relate to each other and how you’re going to address fullness created in the quilting process.
After quilting, it’s time to add the binding. Maybe I’ll document that one day — but not today. I used my signature black on the binding and a busy black & white print on the back with a matching sleeve. I don’t usually enjoy handwork, but the handwork on this piece coincided with some needed stress relief — and I was glad to have it to work on.
Then I had to soak it. I use a clear glue in the binding to help me get it into place perfectly (thank you Sharon Schamber) so I have to soak it in water to disintegrate the glue as much as possible. I filled my washing machine with cold water (warm water or even soap could set the erasable blue pen marks permanently so be careful) and left the top open so it wouldn’t spin. Then I folded the quilt with the top facing outward — and this time, I put a dye magnet sheet on each of their mouths. If you remember, on my last quilt, the red in the mouth bled onto other white parts of the quilt — never to come out. I wasn’t taking a chance this time. I laid it in the water, making sure all of it soaked well — taking care to keep the mouth from touching anything other than the dye magnets. After about an hour, I let the machine take it through a slow spin to wring out the excess water.
When I pulled it out — no crocking of color this time. I’ll have to remember that trick next time.
And then I laid it out on one of my design walls. This one has started to bend from the water that seeps into it when I block on it. In my previous home, I could pin right into the rug — but I have looped carpet now so I don’t have that luxury. I keep this wall for blocking — another for photographing. I didn’t realize at first that the water was warping the Celotex — it really messes up photographs. It took me a while to realize it was a warp in the board.
One final note — how I did I decide how much sky to add? I spent quite a bit of time thinking about that. I think that most people would cut the line just above the heads and consider the sky empty space without design details. However, it is much better that the horizon line (which I see as the median line of the tops of the cityscape) fall at 2/3rds — which brings the golden ratio into the composition. I end up with quite a bit more sky in the piece, but even though it isn’t full of appliqué details, it brings an overall harmony to the piece that it wouldn’t otherwise have.
I’m still working on a name for this piece — I’ll post a page for it when I’ve made a decision.

Muscular Industry
1With the children back in school, I spent all of last week finishing the appliqué on the 2nd figure and preparing the quilt sandwich.
After that, I always stumble. The blank canvas is daunting, and quilting is difficult to undo.
One of the criticisms of Just Call Me Jack that I received from a judge’s sheet from IQA Festival was that they found the quilted circles in his face distracting.
Knowing how to quilt the face is a hard thing. There are no rule books and many people try to avoid adding quilting lines to the face because they think it makes the face look wrinkly. However, an unquilted face sags over time, especially if the piece is closely quilted around the face.
I’ve had several people ask if I follow the muscles. The answer is yes and no. Our faces are not just muscles – we have more character than that. I use curves, swirls, and combination lines to fill in intersections. So I take instruction from the muscles but I’m also trying to give the impression of depth in the face.
But I wanted to see if quilting the lines strictly according to the muscles was a better option. I’m open to change. I need to grow in my work, so I took out my pencil and made a sketch on a picture of the appliqué so I could assess that as an option without having to commit it in thread.
To be honest, I’m not thrilled with it. This is more what I would do.
. . . And I like it better. The first is too choppy for me. I think faces need to have more flow. And I like the swirls. They give an impression of where light hits the outermost parts of the face — the cheeks, the chin, the nose, and sometimes the forehead.
For now, I like my style. Both of them seem reminiscent of face painting in ancient cultures, but the effect in thread will be more subtle. To me, quilting can give the illusion of things — take over where the appliqué stops. I’m working more with suggestion than is obvious upon first glance. The appliqué doesn’t always give you the needed visual clues — sometimes the quilting lines take over and finish the job.

How to Fly Part 5
1My Amelia piece is coming to an end. She is in the final stages of completion. But there are still a few things I wanted to share.
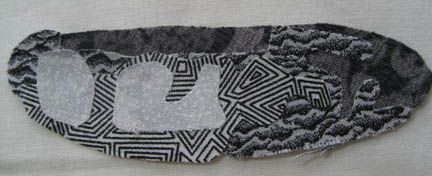
First of all, teeth. I think I stumbled into making teeth when I made Shoshanna. It’s a formula of fabrics that I’ve used many times — but on this piece, I wanted to change it up — so I picked new fabrics — and it doesn’t work.
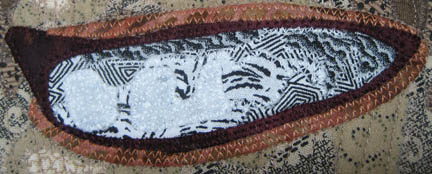
It was still instructive. It taught me that even though you have a good value range that works — it may still not work for the realism you’re looking for. In the case of teeth, the first value isn’t really white — it’s a very hard to find gray — but it isn’t bright white — because let’s face it, most people don’t really have bright white teeth. Also, the following value, the 2nd one, needs to be more white than black. Teeth are small and if you get an evenly spaced pattern of black & white — you’ll see more black in this layer than you’ll want.
This is what I used for the mouth — it works better.
Quilting. I’ve been quilting and quilting and quilting. This is a large piece — for me anyway — and it has taken me a couple of weeks to finish quilting it.
How do I start? I take a picture of the piece & print it out in black & white. Than I draw on it with a pencil to plan how I will quilt the piece.
I don’t like to mark the piece if I can get away with not — but there are always the main lines of the face that I lay out with a soluble pen. A few lines here & there — and the rest of it flows outward.
Have you ever heard that you should quilt from the inside out? It is true — especially if you are quilting closely together. My lines are about 1/4 inch apart. But remember, I prefer to mark the main lines & echo from there — but that can mean that I can quilt myself into a corner — like I did here. The blue scarf to the left is all ready closely quilted. Then I laid out the lapel on the right side — and starting quilting in — only to find a hump that I tried really hard to ignore & “quilt it out”. Sometimes you can do that — if it’s small enough — but this was just not working. What could I do? I spent about an hour ripping it out.
And then I marked my lines from the outside in — so I could quilt from the inside out.
See how nice & flat it is now?
On a piece this large — I developed quite a bump on the top that I smoothed as I went. I quilted the face first, then the neck & scarf — and then it became apparent that I was developing a wave on the right & left.
Even though I started with a perfectly smooth top pinned to the batting & backing — it stretched as I quilted it. Even though I had a base muslin layer that was perfectly straight — it stretched. I suspect that I wouldn’t have the same problem on a frame. It may just be the nature of working on a home machine and the tension that the hands put on the top as you work along. I’m sure some of it is the result of tight quilting.
So I made the decision to move pins as I went — to smooth out the top. And now that I’m putting on the binding, the entire thing is <almost> completely flat. And the back is smooth — no tucks.
One last thought — did you see how freaking EVEN my free motion stitching is up there? I have amazed myself. I think that making more pieces this year has meant more quilting experience & maybe therefore more even quilting. It isn’t my intention — I really think that even quilt stitches are more pertinent for bed quilts than art quilts — but it’s interesting to see it arise from the many hours of practice.

Almost Done
1I’m almost done with Bukonyan Elder. She’s taken me much longer than I expected — but she is quilted now & blocked. I’m waiting for her to dry before I take pictures.
I showed a picture earlier of what the back looked like after all of the applique. I thought you might want to see the back now that it’s been quilted.
The brown thread shows up nicely on the black and white print — but some of the other areas don’t have dark enough thread for you to really see the outline — so I decided to crop out the other areas & only show her face and hands. I like the back. Her life in outline. She looks more like a sketch.

Quilting a Face & Conquering Your Fears
6I should say, conquering MY fears. Every time I finish a quilt, the hardest point for me is when I have to sit down & start quilting. I think about everything else in the world I can do to put it off, and my heart races at the thought of beginning. I think it is very similar to the fear of drawing — which is the fear of failure. Moving through a process that makes it less initimidating & breaks it into smaller, workable pieces is how I have to approach quilting — or I would never get it done. To be honest, I’ve even considered skipping this part altogether. I know an artist that mounts all of his fabric pieces on wood — and another one that mounts it onto a frame — but in the end, I know that the quilting adds a dimensionality to the piece that I like. I just don’t always know how to get there.
What works for me is to take a black & white picture of my photograph & start drawing on it with a pencil. I can mess up, erase, and start over. I try to follow the natural contours of the face — or the line of the shirt, or the neck, or the ear. Pulling all of these lines together into something cohesive is what I am working out on paper so that I won’t be pulling out stitches later on the quilt. I used to draw all of my lines on the quilt — I don’t do that anymore (it took too long & once I had my confidence, I didn’t need it anymore.) I look at my roadmap & I draw in a few primary lines on the quilt — and then fill them in with contour quilting lines.
I won’t always follow my map exactly, but I have an idea of where I want to go and I refer back to it as I quilt.

Fiber Art Fusion Class
0Last night, I walked through my process with my Fiber Art Fusion group. Great bunch — always a fun group to spend creative time with — but I was so nervous about doing this in front of MY group. Speaking in front of strangers is so much easier. In addition, this was more than a trunk show — I was walking through my process — which is complicated. Yes, there are other ways to achieve the same ends. I tried to tell them which things I had tried & explain why I do things the way that I do. I tried to make it as simple as possible — but at one point, all of those blank faces was truly daunting. It’s a detailed technique and requires a lot of drafting — so I guessed that about half would love it and half would hate it — which I think accurately described the meeting.
I have been working with fusibles for so long I had forgotten all of the misunderstandings. Although most everyone immediately understood machine applique — and there were hardly any questions about Photoshop — using Wonder Under created the most problems. If I do this again, I’ll have to come up with a better way to demo how it’s done.
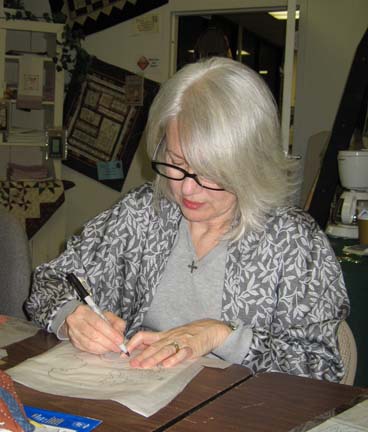
This is Martha Meyers working on drafting:
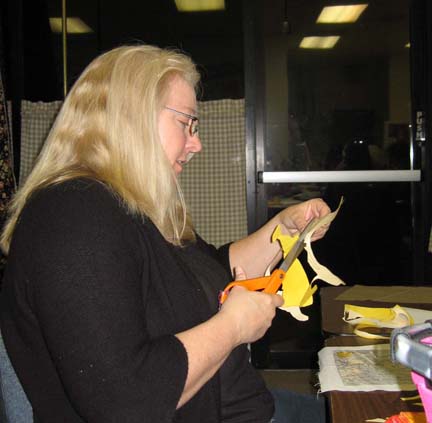
And this is Rebecca Reasons-Edwards happily cutting away (my favorite part):
I’m hoping that a few of them will share their finished fused projects. Unfortunately, most of them only got through with drafting and a couple only through the first value by the time we were done for the evening.
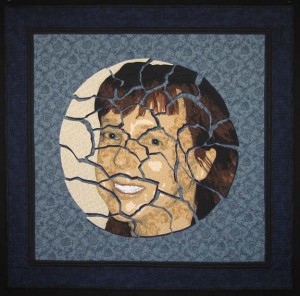
Before I ran through the project, I did spend some time showing them some of my portrait quilts including one that I finished just in time for show & tell — Cracked:
You can read more about this piece in the gallery section of my website here.
I did have someone ask for resources for learning Photoshop. I have taken online classes at both Eclectic Academy & LVSOnline & found them both to be wonderful.
After spending the last 3 weeks quilting & wanting to finish my quilt in time for the class, it feels strange to have a day without a deadline looming over me.
I do want to point out that there is a substantial border on Cracked — which I don’t usually do. After hanging Duodecim in my dining room with my usual black skinny binding as a stand-in for the only border — I decided that maybe my piece needed breathing room. If it were a painting, I would have added a broader frame — for a quilt, a wider border. So I added one on this quilt.
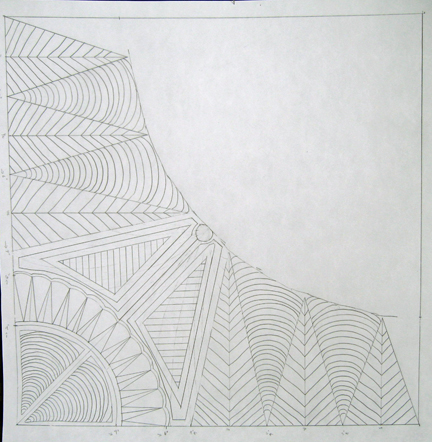
When I was done quilting the plate pieces, I was really stuck on how to quilt the rest of it. I took a 16 x 20 piece of paper, mapped out a corner, took out the quarter circle, and starting drawing with a pencil. I made a few adjustments along the way — and the corners had to have room to change since the plate pieces affected each corner a little differently, but this is my last drawing.
In the final border, I added what I call piano keys. I had intended to stipple — but it’s been a while & my stipple was just too rough. The keys add a more formal border anyway, which I like.
I’m not sure I’ll do another one with a wide border again. I’ll have to hang it in my dining room first and see if I like it better.

How to Quilt a Face
7When it comes time for me to quilt, I usually have a fear of starting. Most people don’t quilt the face at all — but my entire quilt is a portrait and I have no choice but to quilt it. And let’s face it — the trend at shows is close quilting. I have tried sparsely quilting faces — and the judges don’t like it. I’m not saying that you have to make your choices based on what the latest trends are, but I do think that judges are following the trendsetters when they are judging & jurying — and close quilting has become the norm. (Stitch regulators too — but I won’t even go there. I don’t personally care too much about stitch length — I’m creating art not a bed quilt. I guess this is where I draw my line.)
The easiest thing for me is to take a black & white picture of the model, grab & pencil, and start drawing away. I can erase anything I don’t like — it isn’t permanent & doesn’t involve ripping out stitches. I do try to follow what I consider to be the contours of the face so that the quilting itself will give dimension to the face. I follow the contours of the applique sometimes — and completely ignore them at other times. There are no rules — just my imagination.
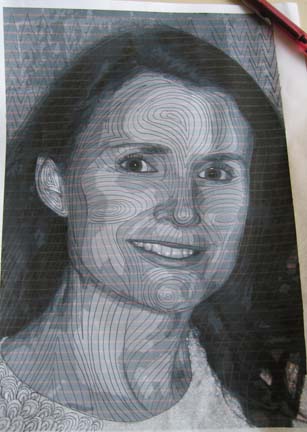
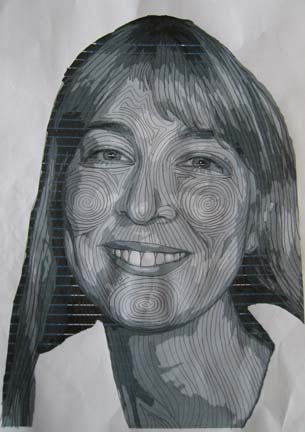
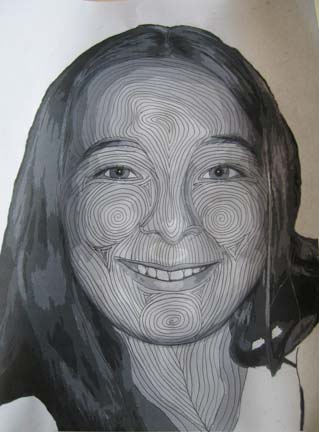
I show three pictures to give you an idea of how I might change things depending on the pose — or what things are more similar. To be honest, I have found it easier to take out previous photographs and see what I have done before I start. I have also found it easier to do something else while I draw on the photo — like talk on the phone. I tend to be more creative that way & not as likely to second guess everything I do.
I used to transfer most of my lines to the actual quilt before starting using a blue or white erasing pen. Now I transfer very few lines — only a few guidelines as I go — and the forehead which is generally based on the applique of the lightest color. If I quilt from the outside in, I get a big poofiness in the middle (ask me how I know) — so it is generally just easier to draw it out & then quilt on the lines.
I quilt about 1/4 inch apart so poofiness can be a big issue. I pin the whole quilt before I start & try to quilt from the inside out as much as possible. When I get to the outer borders of the head, I’ve pushed quite a bit of fabric out to the edges — so I’ve learned the hard way not to outline the head first — save that for last. I also tend to smooth out the fabric in the background & move my pins to accommodate the moving poof — pushing it out to the edges — before I start quilting that area.
There is stretch that goes on when you quilt that close — both in the top and the batting. I use the 70/30 Quilter’s Dream batting. There is a scrim side I used to always face to the back because it has some cotton imperfections — but one day I made a mistake & put it scrim side up facing the top — and I’ve had a lot less waviness when I’m done quilting since then. I’m sure there is a rule somewhere about scrim up or down that I’ve never heard. But this is what works for me.
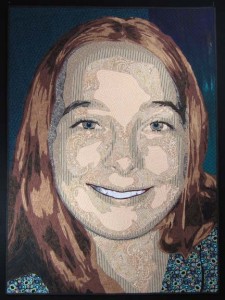
I have finished this one — decided to name it Duodecim which is latin for twelve. I’ve always thought this was the perfect age and have always felt that age in my heart. This is the final pic but there are more detail shots on my website here.

The Price of Passage
2When my art group, Fiber Art Fusion, started talking about making our annual exhibit based on dimensional pieces, I was really excited — but I had no idea what I was going to do. Most ideas came & went, discarded for not being unique enough — and the one idea that stuck was to do a hanging bridge. Most all of my work is flat on the wall — but this would be sculptural using fabric as the primary medium.
So where have I been lately? Working frantically on this. I had most of the summer to think about the project, but very little time to actually work on it, and the exhibit is being hung on the first of next month.
But, thank goodness, I am finally done. It spoke to me today — and said that that was it — add no more.
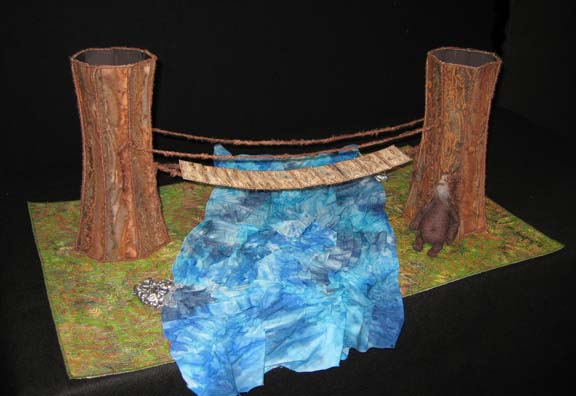
It is called The Price of Passage because of the bridge troll. How can you have a proper bridge in the middle of the forest without a troll — and of course, he’s going to expect payment for you to cross it.
I started with the trees. Our group had a great brain storming session with Sharon Ahmed in which she encouraged us to cut up paper and tape it together to come up with unusual shapes. I have also seen Terry Grant do the same thing when she is developing a pattern for a dimensional fabric teapot. At the end of school, I salvaged a sketch book of heavy white paper — most of it unused — and started cutting and taping. It took some time to figure out the size and the repetition of the pieces in order to get a nice round look.
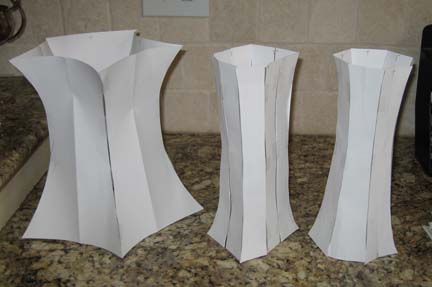
The first one on the left is my first attempt. Its diameter was too large and even though the paper was folded in the middle, helping to give a nice curve, I knew that wouldn’t translate to Peltex. For the 2nd tree, in the middle, I cut up the left & right halves — and the whole thing looked square. Adding one extra piece was a good idea — but didn’t really fix the problem enough. So for the 3rd tree (3rd times the charm), I drew the pattern with a left & right side & taped 7 of them together to give me a nice round shape. Voila — I had a pattern.
Then I cut out a side from the tree to make a template — fused fabric to both sides of Peltex — and then cut out the template from the Peltex. I wished I hadn’t done that so quickly. I then had to go back & add a fluffy brown yarn to cover the Peltex on the edges. It is much easier to mark the pattern on the fabric, sew the yarn onto the Peltex on that line, then cut it out & cover the edge with more thread. It gives you much better corners. I didn’t do that on the trees — but did remember to do that for the slats on the bridge.
Once I had 14 pieces, I started sewing them wrong sides together with a tight zigzag. This gave me a nice hinge that I think adds to the character of the trees — and it allowed me to sew them together by machine. I also added more fluffy yarn to the edges on the top & bottom of the trees before the final edge seam was sewn to give a cohesive look.
Then I made the bridge slats. They were done like the trees — with a minor change. I fused fabric to one side of the Peltex (which will be the back of the slats), marked the slats with a permanent marker, and then sewed on an O ring to the 2 short sides (thus saving me from sewing through Peltex by hand). Then I fused fabric to the front side of the Peltex and sewed a simple straight line — following the marked lines on the back side — so that I could see where to add the string on the front (I used a brown crochet thread) — which I added with a tight zigzag. The slats could then be cut out and the edges zigzagged with more thread.
Despite my eagerness, I realized at this point that the actual bridge had to be the last thing added. Again, I used a base of Peltex & fabric. By adding the back fabric first, I could sew on the finishing label by machine — and then fuse the fabric to the top.
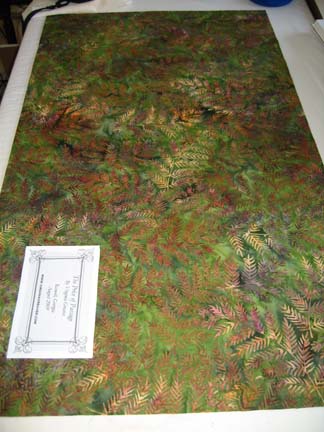
Then I took a great mottled blue hand-dyed fabric, covered the back with fusible, scrunched it up, and fused it on the base with lots of wrinkles left on top.
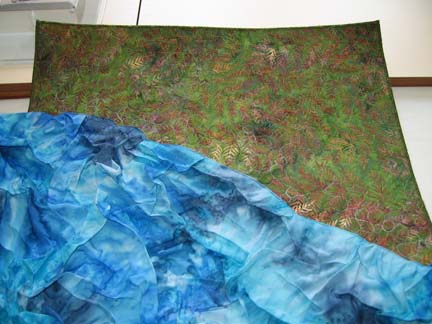
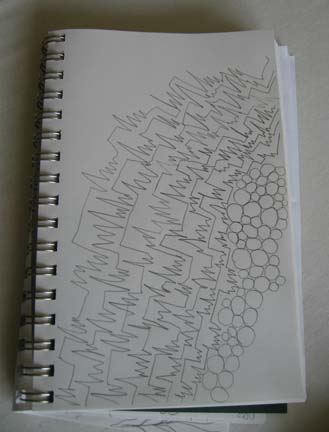
Then the base had to be quilted. Choosing quilting can be difficult, so I turned to my notebook and starting playing with ideas. (I’m a great fan of Dijanne Cevaal and am a big follower of her quilting techniques — guess it shows.)
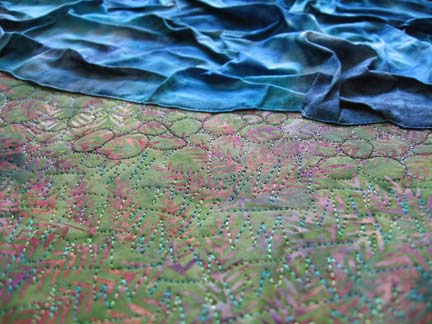
I don’t have a picture of it, but I used a metallic thread for the waves in the water. It was VERY challenging. I used a 100 Topstitch and really low tension — but it was difficult to keep the metallic thread from breaking when I was free motion quilting through Peltex and four layers of fused fabric.
Then I had to add the trees. No hope at this point but to sew them on by hand. I taped them down so they wouldn’t wiggle too much. I put on one of those sticky “thimble” sheets on my middle finger, but the needle kept puncturing it — and my finger. Then I had to wait & heal a few days.
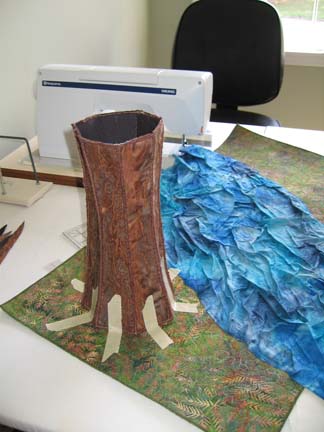
When the pain subsided, I added some metallic silver tulle and Tyvek that I had bubble melted and painted pewter.
My final addition before the bridge was the troll. I had been thinking about him all along, and in his first incarnation, he was wired (which was new to me) — but I had to discard him because he was out of scale for the piece. I don’t have a lot of experience making dolls, but after having spent some time reading Susanna Oroyan’s book Anatomy of a Doll, I knew that I couldn’t make too complicated a doll in the size that it needed to be in order to fit the rest of the piece. He also couldn’t be pretty — which was a strange thing for me. As artists, I think most of us try to make our work appealing, but a troll shouldn’t be too appealing. I drew out a main shape which included the legs, a different pattern for the arms, and a side view pattern of the head so that I could give him a nose and chin. He is my first attempt at needle sculpting a doll. He has beads for eyes, perle cotton thread details, gray wool felted on for the beard, and brown eyelash yarn for the hair.
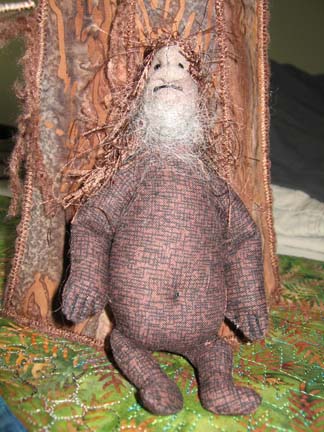
I would have liked him to have been wired and had more detailed hands, but he is very small and for me, it made more since to hinge him with a sewn line for the elbows, legs, and fingers.
The bridge was last. I strung 2 rows of fluffy brown yarn (same used on the trees) through the O rings on the back of the slats. I also added O rings on the side of each tree. Then I tied the string to each O ring — which sounds easy — but getting the tension just right was challenging. Too much pull on one side or the other, and the slats would twist or dip. Once it was done, I had to have handrails, so I added more O rings to the trees & more yarn tied to each end.
The Exploring Dimension Exhibit will be held at The Art Place in Marietta, GA this September 2009.

Disappearing Act
4I am guilty of a disappearing act. I have neglected writing on my blog because I have been working diligently on my latest piece, Shoshanna. I quilted it very closely, about 1/4 inch, and given its size and some problems with my machine (darn that Viking), it took me a long time to finish it. I do have a picture of it when the quilting was done:
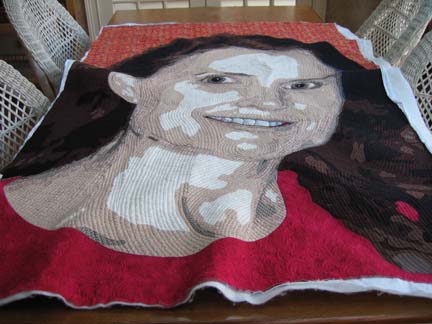
It is incredibly wavy! I wasn’t worried — however, I knew that I would save myself a lot of headache if I added the binding after blocking it. It is always amazing to me how easily it flattens when wet.
Then when I went to add the binding, I decided to use the glue technique that I had seen Sharon Schamber use on her YouTube tutorial. Of course I forgot most of what I had seen and only used the glue to attach the binding to the back, but it is a HUGE timesaver and relief to my poor, noncallused fingers. Next time, I’ll try it all her way. When I was done, I did have to soak the quilt yet again to remove the glue (which is water soluble) — and block it AGAIN — but it is finally done — and I’m glad that I used this technique for the binding.
I have finished pictures on my website HERE.
By the way, I really struggled with a name for this piece. My work has changed from the style I had two years ago so I didn’t feel comfortable giving it the name Faces in Cloth with a number — that series has really developed into a body of work for me. I am also uncertain that using a person’s given name is wise — I wouldn’t want to provide too much access to a person’s personal life. The model’s husband suggested that I use the Hebrew intrepretation of her name — an idea which I really like and I think gives more insight into the feeling of the piece.
The other reason for my disappearing act is that I have many opinions about the economy — which perhaps spill over into politics — and I do not think this to be the right forum for that. I have friends — both conservative and liberal — and I find them all dear to me. This blog is not meant to be polarizing, and I do not personally like when I read the blog of an artist that allows her political views to take over. Artistry with political messages are fine — but I know that most read my blog for my art, not my political views. If I want to share those, I’ll start another blog — and then you can subscribe to that one separately or not. (I’m not to that point — yet.) Sometimes it’s important to know when to keep your mouth shut. IMHO
Happy Birthday Angel
1I know a little angel in heaven. Her name is Anna-Elizabeth and she is 9 today. Her family misses her very much, but today is her birthday, and I think that she would rejoice to know that her birthday is celebrated here as it is in heaven.
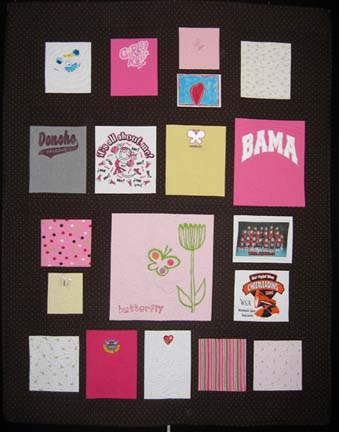
I have been working on a t-shirt quilt for her mother. This last Sunday was Mother’s Day and probably doubly hard for her mom to not have her here with her — but the secret that I know is that she is with her every day. Not everyone can see angels, but if you try really hard, you can feel them there with you. She helped me quilt this piece and I think that our hard work shows. It took two weeks of hard work, but here it is. The handwork — the binding and the label — still has to be done, but this is a short glimpse into where my energies have gone lately.
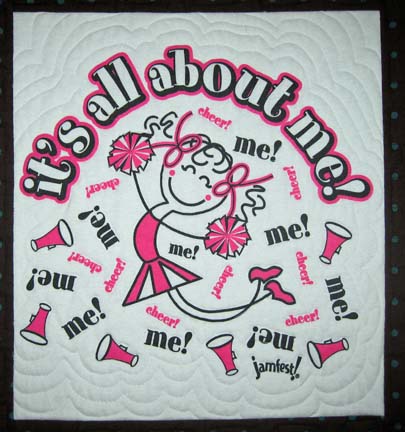
I think I’m going to call it “It’s All About Me” because one of the t-shirts says that — and really it is all about Anna-Elizabeth and her joy.


