How to Quilt a Face
When it comes time for me to quilt, I usually have a fear of starting. Most people don’t quilt the face at all — but my entire quilt is a portrait and I have no choice but to quilt it. And let’s face it — the trend at shows is close quilting. I have tried sparsely quilting faces — and the judges don’t like it. I’m not saying that you have to make your choices based on what the latest trends are, but I do think that judges are following the trendsetters when they are judging & jurying — and close quilting has become the norm. (Stitch regulators too — but I won’t even go there. I don’t personally care too much about stitch length — I’m creating art not a bed quilt. I guess this is where I draw my line.)
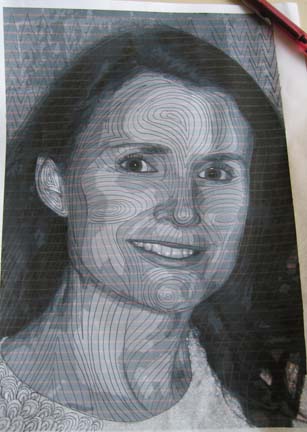
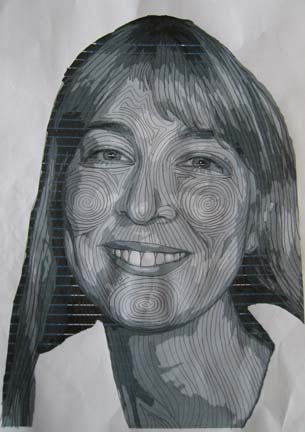
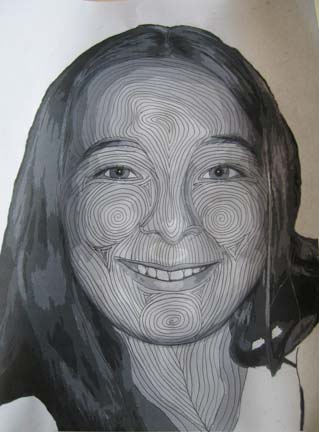
The easiest thing for me is to take a black & white picture of the model, grab & pencil, and start drawing away. I can erase anything I don’t like — it isn’t permanent & doesn’t involve ripping out stitches. I do try to follow what I consider to be the contours of the face so that the quilting itself will give dimension to the face. I follow the contours of the applique sometimes — and completely ignore them at other times. There are no rules — just my imagination.


I show three pictures to give you an idea of how I might change things depending on the pose — or what things are more similar. To be honest, I have found it easier to take out previous photographs and see what I have done before I start. I have also found it easier to do something else while I draw on the photo — like talk on the phone. I tend to be more creative that way & not as likely to second guess everything I do.
I used to transfer most of my lines to the actual quilt before starting using a blue or white erasing pen. Now I transfer very few lines — only a few guidelines as I go — and the forehead which is generally based on the applique of the lightest color. If I quilt from the outside in, I get a big poofiness in the middle (ask me how I know) — so it is generally just easier to draw it out & then quilt on the lines.
I quilt about 1/4 inch apart so poofiness can be a big issue. I pin the whole quilt before I start & try to quilt from the inside out as much as possible. When I get to the outer borders of the head, I’ve pushed quite a bit of fabric out to the edges — so I’ve learned the hard way not to outline the head first — save that for last. I also tend to smooth out the fabric in the background & move my pins to accommodate the moving poof — pushing it out to the edges — before I start quilting that area.
There is stretch that goes on when you quilt that close — both in the top and the batting. I use the 70/30 Quilter’s Dream batting. There is a scrim side I used to always face to the back because it has some cotton imperfections — but one day I made a mistake & put it scrim side up facing the top — and I’ve had a lot less waviness when I’m done quilting since then. I’m sure there is a rule somewhere about scrim up or down that I’ve never heard. But this is what works for me.
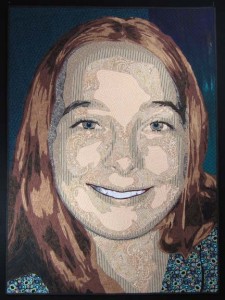
I have finished this one — decided to name it Duodecim which is latin for twelve. I’ve always thought this was the perfect age and have always felt that age in my heart. This is the final pic but there are more detail shots on my website here.
