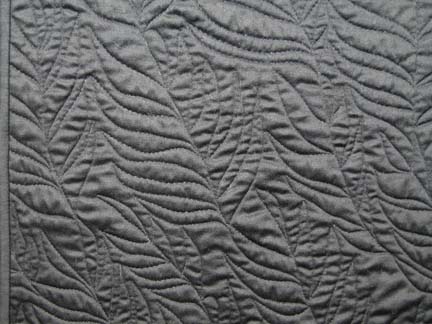
A completed top is a lot like a blank piece of paper. Unless it is small and we intend to mount it & frame it, we have to quilt it. To me, adding the quilting is very sculptural. I try to take a picture of the piece just before I quilt it so that it can be compared with the piece after quilting and the full impact of the quilting can be appreciated.
I spend a lot of time creating my quilt tops, and I get so involved in making them, I do not spend time quilting every day. So it is like a rusty wheel that has to be oiled before I get back down to business.
I have a home machine and I quilt my faces on the machine without a frame. (I have a Hinterberg frame but I haven’t gotten a deeper throat machine for it — and I haven’t explored quilting my art quilts on it.) A lot of my lines are sweeping — they go from the top of the face to the bottom. I would love to say that I sit down and just do it — but I can’t. Without the help of a frame, I can’t do this on my home machine.
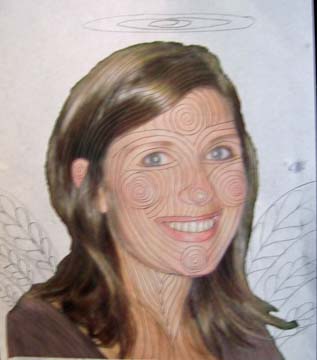
So, I print out a copy of the original photograph — take out a pencil — and start making lines. It is a rough outline of how I will quilt the piece. If I don’t like the way a line looks, I erase it and draw another line. This is my plan, and it is very forgiving.
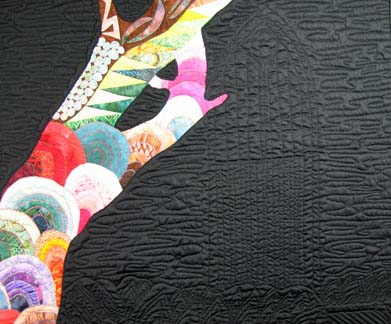
Amy is the wife of a priest and has served as a living angel in the life of my family so I thought that it would be fun to quilt her wings and a halo.
I had someone tell me once that my quilting lines seemed topographical. That is a fairly good comparison as I am trying to mimic the contours of the face.
Now I do something that some would consider scary. I pin the top flat — and I draw on it with water soluble pens. Blue or white, depending on the fabric. Be very careful not to iron over the blue pen — that would make it permanent. I draw on the quilt top directly using my sketch as my guideline. If I draw a line I don’t like, I erase it with water on a Q-tip. It is best to sketch as much as possible before pinning — although I always leave some of it for later. In this case, I left the background to do after I’ve quilted the face. I may change my mind about what I want to do there.
And when I quilt it with needle and thread (I typically use Superior’s MonoPoly invisible thread all over) , I don’t neccessarily follow my lines. Usually, the applique throws off the drawn line some and I can straighten it out with the needle and thread. However, having the guideline of the pen marks on the fabric are very valuable for me to see the entire picture and how it will all work together. The eyes have to work with the nose — the cheeks can’t overwhelm the eyes — the chin needs to work with the cheeks — and in places like the lips and the nose, the quilting lines complete what the applique suggests.
I would be in big trouble if I couldn’t get out the marked lines when I was done because the blue ink on the fabric looks a little scary.
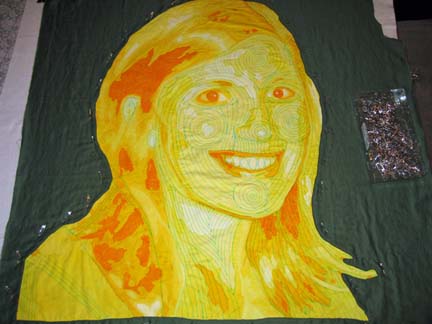
It is very important to be careful with the top until the lines are washed out. Any exposure to heat or soap can set the ink and make it permanent.
As I work, I will spray the sections that I have completed with water to see how the piece is coming along. However, some ink marks will inevitably work themselves back to the surface after it has dried. The only way to know for certain that all of the ink has washed out is to submerge the entire quilt in clean clear water. I will do that once I have finished quilting and binding it.