Letting the Art Lead Me
I have been working on my profile. When I had finished all of the applique sewing, I was stuck on how to assemble them. I wasn’t interested in a traditional setting but had no idea what I wanted to do. I went to the bookstore & stumbled upon a great book — Art Quilts: A Celebration: 400 Stunning Contemporary Designs by Lark Books. It shows several years of quilts from Quilt National, a very prestigious art quilt exhibition held every other year.
There was one quilt in particular that caught my attention. It was many blocks of applique set on a wholecloth with words behind it. Voila! Great idea. I didn’t want words, but complex cloth for a background sounded perfect.
I laid out a couple of card tables in the garage & covered them with plastic. I laid out the background PFD fabric and started painting. I considered dyeing it, but since I’ve moved, I no longer have a shop sink — only my kitchen sink — and I’m not quite ready to christen my new kitchen with the spoils of dyeing. So I painted — blue & green — and it looked very good — and very dark. I knew that the piece would have to be a light value to hold up the blocks. I considered finishing it and then doing another one — but I am running low on my bolt of PFD, so I brought it into the kitchen, plopped it into the sink (carefully that is), and ran water over it until the color was more of a sky color. Perfect. I then hung it outside to dry — which it did very quickly. I went to eat lunch, and when I was done, it was almost dry. I place it in the dryer to finish it.
I should also exlain that I had played with the layout on the computer — in CorelDraw. I knew that I didn’t care for the horizontal orientation — and having the bright yellow in the bottom right didn’t read right — so I took my digital picture, made a layout in CorelDraw, and set it all up. Then I changed the layout from vertical to horizontal, and then I flipped all of the blocks so that the yellow started in the top left and the black ended in the bottom right. I would show you the CDW files, but I set them in pages in one file & CorelDraw won’t let me export the pages. Oh well.
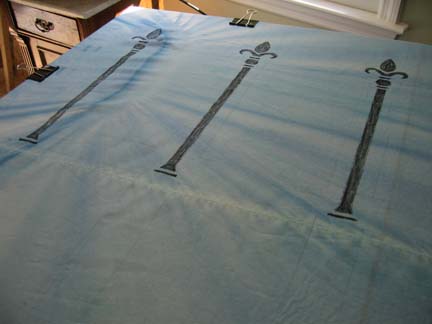
When the background fabric was dry, I laid it out, marked the middle, and drew boxes with light pencil marks for each block. And then I started thinking about this great stencil that I bought 8 years ago of an iron fence that I intended to use in my daughter’s room & never did. At first I was afraid that I had thrown it out in the move, but it was waiting for me in my work-in-progress stack. I measured and placed each rail, marking it with a black Pentel FabricFun Dye Stick. When I was done, I set the dye with a hot iron. This is my first time to use a stencil on a quilt.

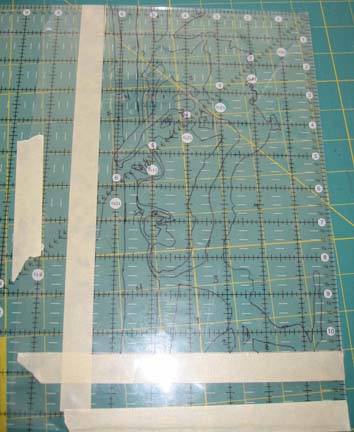
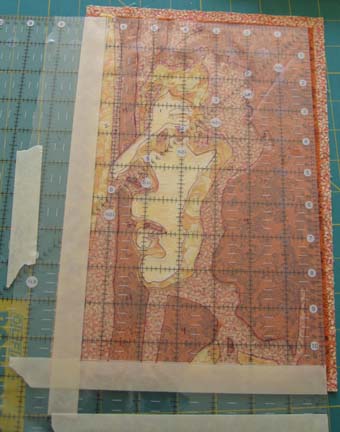
Then I started trimming my blocks. The original was 6 1/2 by 10 1/2 — so I grabbed my large square ruler & lay masking tape along those dimensions. It seemed like a good idea — but really was more irritating than helpful. Then I placed the overlay of the profile that I used to make the blocks on the top of the ruler & taped it down. I turned it to the back and cut off the 2 sides along the top and right side that stuck out. This became my guide for cutting.
Then I placed it over a block, aligned the image on the plastic on the top of the ruler to the block beneath it, and then cut the top & right side. Then I flipped the block over and cut the remaining 2 sides based on the 6 1/2 by 10 1/2 inch finished measurement.
When I was done, I pinned all of the blocks to the background on my design wall so that I could see where I was going.
I love CorelDraw. I used to use Photoshop to lay things out, but CorelDraw is really better for this. This is the first project in which I have exclusively used CorelDraw. Thank you Julie Duschack for introducing me to the wonders of using my computer for design work.
Which is to say that the design wall is very close to what I had done in CorelDraw.
I am currently sewing the blocks on. There are many ways that I could have done this, but I decided on the easy way — more fusing.
Now I want to add keys and I have been looking for key stamps. Sounds easy enough — and I live in a big city now so I should be able to find a stamp with a decent key. I have been looking for 2 days. At this point, I either have to order it from the internet or I can go down to Dick Blick and get the materials to carve a stamp myself.
Why keys? I don’t really know.


