Quilting the Third Dimension
Most people presume that quilts are two dimensional objects. It is flat like a painting. But in actuality, the quilting that we add to a piece can add another layer of realism to surprise the people that view the piece from an arms length distance.
I’m always surprised by how much a piece changes from the end of the applique stage to the end of the quilting stage.
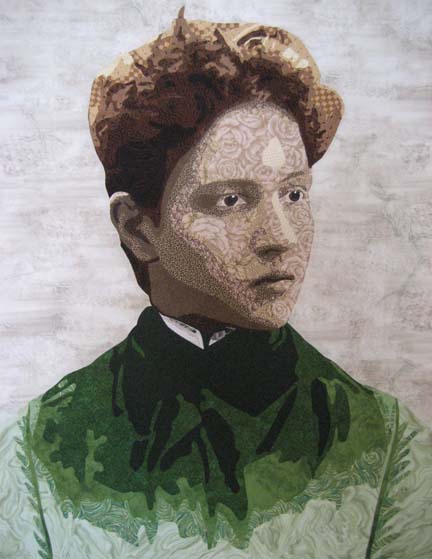
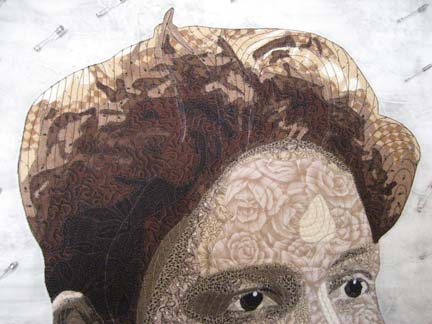
This is a picture of Arminta after applique but before quilting.
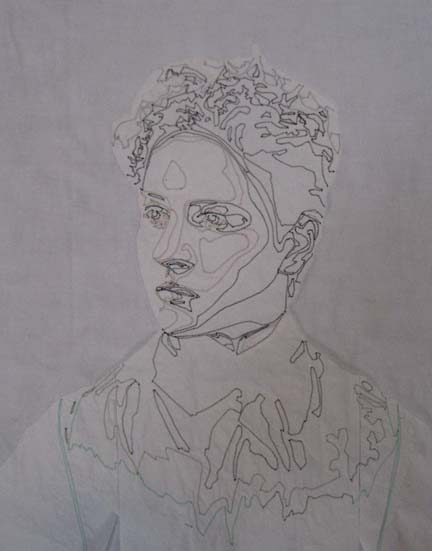
And for those of you curious about the back (and for some reason a lot of quilters are), this is what the back looks like before the excess stabilizer is removed. It’s interesting on its own — in a different way from the realistic perspective.
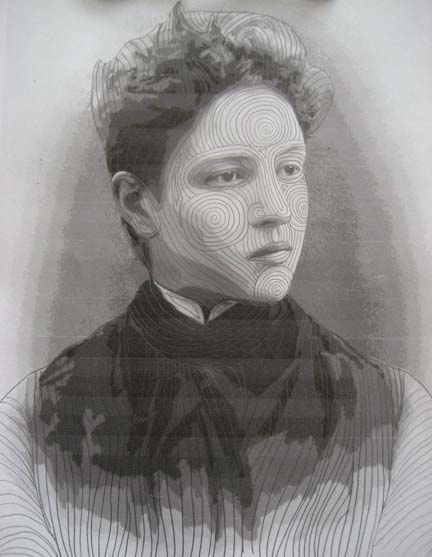
I used to get a creative block whenever it came time to quilt a piece, but I’ve found over the years that if I take my drafted pattern and draw on it with a pencil, I can create a quilting plan for how to approach this piece. The best part about it is that if I don’t like what is happening, I can erase it — which is much easier than un-sewing on the actual piece.
This is her face once it is quilted. I quilt about 1/4″ apart so I have to quilt from the middle out. Because the quilting is so close together, I can easily have the piece stretch as I quilt — and sometimes I have to move pins out as I go to accommodate the wave of fabric I’m pushing over — hopefully to the edge. I had this issue when I made Amelia Earhart.
So I tend to start with the face as it’s the focus in most portraits & the central design element. I start with the nose as it’s the center of the face. Its line affects the eyes, the forehead, the cheeks. I usually do the forehead second, but on this piece, I knew from my plan that the lines from the nose would extend & end at the cheek lines — so I made those second.
I usually have a few independent lines from which the rest branch out. Why do I quilt the face the way that I do? I’m trying to give an impression of the bones and muscles under the face — and this is how I see that coming out for this person.
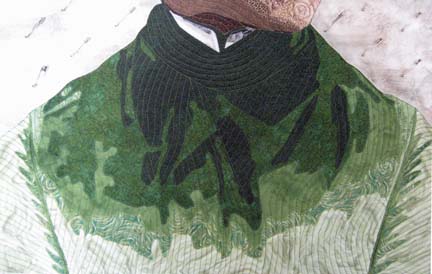
After the face I do the shirt. Notice that I used all one color thread to quilt the face and all one color thread to quilt the shirt. I used to worry a lot about thread — but then I made I Am the Vine, You Are the Branches. When I made the tree, I used the opposite thread on the color wheel from the fabric — and I found it astonishing how almost completely unnoticeable this fact is in the final piece. It isn’t unless you get within inches of the piece that it is noticeable at all.
So now I choose a midrange color from the color family I’m in. A taupe for the face (although I will use a dark brown around the irises) and a medium green for the coat.
Her last part is her hair. I purposefully left a couple of the guidelines for you to see. I draw 3 or 4 of them and the remaining ones are based on those structures.
Of course, at this point, I have to start thinking about the background. I always spend some time puzzling over this part. I spend some time at Leah Day’s website or leaf through the book on backgrounds I have by Dijanne Cevaal — and in the end, I spend a little time sketching in my sketch book. Pencil is so much easier to erase than thread.
