Posts tagged binding

Finishes
1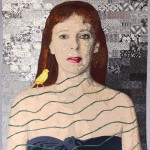 I have been working a blue streak in the studio lately. Not only did I finish The Canary, I also worked with Leisa to make 5 more small pieces for the Micro Bubbles Series (so we’d have 8 total for the JSU show) AND a large triptych for the Wash & Wax show opening at Hammond Gallery at Jacksonville State University on Thursday.
You can see The Canary on its new page here, and you can see the new Micro Bubbles Series II here — scroll down to the bottom to see Series II. I don’t have a pic of Dripped yet. It’s too large for my studio, but I’m planning to take pics of tomorrow once it’s hung at the gallery tomorrow.
The university has unfortunately changed the opening reception to invitation only. They will, however, have a public closing reception on April 7th, and the show will be open the entire month of March (after tomorrow when it’s hung). I have several friends in the area since I used to live near there that I hope will go see the show.
A friend of mine has asked me to explain how I do facings. I took pics and then decided maybe someone else would like to see how they’re done.
I started doing them during the Wash & Wax series. They give a much cleaner look than a binding, and they’re much easier on the fingers since you’re sewing through less layers. It was also the perfect finishing technique for pieces that had a lot of vinyl on them. I couldn’t iron a binding back from off the side of vinyl or it would melt the vinyl, but I had no problem ironing vinyl from the back of the piece while attaching facing.
I cut 2″ lengths for the four sides as well as 4 3-3/4 inch squares. The square is used in the corners, and the bias edge is a blessing.
Mark the top of the quilt with the finishing lines. I mark a rectangle with squared up corners (which with a large piece can be more easily said than done). Press each of the four squares in half. Then pin them into the corners that you’ve marked and sew them on with a 1/4″ stitch from the outside edges.
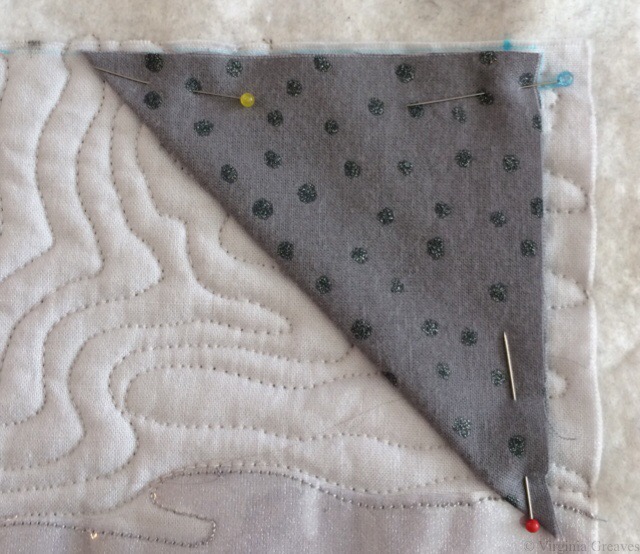
Take the 2″ strips and sew them together to make them long enough for each side (not all the way around). Fold back 1/4″ to the wrong side and press. Then I like to add 1/2″ fusible strips to hold down that 1/4″ that I’ve just folded back. Leave the paper on.
Then pin the facing strip to the sides — but don’t go all the way into the corner. I’m further over here to the left than I need to be. The folded bias square underneath is going to hide the edge anyway. It’s going to be on top after all of this is flipped to the back. After I made this one, I didn’t put the facing strip as far over on my next piece and had less bulk in the corner — which made turning the corner inside out easier.
Sew the 2″ strips to the front of the quilt, right sides together. The folded long side with the fusible will be on the opposite side.
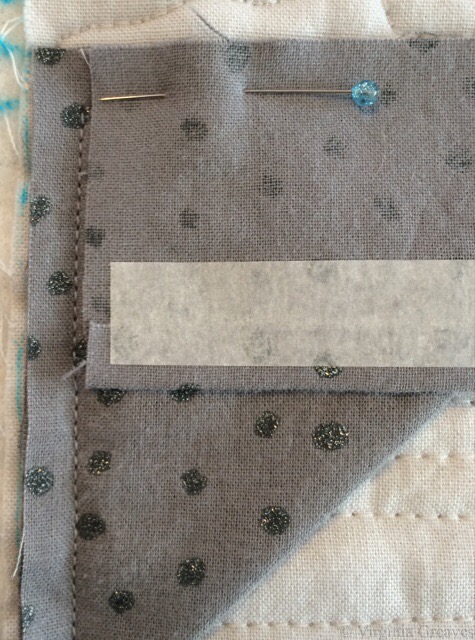
Then press the strips open. Here, you see the top facing pressed open. The right side strip was pressed open and then was stay stitched about 1/8″ from the fold. That’s the next step. Stay stitch all the way around. It makes it easier for the facing to pull to the back. (Lock your stitches at each beginning and ending.)
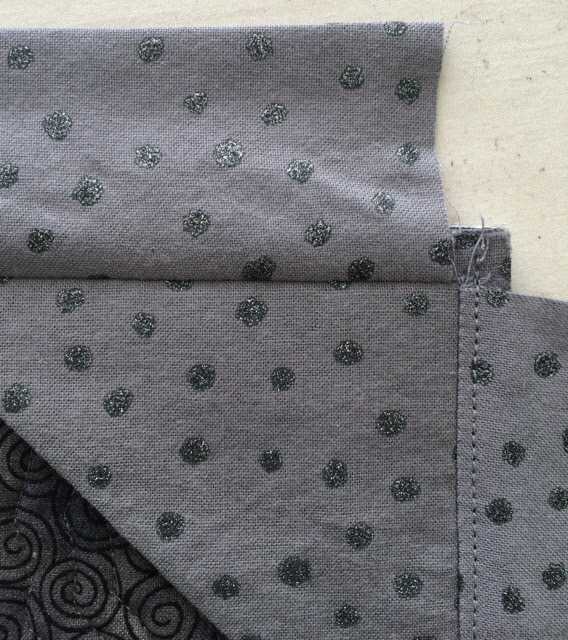
At this point, I cut a small strip of 1/2″ fusible and press it on to the folded edge of the square in the corner. Again, leave the paper on.
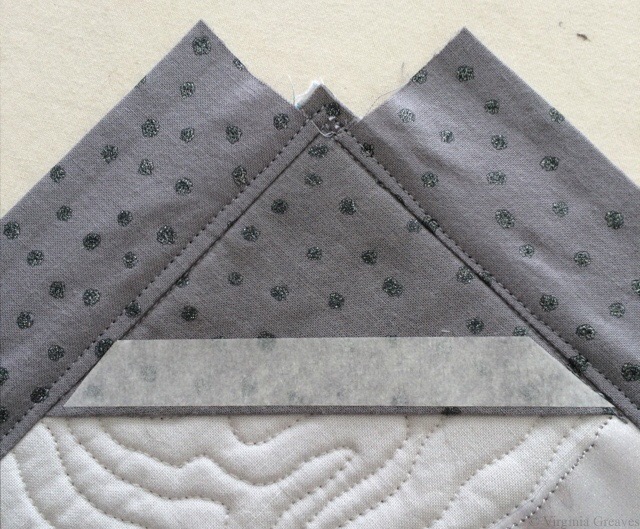
Then turn to the back. Turn the corners inside out.
Then take the paper off the fusible on one strip on one side. Using your iron and steam, pull the facing to the back and fuse down. Don’t worry about the corners until all of the sides are done.
Then take off the paper on the next strip and pull it down. Steam is your friend. The fusible will hold down the edge. If the facing isn’t straight, rip it off, reposition it, and re-steam it in place.
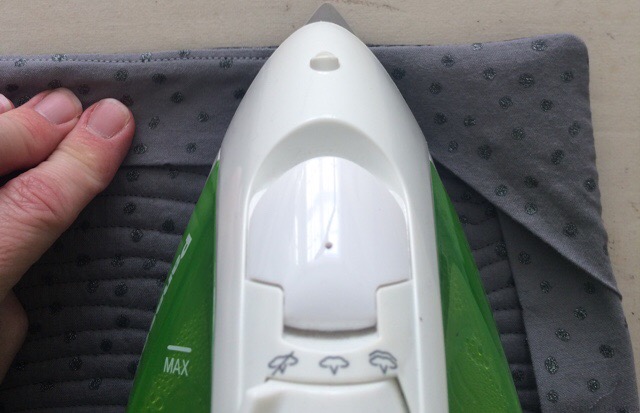
When all four sides are down, work on each corner. Take off the paper strip underneath and fuse it down. The steam will help the bias lay down if it’s a little wavy on that edge.
Notice that I used the same fabric for the backing, the facings, and the corners. I also used the same fabric for the sleeve. It gives it a clean look on the back.
I love using the fusible to hold everything in place until I can hand sew it down — which is the next step. I used to use the clear Elmer’s glue on bindings to hold everything in place before hand sewing, but I found that after a few years of travel, my bindings would begin to wrinkle. I think that even though the glue is water soluble, it wasn’t entirely washing out (even though I would soak my pieces in tubs of water for a while). Over time, it was drawing the fibers together — like a starch would. So it occurred to me to use fusible. It’s all over the front of my work — might as well use it on the back as well. And I know what to expect from it over time.

Then add the sleeve, leaving 1/2″ from the top from the fullness in the sleeve (I always allow 1/2″ of fullness for any thickness in the hanging device).
The first few times I did a facing, I topstitched all the way around from the front to the back. The thread color became an issue as I went around, so I didn’t care for that as much. The stay stitching accomplishes the same thing, and it’s invisible from the front.

Special Finish for Irregular Shapes
0I met with Leisa last week about finishing Abstract #4, and she wanted it to have completely irregular edges. It sounds completely simple, but if you know anything about binding a quilt, it’s really not. I considered a facing, and I’ve begun to really like the look of a faced quilt from the front since there is no distraction of any binding, but facing it would still mean having to join strips at some point, and if none of the points were square, joining them on the bias would be a nightmare.
I briefly considered a bias binding.
After discussion of this dilemma, Leisa suggested that I finish it with a false back. I would have to add some more quilting afterwards, but the end result would be a faced irregular edge without worrying about binding or facing strips. It would be similar to what I’ve been doing on the free-form pieces, so I decided to give it a try on a larger scale. The only difference is that this piece is all ready quilted. I would have to add some more quilting at the end.
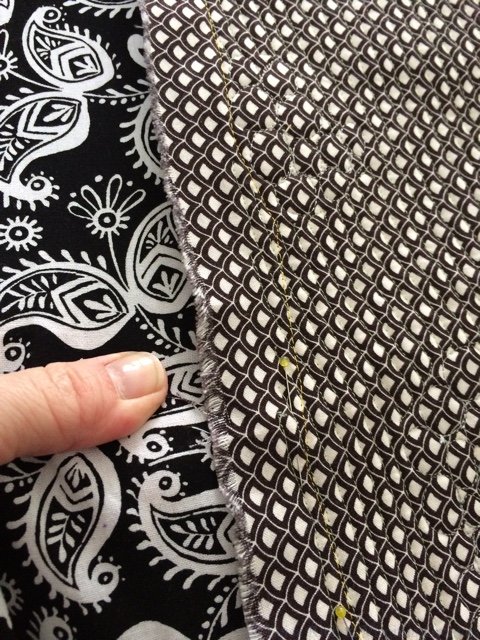
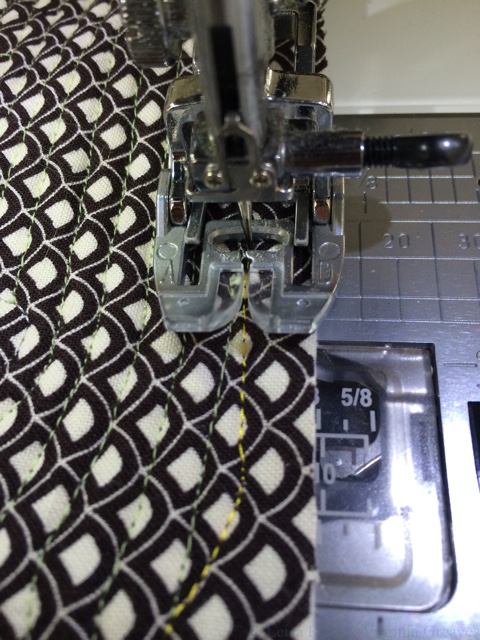
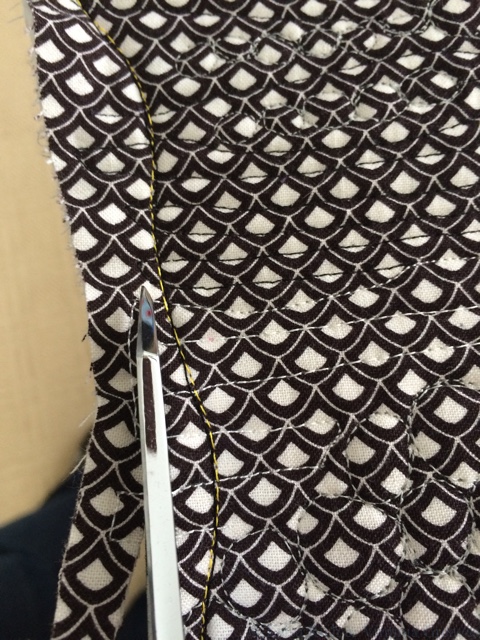
First thing, and sadly I don’t have a picture of this, I took a few markers and drew curves on the quilt to indicate where I wanted the boundaries to be. Then I took a top black thread and a bright yellow bobbin thread (that I would be able to easily follow on the black & white fabric on the currently quilted back) — and I sewed on the drawn line. I would use this as a guide later.
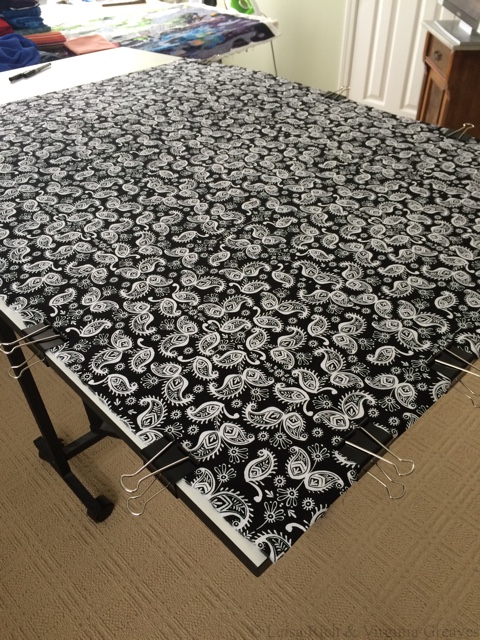
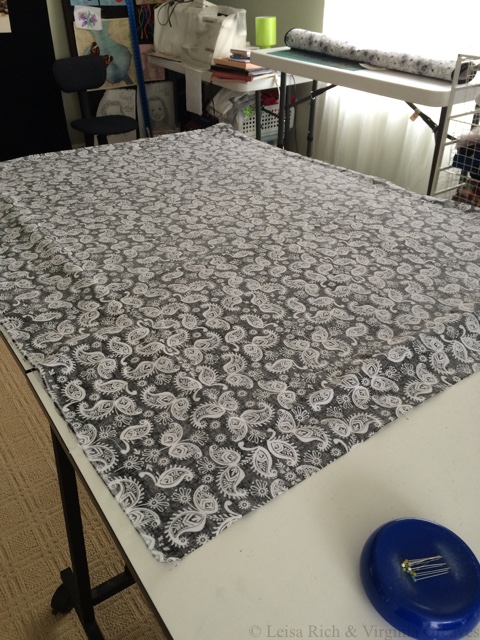
I took my false backing fabric and stretched it flat on a table with the front side up.
I then layered the quilt face side down on top of the false back — right sides facing each other — and then pinned them. I pulled a little on the fabric as I went to make it as taut as possible.
When I flipped it over, it was taut enough I think I could have flipped a penny on it.
I flipped it back over so that the false back was facing down and the quilted back was facing me — and stitched a line over the yellow guide line I had sewn earlier. I did find a section that was relatively straight, about a hand’s width, and left that section un-sewn so I could use that space to turn it right-side out later.
Using sharp scissors, I cut a 1/4″ from the sewn line to remove excess fabric.
I clipped my inside corners to the sewn line (but not through), and I shaved some of the seam allowance from the outside corners.
And then all that was left was to turn it right side out.
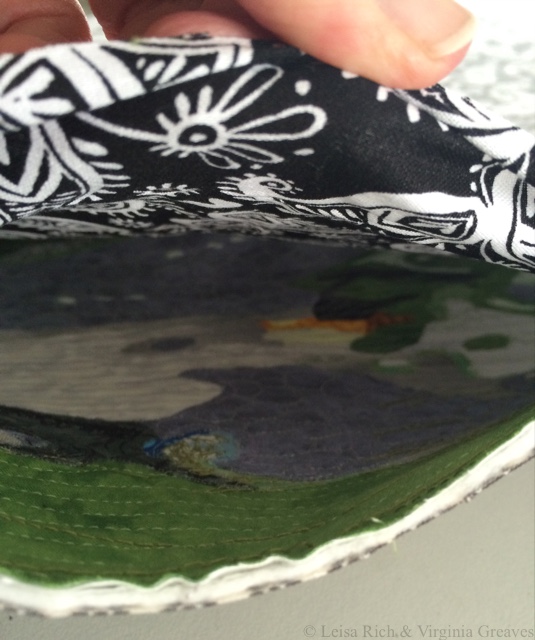
Once turned right side out, I carefully poked out the outside corners and smoothed the edges. It still looks like a pillowcase at this point.
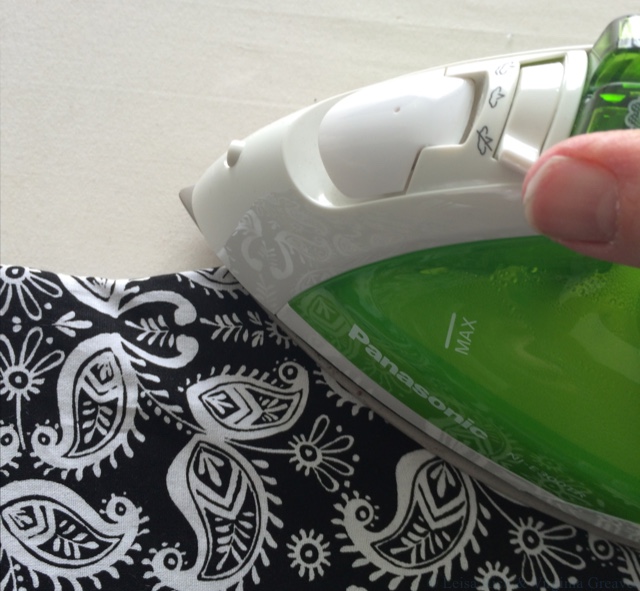
But I turned it over and from the back, I steamed the edges into submission.
I did press down the seam allowances in the section that was un-sewn and pinned them. I’ve learned from experience that it’s a good idea at this point to check that there’s not excess fabric across the middle, and if there is, smooth it towards this un-sewn section, re-fold the seam allowance to pull in that excess fabric, and re-pin. The goal is to make the back as taut as possible.
When I was done, I picked a neutral thread, something that I thought would blend well across all of the fabrics on the front (for me, a charcoal), and topstitched the edge about a quarter inch from the edge.
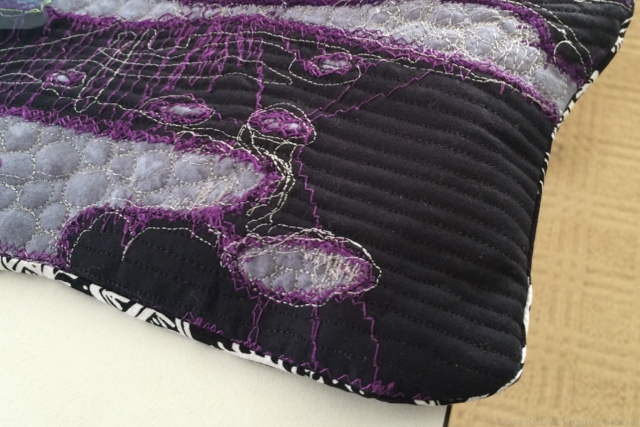
The result is a very flat piece with irregular edges. I did go back and quilt on it for a couple more hours, ditch stitching around the major shapes, and I liked the added dimension that that gave the piece. In the end, I didn’t save any time from adding a binding, but my fingers were happy to not do the hand sewing, and the result is a very well done irregular faced edge. (I did have to hand sew the sleeve to the back at the end.)
I could have, by the way, done this in the beginning with my first back before I started quilting, but given how tightly I quilt my pieces and how large this piece is, I felt that there would be tucks on the back. When you quilt tightly across the grain, fabric stretches, and it’s nice to be able to smooth that out to the ends and off the edges if you need to. With this technique, I wouldn’t have had that opportunity — the pulled fabric would have been trapped at the faced edge. It would have saved me the second quilting time though. Something to consider next time.
But now she’s done. She’ll debut in our two-person show at The Abernathy Art Center in Sandy Springs, GA, in September/October.
I have a page for Abstract #4 here — but the final pictures won’t be debuted on the website until after opening night in the gallery.
