
If you’ll remember, back in December I made a 5″x7″ piece for my art group holiday exchange entitled Dark Angel.
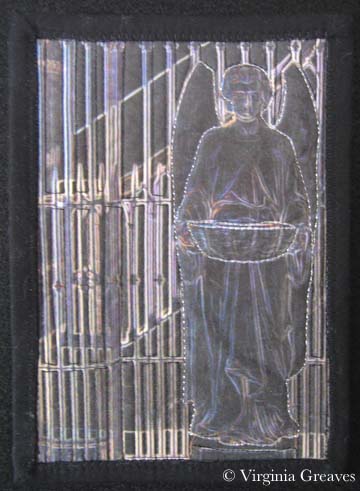
I loved it so much that I decided to use it as a study for a larger piece. It also coincides nicely with a show for which it is appropriate (although we’ll have to wait and see on that.)
I had my original image — and the image that I had manipulated in Photoshop and resized to 5″x7″. Interestingly, when I took the original image — which was larger — and tried to recreate the effect, I couldn’t. I need to take better notes as I work. So I was forced to upsize the small file. This has to be done carefully or the image quality will suffer greatly.
In Photoshop, I increased the size in 15% increments using bicubic resampling and then using the unsharp mask tool. I think it came out well.
I printed these out onto Jacquard cotton inkjet fabric sheets. (I considered sending it out to a commercial printer, but they all wanted minimum order sizes and I couldn’t justify the expense.) After printing them out, I sprayed them lightly with Scotch-Gard and let them dry.
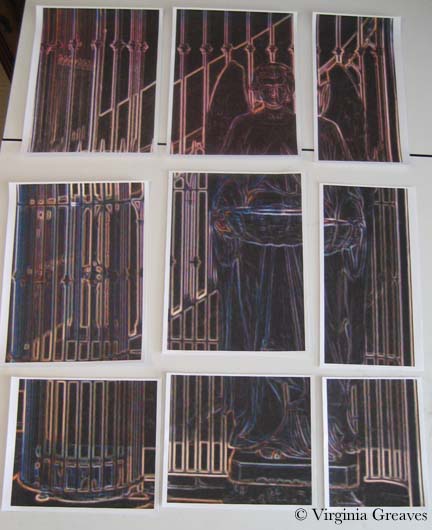
I knew that sewing this piece together would be tricky. I had used PosteRazor to print them out and didn’t specify a border — and wouldn’t you know, my top border came out shorter than 1/4 inch.
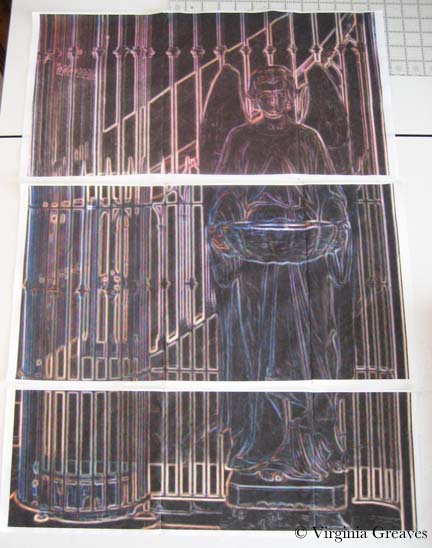
I could have reprinted them, but given the expense of the sheets and the printer ink, I decided to make do with what I had. I used a lightbox to align pieces before sewing them together. I made sure that I couldn’t see a shadow of the one underneath — and then I glued them together. Yes — I glued them. I’ve been using the trick of ironing clear Elmer’s glue instead of pins when applying binding and it works so well I thought I would use it here as well. I used as little as possible though.
I used my open toe foot and sewed just inside the printed image so I wouldn’t see any of the white border on the front.

This shows the three rows sewn together. I did, by the way, iron the seam allowances to one side to add some durability to the seams that were cheated a little in fabric and also to help the rows sew together straighter (sewing a left and a right opposing seam together is more likely to give you a perfect match in the middle).
This is the final piece — well, before quilting and finishing. I will spray it again with Scotch-Gard one last time before I start quilting.
