Inkjet Fabric Printing

Enter the Angel

1

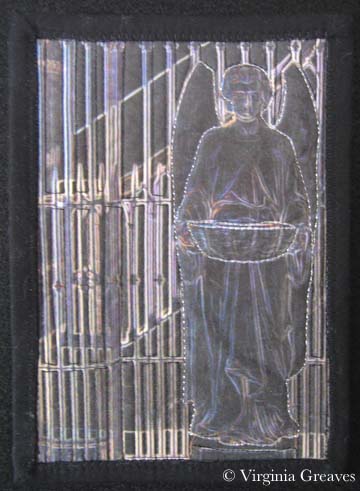
Back in December, I created a small 5″x7″ piece called The Dark Angel. As I’ve mentioned before, I loved it so much that I decided to use that as a study and create a larger piece based on that image. This is how I came to create The Bowl Judgments.

I do not usually add a border to my pieces but in this instance, I decided that a border could add another dimension to the piece. Just as the middle portion is about the luminosity of the colors on the black, I wanted the border to be the inverse. Using black fabric and a light purple thread, I created a subtle sweep of quilting lines.

I did, by the way, attempt the McTavish quilting technique on the borders. I probably got better as I went along. I suppose that the variance in the the quilting will just have to be chalked up to artistic variance.

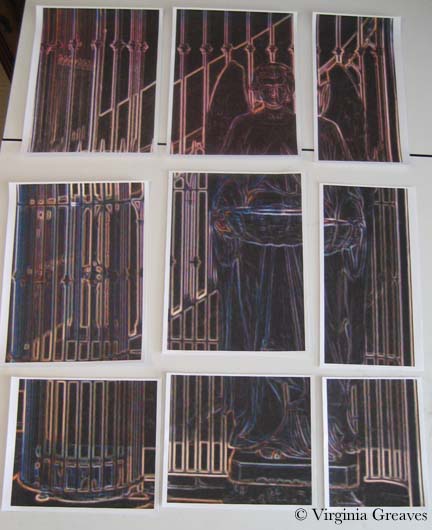
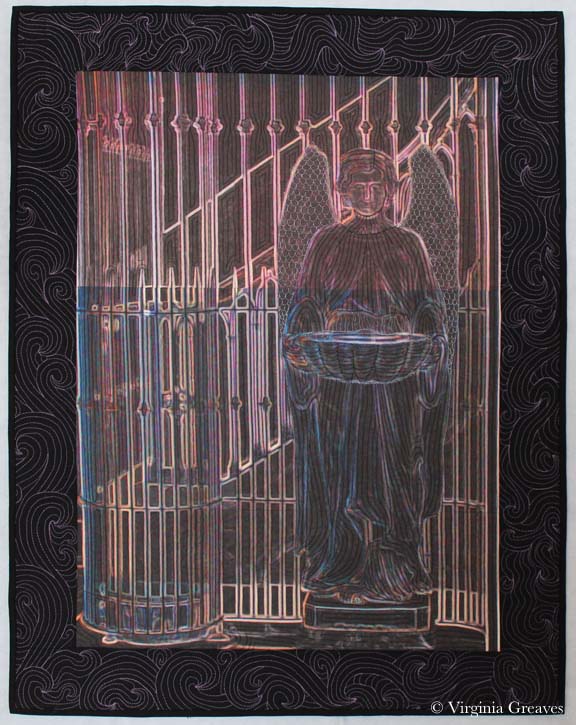
I must admit that photographing his piece has been very difficult. My camera has not been happy and I have taken many pictures in an effort to create an image that accurately portrays how the piece looks.

At first, my camera locked up completely. As far as I can tell, it couldn’t tell where the image was — even in a room with special spotlights pointed at it. At some point, late in the day, it finally gave me something.

The BowlJudgments black

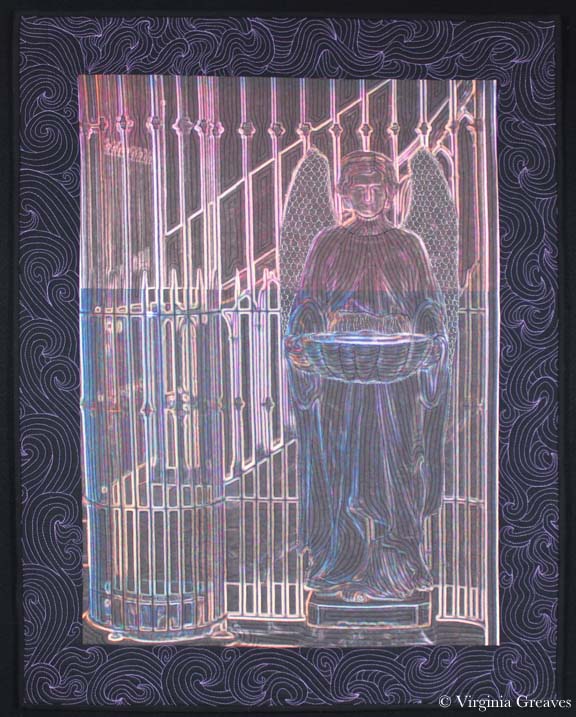
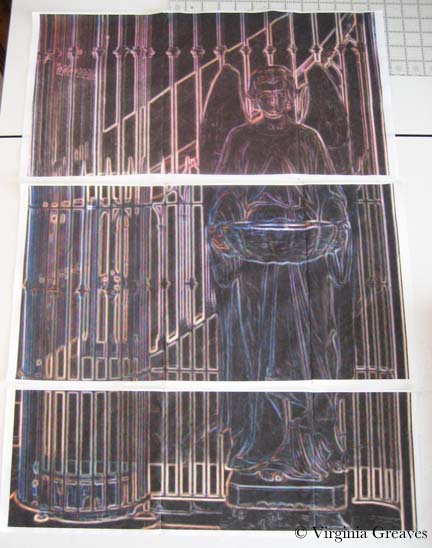
But really, this picture makes the border look almost like printed fabric. The quilting lines are more subtle and the image in the middle is not that washed out.

I finally realized that the camera would be happier if I used a white background. I thankfully had a large piece of white felt in my closet that I hung on my black design wall. From there, I set the autofocus point on the black border — and I think that this comes closest to the actual piece.

The Bowl Judgments

It always surprises me when the camera doesn’t just take a picture of what my eye can see. Our eyes are so much more complex than we give them credit for.

I so loved working on this angel that I would like to do another one — but I’ll have to plan some trips for pictures. Right now I’m researching another portrait to do but haven’t settled on an idea yet.

The Dark Angel

1

If you’ll remember, back in December I made a 5″x7″ piece for my art group holiday exchange entitled Dark Angel.

Dark Angel

I loved it so much that I decided to use it as a study for a larger piece. It also coincides nicely with a show for which it is appropriate (although we’ll have to wait and see on that.)

I had my original image — and the image that I had manipulated in Photoshop and resized to 5″x7″. Interestingly, when I took the original image — which was larger — and tried to recreate the effect, I couldn’t. I need to take better notes as I work. So I was forced to upsize the small file. This has to be done carefully or the image quality will suffer greatly.

In Photoshop, I increased the size in 15% increments using bicubic resampling and then using the unsharp mask tool. I think it came out well.

I printed these out onto Jacquard cotton inkjet fabric sheets. (I considered sending it out to a commercial printer, but they all wanted minimum order sizes and I couldn’t justify the expense.) After printing them out, I sprayed them lightly with Scotch-Gard and let them dry.

Angel printed into sheets

I knew that sewing this piece together would be tricky. I had used PosteRazor to print them out and didn’t specify a border — and wouldn’t you know, my top border came out shorter than 1/4 inch.

I could have reprinted them, but given the expense of the sheets and the printer ink, I decided to make do with what I had. I used a lightbox to align pieces before sewing them together. I made sure that I couldn’t see a shadow of the one underneath — and then I glued them together. Yes — I glued them. I’ve been using the trick of ironing clear Elmer’s glue instead of pins when applying binding and it works so well I thought I would use it here as well. I used as little as possible though.

Angel on lighboard

I used my open toe foot and sewed just inside the printed image so I wouldn’t see any of the white border on the front.

Angel being sewn together

This shows the three rows sewn together. I did, by the way, iron the seam allowances to one side to add some durability to the seams that were cheated a little in fabric and also to help the rows sew together straighter (sewing a left and a right opposing seam together is more likely to give you a perfect match in the middle).

Angel in rows

This is the final piece — well, before quilting and finishing. I will spray it again with Scotch-Gard one last time before I start quilting.

Angel in larger size

Go to Top