This year I wanted to make another animal portrait for the IQA Silent Auction in Houston. I think they’re easily relatable and are a good choice for broad appeal for the auction.
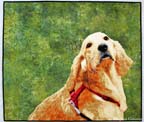
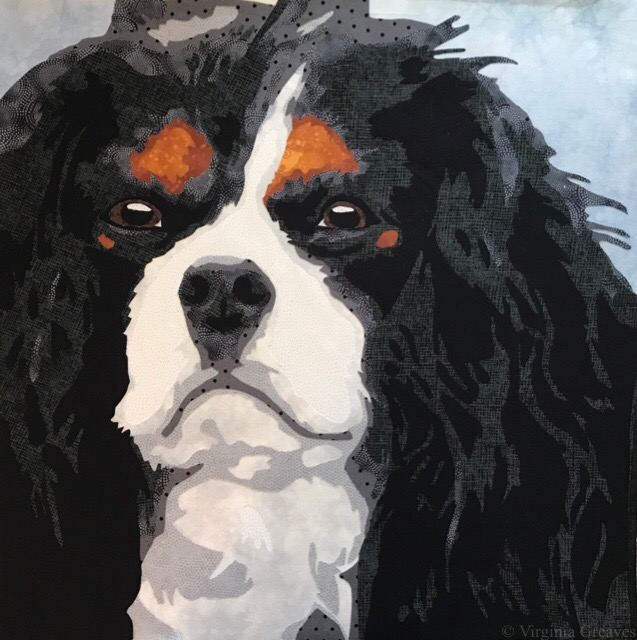
I was going over my inspiration folder and found this adorably cute Cavalier King Charles spaniel which I thought I could do rather simply. Oh, the best laid plans. See, I fell in love with this piece as I worked on him. I spent way more time than I had intended, but he grew under my hands into the adorable creature that had captured my heart in the photograph. I’m really fond of this piece.
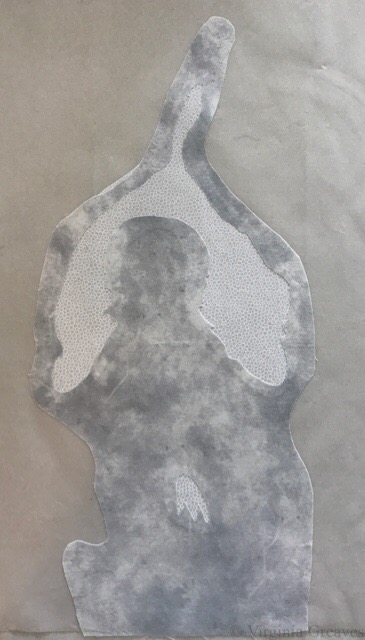
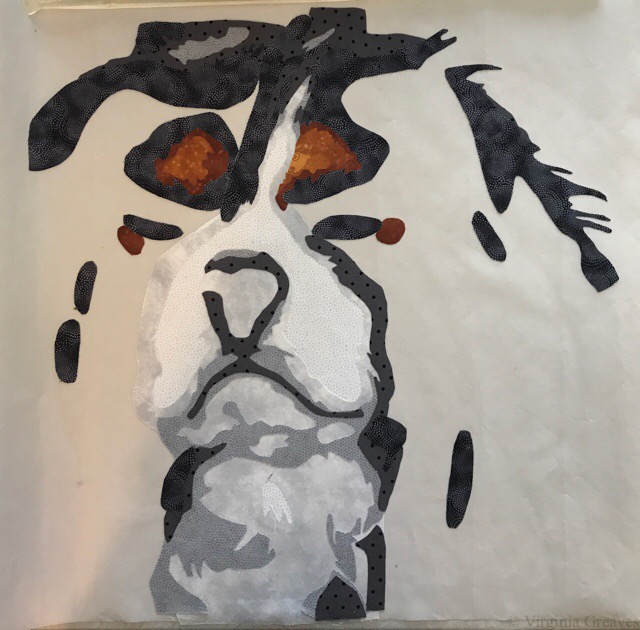
This shows the 1st two values.
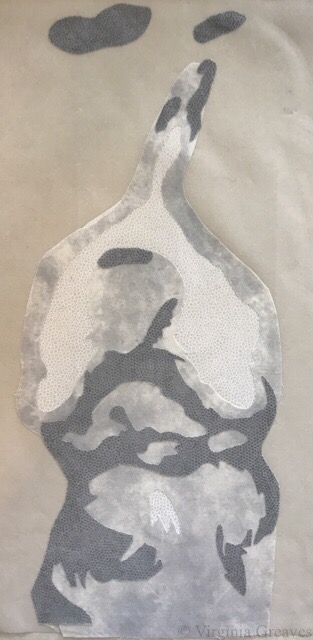
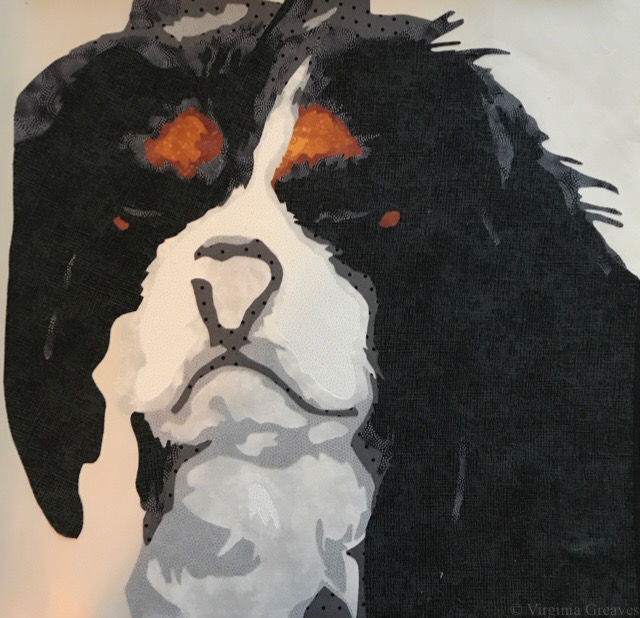
And the 3rd.
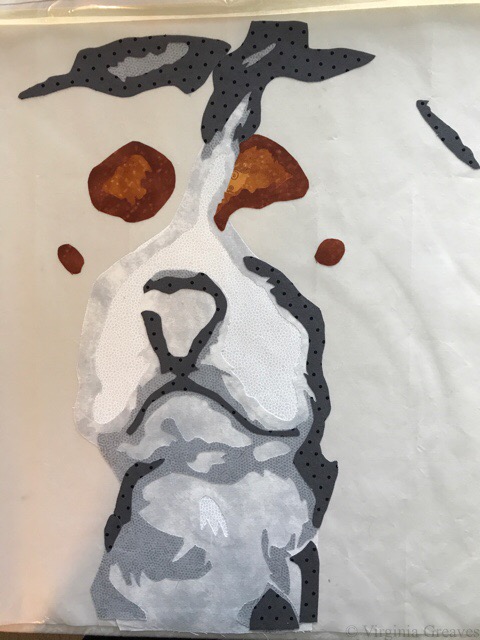
Although he’s all black and white, there are a couple of points of orange. I studied the spots above his eyes. Logic told me that the color was brown, but no, it was really fairly orange, although the darkest orange tends toward brown. I decided it would look better underneath the black fabrics rather than on top, so they were added at this point.
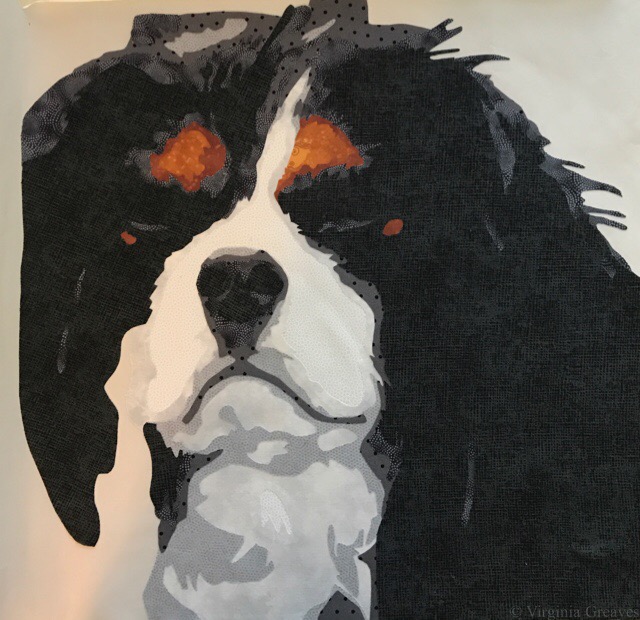
And then the 4th value. Now you can see the outline of the nose and the mouth.
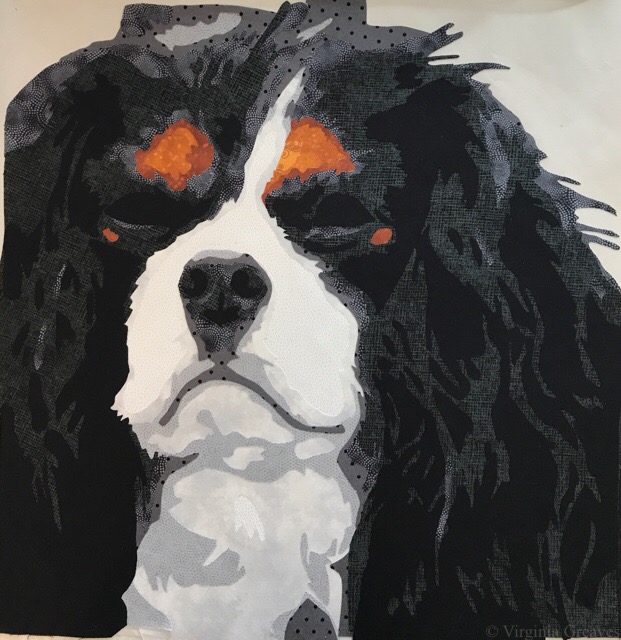
The fifth value. I took this pic on my iPhone at night in my studio so the grays look darker than they actually are.
The 5th value.
I realized at this point that I had neglected his nose and went back to do that.
And then the last value. Better picture.
I played with his eyes quite a bit until I got them just right. The pupils were bigger than I had anticipated, but this gives the expression I was looking for. Isn’t he charming? The eyes really do make the piece.
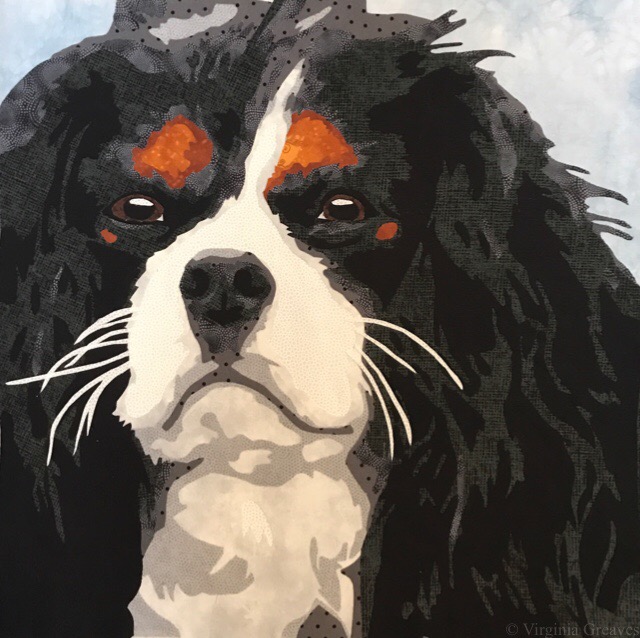
And then because I could, I went back and added some whiskers.
This is what he looked like all cut out. I spent several hours machine appliquéing him down and quilting him.
The final pice is called King Charles and can be found in its quilted and completed state on its own page here.
It will be available for sale in Houston at the Silent Auction in November 2017. I hope that you’ll consider bidding on it. I’ll mail him off this week — be a little sad to see him go.
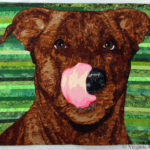
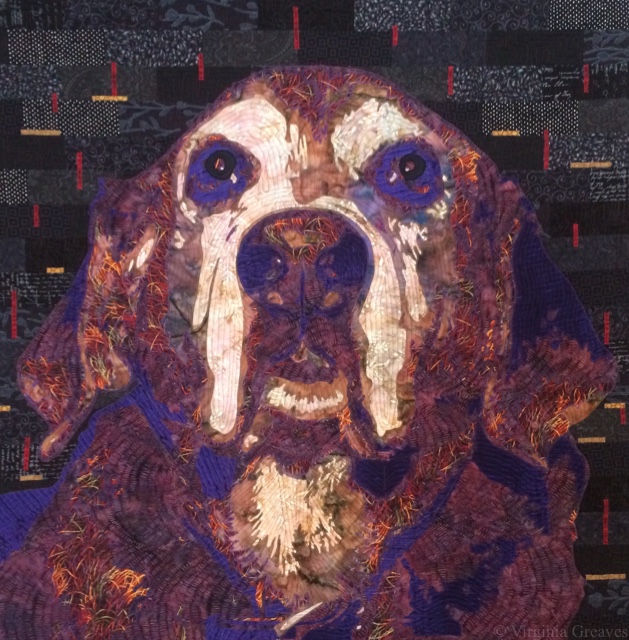
Although I’ve made many dog portraits, my current pet is brindled, something I despaired that I would never be able to capture in fabric. A brindled animal is typically brown with streaks of black. It’s very distinctive. Given the nature of closed shapes in appliqué, I didn’t think that it was something that I could recreate. However, I was speaking with one of my SAQA mentees recently, and she had tried it in her work with success and encouraged me to do the same. It’s all about the fabric.
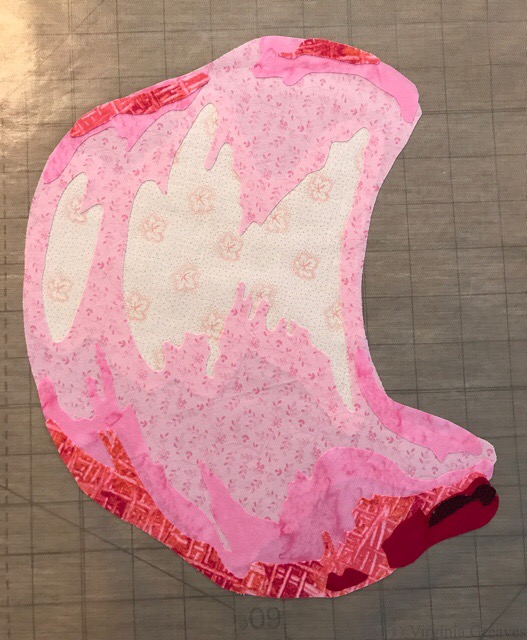
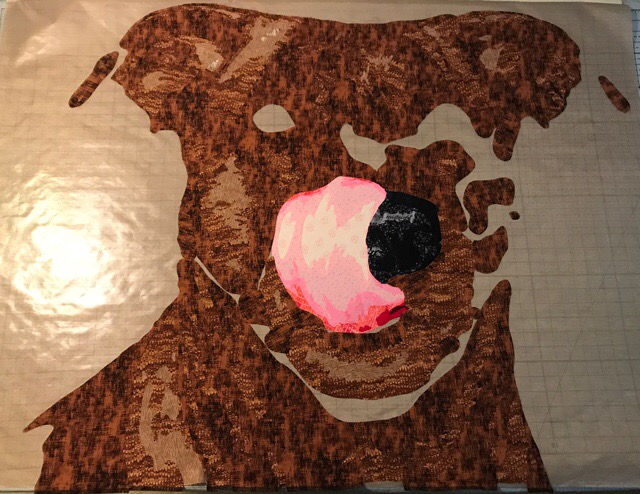
So for this piece, I chose a picture I had taken of her with her great big tongue curled up over her nose. It showed a lot of her personality. I searched through my pinks for just the right ones and started there. I could have put the tongue on last but worried about the darker fabrics I would use for her fur showing through, so I started with the tongue.
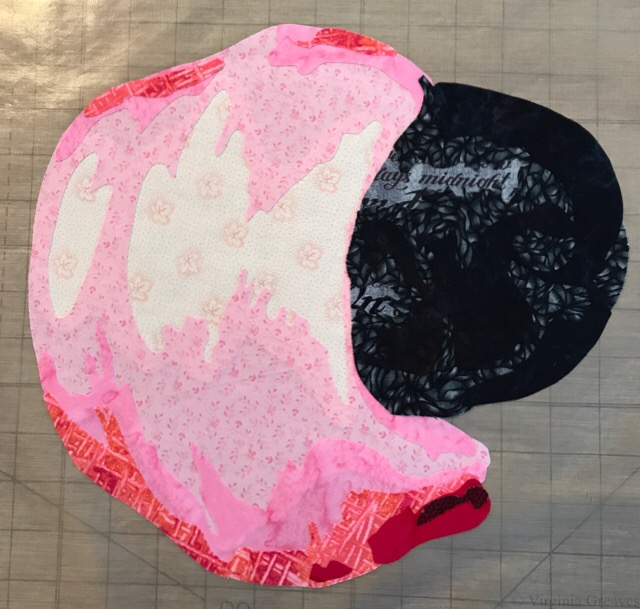
And then after the tongue, I went on to the wet nose.
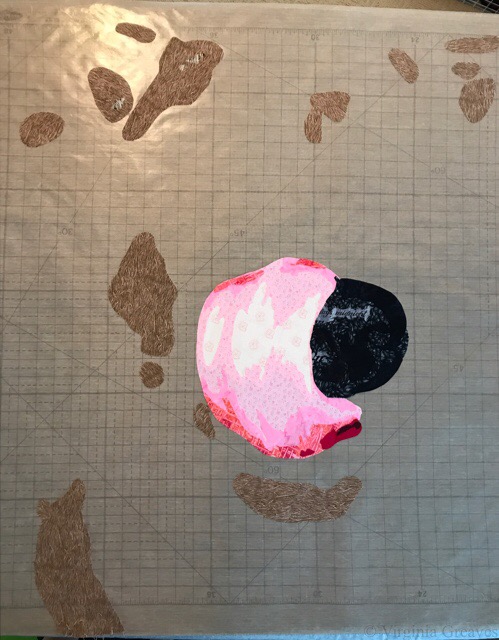
And then the hard part — the fur. I chose highly textured browns. These are the first two values, although there’s only the tiniest amount of the lightest brown up there in the top left-hand corner.
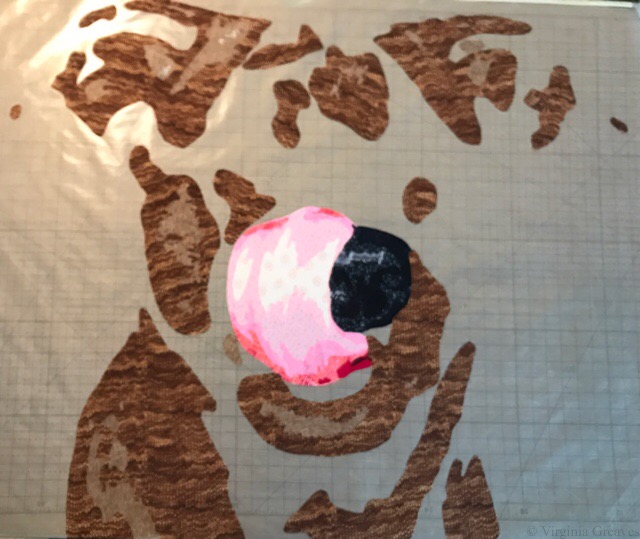
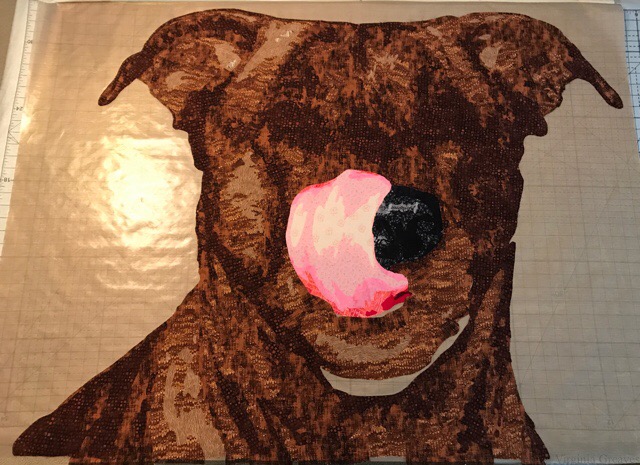
This is the 3rd value — not a very clear pic but probably taken late at night in my studio. Did I mention these are flat on my drafting table and I’m standing above them on a ladder taking the pics?
And here, with the next value, you can start to see the magic happen. The textures start to blend together but still maintain their integrity.
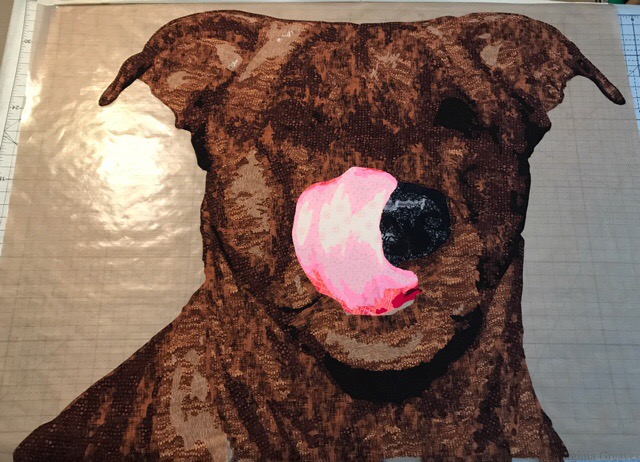
The next value.
And the darkest value.
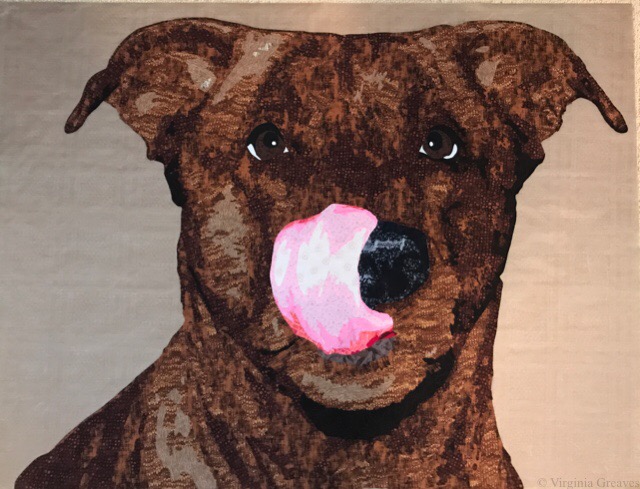
The eyes always make a big difference. It was interesting finding a brown iris color that wouldn’t blend into the fur.
And then this is the background I went with. I cut strips of green and randomly assembled them for the background to give an abstracted look.
And this is her. This is what she looks like. This is the piece before quilting.
I almost finished this piece in July but a confluence of activity prevented that from happening — so it was finished in early August. And then I was able to then create a piece from beginning to end for the IQA Auction by the end of August. No idea how that happened. I will share pics of that one in another post.
I named it Tasty, and you can find it once quilted and completed on its page here.
Often, I wonder what to name a blog post — but not this one. At first, I was going to title it, Nothing is Ever Easy. That’s what I had in my head as I started this morning, but it quickly turned into How to Eat an Elephant.
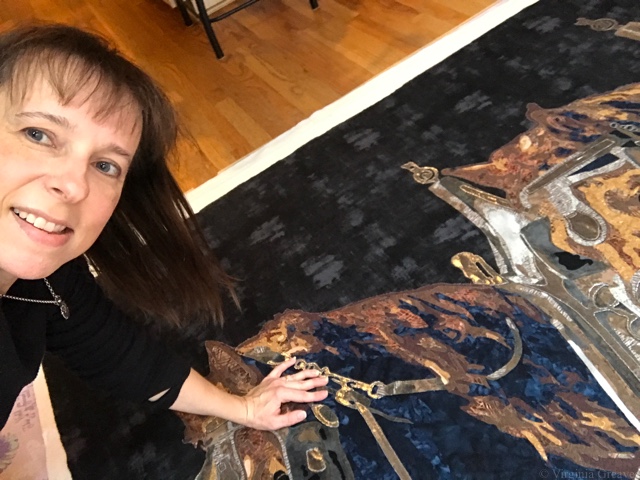
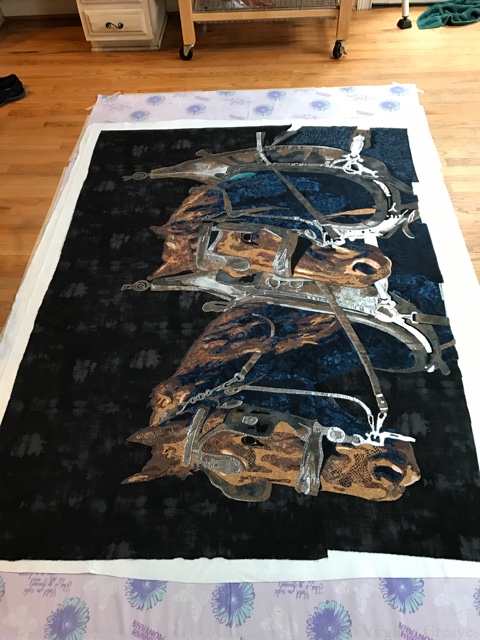
My Elephant is the Horses. I have been holding off quilting it until I took a long-arming class at my local quilt shop. I had it in my head that, because of its size, I had to put it on a frame. So I worked on every other project in my house while I waited for my class, which I had last Saturday — except it wasn’t what I thought it would be.
I was very lucky to be given the chance to sew on four different HandiQuilter long-arm machines. The 1st was the Sweet 16 which was set into a table. I was sure that this was NOT the one for me. The next model up was the Simply 16 on a small frame, then the Avante on a full sized frame, and finally the Fusion on the largest frame. I had my eye on the Avante.
There were three other people in my class, so we rotated through the machines. I started with the Simply 16 on the smallest frame. Although I don’t normally quilt a lot of feathers, I decided that it was a good place to start. I was so surprised that I couldn’t make the petals come back to the stem. It was really hard to control. And then I worked on the Avante, and it was better, but not a lot. The machine was not moving as I wanted it to. The teacher suggested that I was too used to free motion quilting with my hands guiding the piece, rather than guiding the machine over the top of the quilt. Then I tried a pantograph on the Fusion. I’m not the least bit interested in pantographs, but it seemed to be the highlight of the class to everyone else, and it was a good exercise to just follow a drawn line. It was hard to do too.
And then I sat down at the Sweet 16, and I just quilted. It felt natural, and my feathers looked great. I was in control.
<sigh> I knew by the end that there was no way that I could put the horses on a frame. It’s possible for me to develop the skill over time, but it’s not something that’s going to happen quickly. Renting by the hour at the local shop, I don’t know that it will ever happen. The skill set that I’ve developed is just not as translatable to a frame as I wanted (& needed) it to be.
So I came home and knew that I was going to spray baste my quilt and start quilting it here at home. I may take it to the shop towards the end, when it’s at its heaviest, when I’m quilting the background, and see if the Sweet 16 is a big improvement over quilting it at home, but the table, even with the extra side pieces, is not very big. Here at home, I’ll set up many tables around my machine, and although I’ll have to crawl on the floor to get out of my studio, hopefully it’ll hold the length of the quilt as I’m working on it so gravity won’t be working against me.
And today, I laid out my sheet in the kitchen, I taped things down, and I started spraying. I do wish that I had put down a second sheet as I had quite a bit of overspray onto my wooden floor. My poor socks are covered in a layer of spray glue. But it’s done. My back hurts, but it’s basted.
At least there was no one here to laugh at me as I crawled around on the floor, smoothing it out.
When I was done, I took it upstairs and made sure the back and front were perfectly smooth. I always find that, even with taping, I have a few lumps and wrinkles that need to be worked out. Thank goodness the spray basting allows me to reposition everything until it’s smooth.
Now it’s ready for quilting. Wish me luck. I think I might need it.
So I just got my email saying that my piece, Minerva, didn’t get into QN ’17, and I was talking to a friend of mine who also didn’t get in (who, incidentally, was in their last exhibit in ’15), and I started thinking — wouldn’t it be really cool to see all the amazing work that didn’t get into QN ’16. I mean, the pieces I know that didn’t get in are spectacular! The acceptance rate was just slightly over 11% — imagine seeing the awesome work that isn’t going to QN ’17!
So I’m going to do this — I’m going to start a gallery page “I Got Rejected From Quilt National,” and I’m inviting other artists that weren’t accepted to send me a pic of their work.
You can email it to me at ginny@virginiagreaves.com with subject line “QN” — and please make the pics 1800 px on the longest side.
And if I get more than just a couple, I’ll post the page for all to see.
Even if you don’t want to participate, if you received a rejection, know that you’re in good company. Keep going. Enter your work somewhere else. There are lots of other shows out there.
Mercury must be in retrograde because it’s been an exciting couple of days.
It’s been quite some time since I’ve written. In late May, I spoke at the East Cobb Quilt Guild here in Roswell. I took my slideshow that I’ve been building to show a retrospective of my work — and one of the pieces I had in the slideshow I had entered into the the East Cobb show coming up in a couple of weeks. After I verified that the judges would not be in attendance at the meeting, I decided to leave that quilt in the slideshow but not take it to the meeting. I did, however, have someone pointedly ask me at the end of the presentation where that piece was — that they wanted to see it in person and why had I not brought it? So I fessed up that it was sitting at home, but that they could study it more closely at the upcoming show.
It’s a great guild, and I have several friends that are in it, so it was a lot of fun seeing old friends again.
Fast forward to last night, the awards ceremony and opening reception for the show. I went alone as everyone in my family was busy, but I was greeted by friends at the door and was invited to sit with others that were excited at having seen my presentation a couple of weeks ago. The only thing more fun than old friends are making new ones.
As I was sitting there, the art category came up. Well, I didn’t win anything, but at least Judy Alexander won 1st place. I was very happy for her. I enjoyed all of the categories, and it was fun to see the 1st place winners on the overhead screens.
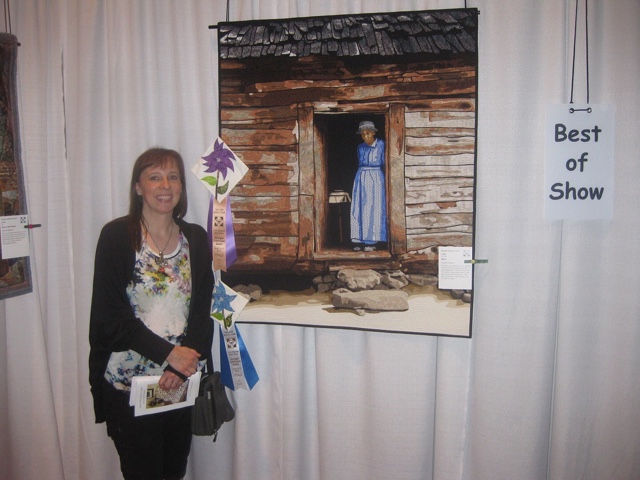
And then they came to Pictorial. Well, maybe I entered in that category. Turns out, I did! And I chuckled. I was thrilled to see Worn come up on the overhead and win 1st place in its category. I got to walk up to the front and hug Lynn Rinehart and have my picture taken with the ribbon. The ribbon was mostly handmade — beautifully done. And then I sat back down.
They finished the categories and then started talking about the Best of Show winner. This is always a traditional quilt. I know this. It’s expected. Except — HOLY COW! It’s my quilt up there on the screen! I covered my mouth and the woman I was sitting next to had to push me into the aisle so I would walk up to the front. I couldn’t believe it!
photograph by Ben Hollingsworth
So I am overwhelmed. I would do what I do anyway, but it’s ever so nice when people like your work. And to be recognized among your peers is a bountiful blessing.
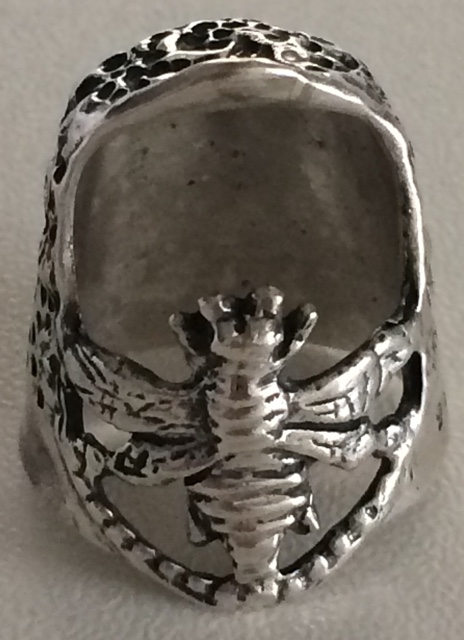
This morning, I went over to the show to have a quilt appraised — both Worn and Golden Moment will be traveling to Sacred Threads soon and they both require a written appraisal — and my daughter had taken my car since she had been having problems with the Explorer. I had intended to arrive at the show with a half hour before the appraisal so I would have some time to browse the show quilts, but unfortunately, problems with the car took my time and frazzled my nerves. I did make my appraisal appointment on time though, and had just enough time to buy something I’ve wanted for a long time — a thimble from TJ Lane.
I had tried to buy one in Houston last year and couldn’t get near their table, but at this show, there was plenty of room for me to look. My initial choice was one with a jewel, and as much as I loved it, it just didn’t fit my finger. I found another one with a jewel that would work, but again, it didn’t cover my finger as well as this one with the bee — so I went with the bee — because I’m actually buying it to use it, not for jewelry. It’s really all Lynn’s fault. I was trying to talk myself out of it, and she walks up and tells me that I should get it as a reward for myself. It’s a nice present, but really, if it saves me from repeatedly sticking the needle into my finger as I’m sewing on the binding or the facing, I should consider myself pampered and happy. For ages, my thimble has been a cheap brass one that doesn’t fit right, and I think I inherited it from my mom. So now I have quilter’s bling.
Before I left, someone came up to tell me congratulations, that I had won Quilter’s Choice from the vote last night! Wow. So I went to see the new ribbon on my piece, and I was able to spend some time speaking with the docent who was so kindly showing people my work. The First Lady of Georgia, Sandra Deal, wife of Governor Nathan Deal, had come for the ribbon cutting of the show that morning. She loved my piece and wanted to have a picture of me with it, but sadly, that was during the hour that I was dealing with the car, trying to find Lynn, and then having the quilt appraised. Lost opportunity. Oh, well. I was glad to hear that she had enjoyed my piece and that her entourage had taken many pictures of it.
And then I came home to borrow a car, deal with the appliance repair man, and take my other daughter to the doctor (so I was glad that I had borrowed a car because it turned out that I really needed it).
It’s been a long day, I did not sleep well last night, but I’ve taken the ups and the downs and I’m moving forward. Before I left the show today, I converted my entry fee to a multi-day pass, thank goodness, and I hope to go back for some time tomorrow.
Georgia Celebrates Quilts will be open again tomorrow and Saturday 10am-6pm at His Hands Church in Woodstock, GA.
I have been neglecting my blog. Instead, I spent the week briefly looking at the vitriol on QuiltArt, and then turning to my studio. The best thing to combat all of the crushing criticism was a deadline.
Although among all the negativity, I received a lot of surprising support. I had some Atlanta friends that stood in the gap for me when I couldn’t, and for that, I am truly grateful. I also had some internet friends stand up and proclaim their support, and I received many emails of support and encouragement. I heard from people I never expected to, and I made some new friends. So out of the fire, there has been some good.
My last blog post has been read, I believe, almost 2,000 times. People have been combing my website, and I’m certain that a good deal of it was in judgment, not support.
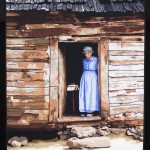
There is something about the Migrant Mother photograph — and my use of it — that brought out a lot of strong emotions in people. And in that regard, I think it has been successful. Not all of the PR has been good, but it’s certainly been a topic of discussion.
Regardless of all of that, I have deadlines to meet. I have an entry due at the end of the month and guests coming next week — so this new piece has to be completed this week. I finished the quilting yesterday and am almost done with the handwork. I hope to complete it today and block it.
And then there are new shows to consider. I have another piece based on a Dorothea Lange photograph that I’m considering entering in AQS — at risk of the ivory tower elitists coming to hunt me down for having the gall to (gasp) use someone else’s photograph as the inspiration for a piece of work. I also have to prepare for Sacred Threads which is coming up as well as the local East Cobb Quilt Guild Show.
Furthermore, all of my studio efforts after finishing my current portrait will go back to the abstract pieces for the two person show I’m debuting with Leisa Rich in October.
One foot in front of the other — moving forward. There are people that don’t like my decisions, but life is too short to spend time worrying about them. They don’t understand me — and I don’t understand them. It’s like the school playground all over again. I think I’ll just go back to my studio. It’s peaceful there.
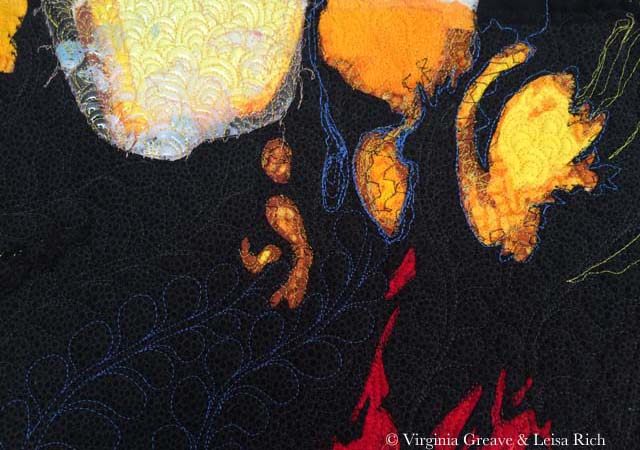
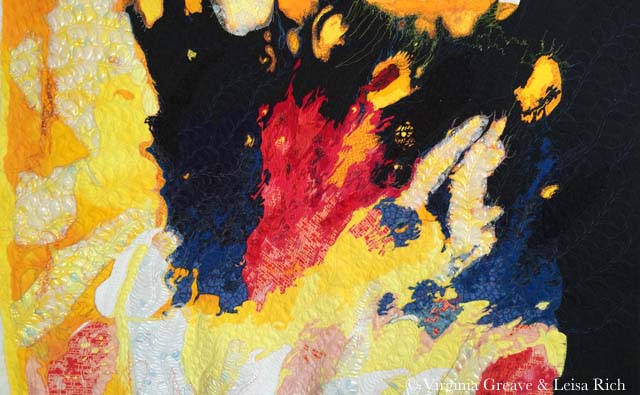
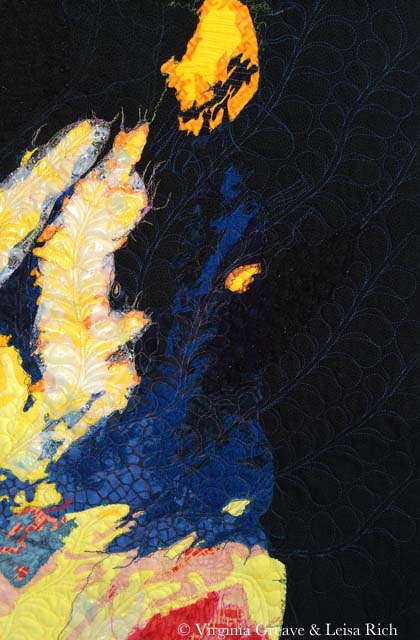
A friend told me that it was hard to see what I had done on the piece from my last blog post so I have posted some more detail pics. I hope this makes it easier to see the quilting.
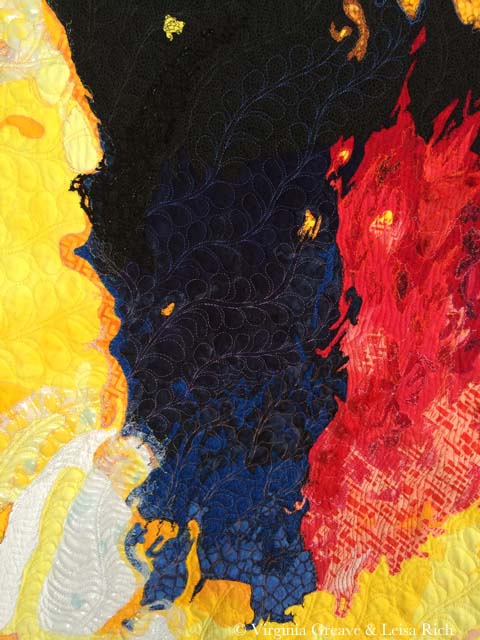
Yesterday I finally finished quilting the 3rd abstract piece that I’ve been working on collaboratively with Leisa Rich. I have to admit that I let my mind run away with this one.
This is a pic that Leisa took of it after she had added embroidery.
And this is the same piece after I have quilted it.
I started with free motion quilted feathers — in metallic thread. CRAZY if you’ve ever sewn with metallic copper thread — but I had the wind at my back that day and it flowed like water onto the surface of the piece. I graduated through copper, purple, blue, and then a gray for the deepest part of the black fabric. I then moved over to the red and brought a flame stitch out of my bag of tricks. Then I moved down into the yellows and whites. I did change to more of a wavy frond for the white — I liked the difference in texture — and some of the yellow blobs were awarded with scallops. I did revisit the copper thread on the lighter blue fabric over on the right hand side — but I was not lucky on those days and struggled with a lot of broken thread. I moved back into blue thread as soon as the piece was ready for a change.
I love free motion quilting on my Janome. Even sewing on the plastic overlay didn’t cause many problems. My Viking would have given me fits.
I hope Leisa forgives me for putting traditional feathers all over it. It called out for that organic feeling. I’ve never used so many free flowing feathers on a piece in my life. It felt good to step out of contour quilting.
I am giving this back to Leisa next week — I think she’s planning some hand embellishment.
We have a curator that approached a local Atlanta gallery about having a two person show of our work — and it looks like we have reached an agreement and the show will go on in late 2015. Time to get busy — I have a lot to do to get ready!
Last week, I completed the 1st and 2nd pieces in the collaborative series. I did the 2nd one first — the larger one — and all of the binding was done by hand. The 1st one — the smaller one — I couldn’t bear to hand stitch the binding. I had too many holes in my hands. I just couldn’t do — so I did something I’ve only done once before. I machine stitched the binding.
I drew out the outline of the final boundaries on the top. Then I stitched on top of that outline using a yellow bobbin. Then I turned it over and used the yellow line to show me where to machine apply the binding. Once it was on (and the top edge of the sleeve), I cut off the excess.
There is a lot of plastic on the top of this one so I had to be very careful with this next step. I love using Sharon Schamber’s trick to hold the binding in place with water soluble clear Elmer’s glue that has been pressed with an iron — but doing this meant folding the binding to the top and pressing right next to the plastic without melting it with my iron. It had to be hot enough to engage the glue to hold — but not hot enough to melt the plastic underneath. I was “pressing” my luck but I did it anyway and it worked well enough. I then used a machine blanket stitch to attach the binding to the front.
I’ve been surprised over the years that — the only other quilt I’ve done this with — I have hanging in my living room and I truly forget that the binding was attached differently. Looking at it very closely, I prefer it the other way. If the final stitches are on the back, any irregularities are on the back — but my hands had to have some time to heal. I think it turned out fine. I still had to hand stitch the sides and bottom of the sleeve and the corners of the quilt — but there wasn’t a lot of that.
My typical process after finishing a piece is to block it, photograph it, and then post a new page for it on my website. Leisa and I both agreed not to completely block these pieces — although I did spray the binding with water and, on the small one, I pinned it to the ironing board and soaked the binding only in an effort to make the piece hang straight.
I photographed the 2nd one with no issues. The 1st one cannot be photographed using my traditional methods — the plastic across the front on top of the black causes too big of a glare. After spending time reading about this, I think I’m going to have to built a light diffusion box just for the purposes of getting a good picture — so there is a future project.
Leisa has asked that we not debut the final pieces until they are exhibited all together in (hopefully) late 2015. Therefore I will post pages for them without final pictures — only a notice of exhibition. This was a hard decision for me but I agree that seeing all of the pieces together creates an impact that would be diminished by individual publication.
I have been thinking about a portrait for competition — what needs to be my next piece — but I’m still in the idea stage so I started prepping #3 for quilting yesterday. Like #1, it has plastic on it — so it can’t be pin basted — my usual method. It would have to be spray basted — but it’s quite a bit larger than #1 so I jumped on the internet for some help and came up with the following plan.
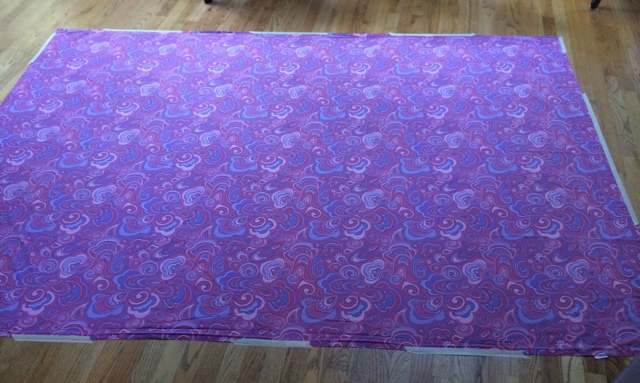
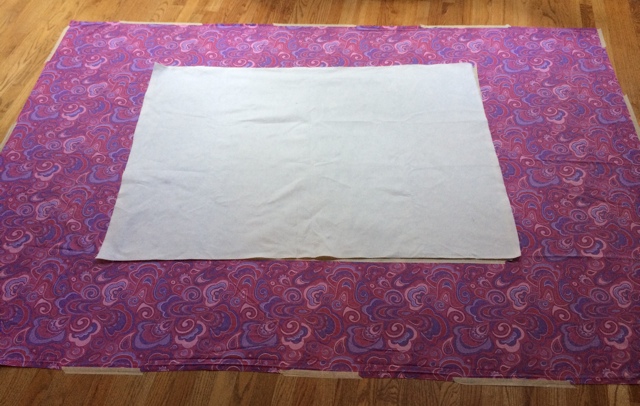
First, I laid down a sheet on the wooden floor in my kitchen. (Yes I know it’s hideous — it was bought years ago for one of my girls. Makes it perfect for this.) I taped down the edges. The intent is for this to catch all of the overspray. When I’m done, I can just throw it in the laundry.
Then I tape the backing fabric face down onto the sheet.
And then I lay the batting on top of the backing.
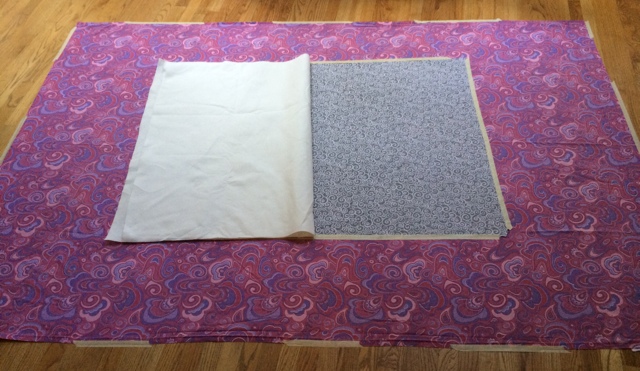
I fold half of it back . . .
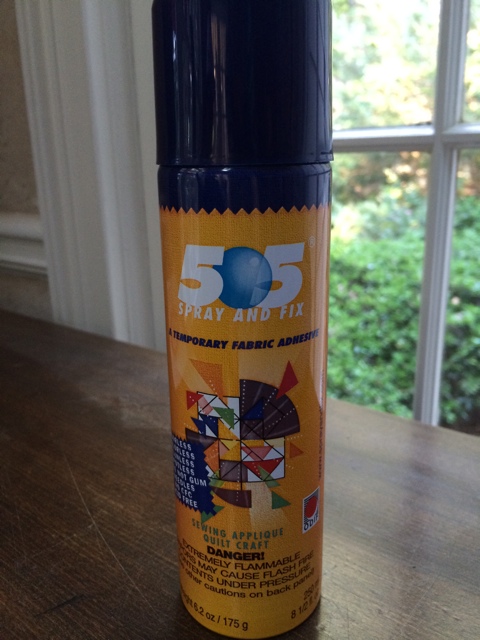
and I grab this can of 505 Spray and spray the BATTING that’s been folded back. I then fold it back onto the backing making sure that it’s smooth. If there is a wrinkle, I can lift it, move it, and then press it back together. Then I do the same thing with the other side. I fold the batting over at the halfway mark, spray it, and then smooth it back onto the backing fabric.
Once that’s done, I do the exact same thing with the top — except I still spray the BATTING.
It took me half an hour to do this, and at the end, my fingers didn’t hurt. I was at the end of a can and it started spraying out white goo — which thankfully didn’t transfer to the quilt. It just stuck to the can. I luckily had another full can to finish the job.
I should consider doing it this way more often. Even better, I realized this morning that I can draw out some intricate shapes on the top this morning without worrying about pins getting in my way. I know you’re supposed to do all of your drawing (if you’re going to do that) before you baste it, but my process is more organic. I add to the piece what it needs as I go along.
Having finally finished the appliqué for the family portrait I’ve been working on, I pinned the piece with batting and backing — and then began to prepare myself mentally to begin quilting.
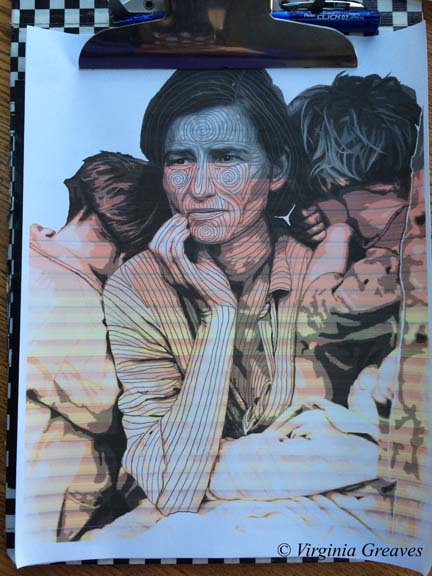
This is always the hardest part for me. I will put it off and find a hundred excuses not to get started. I think that the fear stems from the dislike of UN-sewing — an inevitability of the quilting process. I have, however, discovered that a good way to move me through this stage and get back to the machine is to print off the value painting I made earlier and start drawing quilting ideas on it. If I don’t like the direction of a particular area, all I have to do is erase it. Then when I sit at my machine, the drawing sits beside me and tells me where I need to go.
(Forgive the print — it came out in a pinkish hue because I was running out of black ink.)
I did have a problem when I sat down at my machine though. I have a Viking Designer 1 — and the truth of the matter is that it has given me problems since year 4 (it’s about 13 years old now). I had taken it in to the dealer for a cleaning — and she kept it for MONTHS (did I mention I didn’t have a backup machine?) — and when I FINALLY got it back, the touch screen menu didn’t always do what it was supposed to do. I could always reset it by turning it off and on — and I certainly didn’t want THAT dealer to touch it again (and Viking wouldn’t let me use anyone else) — so I had to wait until sometime after year 5 after she had gone out of business before I let someone look at it again (I still have trust issues with someone having my machine for any length of time).
I thought when I bought it that it was warranted for 20 years — and I considered it a good 20 year investment piece. However, I learned the hard way that the electronics were only covered for 5 years. And did I mention that the cost of replacing the motherboard is about $1,200?
Anyway, I’ve just lived with it — but when I sat down on Thursday to start quilting, it just wouldn’t behave. However, I have another Designer 1 that a friend gave me years ago (after hearing me complain about mine — she thought hers would be kinder to me) — so I took everything and set it up on that machine. I turned it on — and learned that it had grown unhappy over the last few months — watching me sew away on my other machine. That machine’s screen doesn’t work — at all. Not even a little.
I went back to my original machine and finally got it back in business. (And since then, it’s been working really well. It must know that I’ve been looking at other machines on the internet.)
And why all of this drama? Well — I have to come clean here. The truth is that I’ve been quilting with my feed dogs up for years. I KNOW! Crazy as it sounds, when I was first starting out, I was having problems and someone suggested just leaving them up — so I did and it helped and it’s been that way ever since.
Except when I was quilting my last piece, Golden Moment, it was sooooo heavy and it was hard to move around — so I was persuaded to try Leah Day‘s Ultimate Quilting Kit — a Supreme Slider, Machinger gloves, and Little Genie teflon bobbin washers.
By the time the set came, I had just finished quilting — but I knew the day would come that I’d really enjoy using them — and that day was Thursday.
Except — in order to use the Supreme Slider, the feed dogs have to be down. You don’t want it to accidentally slide out of position (which the feed dogs might do) and start being quilted to the underside of your piece. That would be REALLY bad.
Hence the sewing machine problems. I had lowered the feed dogs to set up the machine only to realize I had a couple of appliqué fixes to make — so I had to raise the feed dogs — which they didn’t want to do.
The sewing machine argument aside — I enjoyed the gadgets. The teflon washer that you drop in the bobbin case really does cut down on the out of control speed spinning that the bobbin can sometimes do when you’re quilting fast. The Machinger gloves help me hold onto the quilt — but they’re going to take some getting used to. (It’s awkward when I have to start a new line and pull the bottom thread to the top with the gloves on — I end up with a lot more thread pulled than I’m used to.) The Slider also helps move the quilt around easily — although I’ll be able to evaluate the drag on the needle better when I get to the edges of the quilt. (I started quilting in the middle which keeps most of the quilt on the table so there’s not much drag at this point.)
Quilting with the feed dogs down does feel a lot different — I can tell that I have a higher chance of messing up the intentionality of the line if I’m not extra careful. I might try decreasing the presser foot tension the next time I sit at the machine.
There’s a learning curve in everything new — but I think that these are good things to learn.
Today, I managed to finish quilting the mom in my piece — except for her hair and clothes.
I am worried about my sewing machine. I don’t know that I’ll ever want to buy another Viking given the customer service problems I’ve had with them — but nor do I relish the thought of learning an entirely new machine.
My friend Rebecca has a Janome 5500 that I may borrow for a while — so I can try another something new.


 The final pice is called King Charles and can be found in its quilted and completed state on its own page here.