Posts tagged spray basting

How to Eat an Elephant

5

Often, I wonder what to name a blog post — but not this one. At first, I was going to title it, Nothing is Ever Easy. That’s what I had in my head as I started this morning, but it quickly turned into How to Eat an Elephant.

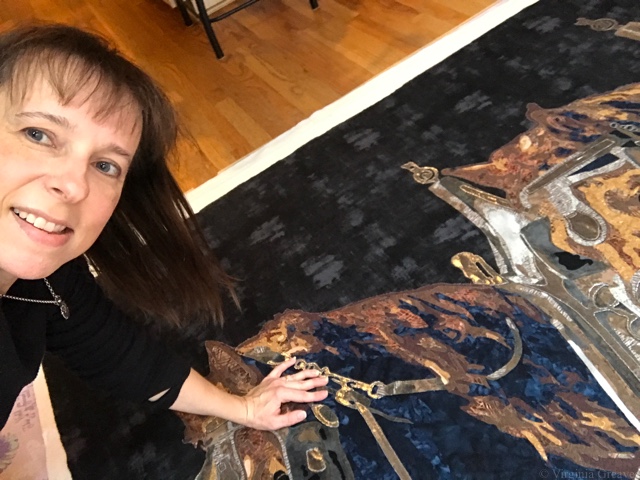
My Elephant is the Horses. I have been holding off quilting it until I took a long-arming class at my local quilt shop. I had it in my head that, because of its size, I had to put it on a frame. So I worked on every other project in my house while I waited for my class, which I had last Saturday — except it wasn’t what I thought it would be.

I was very lucky to be given the chance to sew on four different HandiQuilter long-arm machines. The 1st was the Sweet 16 which was set into a table. I was sure that this was NOT the one for me. The next model up was the Simply 16 on a small frame, then the Avante on a full sized frame, and finally the Fusion on the largest frame. I had my eye on the Avante.

There were three other people in my class, so we rotated through the machines. I started with the Simply 16 on the smallest frame. Although I don’t normally quilt a lot of feathers, I decided that it was a good place to start. I was so surprised that I couldn’t make the petals come back to the stem. It was really hard to control. And then I worked on the Avante, and it was better, but not a lot. The machine was not moving as I wanted it to. The teacher suggested that I was too used to free motion quilting with my hands guiding the piece, rather than guiding the machine over the top of the quilt. Then I tried a pantograph on the Fusion. I’m not the least bit interested in pantographs, but it seemed to be the highlight of the class to everyone else, and it was a good exercise to just follow a drawn line. It was hard to do too.

And then I sat down at the Sweet 16, and I just quilted. It felt natural, and my feathers looked great. I was in control.

<sigh> I knew by the end that there was no way that I could put the horses on a frame. It’s possible for me to develop the skill over time, but it’s not something that’s going to happen quickly. Renting by the hour at the local shop, I don’t know that it will ever happen. The skill set that I’ve developed is just not as translatable to a frame as I wanted (& needed) it to be.

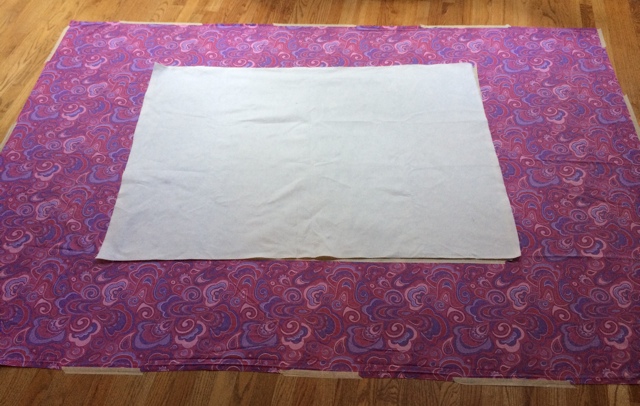
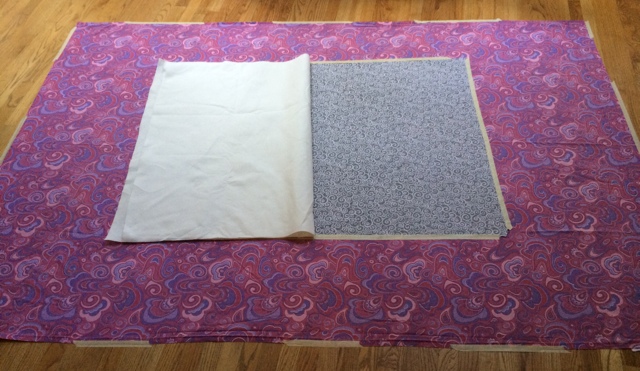
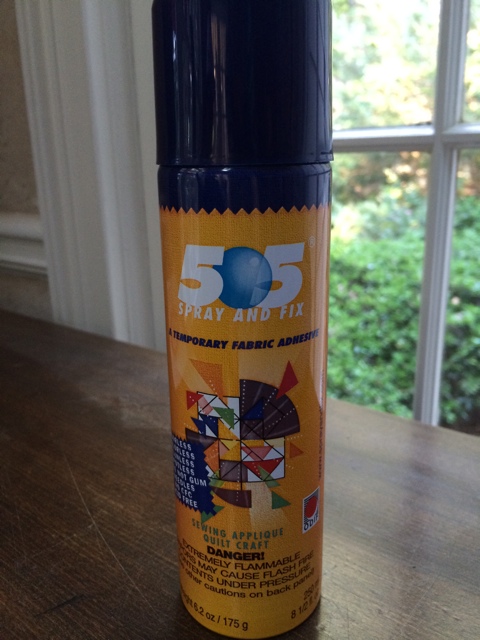
So I came home and knew that I was going to spray baste my quilt and start quilting it here at home. I may take it to the shop towards the end, when it’s at its heaviest, when I’m quilting the background, and see if the Sweet 16 is a big improvement over quilting it at home, but the table, even with the extra side pieces, is not very big. Here at home, I’ll set up many tables around my machine, and although I’ll have to crawl on the floor to get out of my studio, hopefully it’ll hold the length of the quilt as I’m working on it so gravity won’t be working against me.

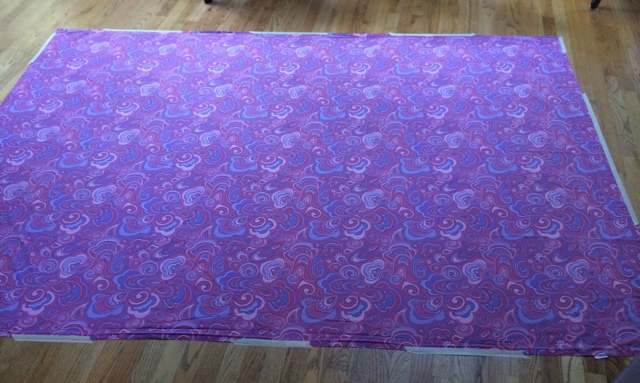
And today, I laid out my sheet in the kitchen, I taped things down, and I started spraying. I do wish that I had put down a second sheet as I had quite a bit of overspray onto my wooden floor. My poor socks are covered in a layer of spray glue. But it’s done. My back hurts, but it’s basted.

Spraybasting on the Floor

At least there was no one here to laugh at me as I crawled around on the floor, smoothing it out.

Horses Basted

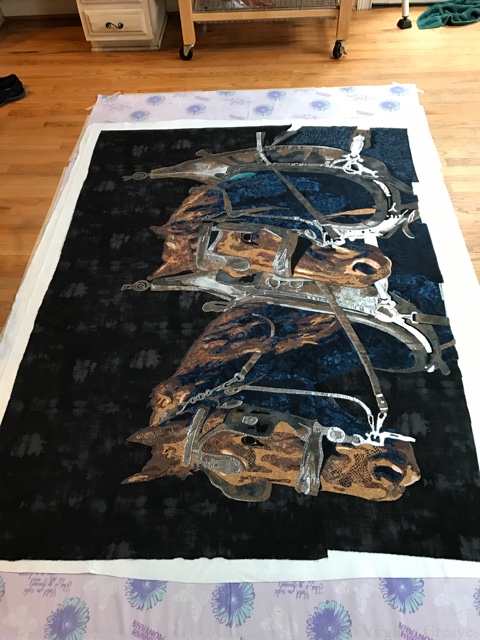
When I was done, I took it upstairs and made sure the back and front were perfectly smooth. I always find that, even with taping, I have a few lumps and wrinkles that need to be worked out. Thank goodness the spray basting allows me to reposition everything until it’s smooth.

Now it’s ready for quilting. Wish me luck. I think I might need it.

New Solutions

0

Last week, I completed the 1st and 2nd pieces in the collaborative series. I did the 2nd one first — the larger one — and all of the binding was done by hand. The 1st one — the smaller one — I couldn’t bear to hand stitch the binding. I had too many holes in my hands. I just couldn’t do — so I did something I’ve only done once before. I machine stitched the binding.

I drew out the outline of the final boundaries on the top. Then I stitched on top of that outline using a yellow bobbin. Then I turned it over and used the yellow line to show me where to machine apply the binding. Once it was on (and the top edge of the sleeve), I cut off the excess.

There is a lot of plastic on the top of this one so I had to be very careful with this next step. I love using Sharon Schamber’s trick to hold the binding in place with water soluble clear Elmer’s glue that has been pressed with an iron — but doing this meant folding the binding to the top and pressing right next to the plastic without melting it with my iron. It had to be hot enough to engage the glue to hold — but not hot enough to melt the plastic underneath. I was “pressing” my luck but I did it anyway and it worked well enough. I then used a machine blanket stitch to attach the binding to the front.

I’ve been surprised over the years that — the only other quilt I’ve done this with — I have hanging in my living room and I truly forget that the binding was attached differently. Looking at it very closely, I prefer it the other way. If the final stitches are on the back, any irregularities are on the back — but my hands had to have some time to heal. I think it turned out fine. I still had to hand stitch the sides and bottom of the sleeve and the corners of the quilt — but there wasn’t a lot of that.

My typical process after finishing a piece is to block it, photograph it, and then post a new page for it on my website. Leisa and I both agreed not to completely block these pieces — although I did spray the binding with water and, on the small one, I pinned it to the ironing board and soaked the binding only in an effort to make the piece hang straight.

I photographed the 2nd one with no issues. The 1st one cannot be photographed using my traditional methods — the plastic across the front on top of the black causes too big of a glare. After spending time reading about this, I think I’m going to have to built a light diffusion box just for the purposes of getting a good picture — so there is a future project.

Leisa has asked that we not debut the final pieces until they are exhibited all together in (hopefully) late 2015. Therefore I will post pages for them without final pictures — only a notice of exhibition. This was a hard decision for me but I agree that seeing all of the pieces together creates an impact that would be diminished by individual publication.

I have been thinking about a portrait for competition — what needs to be my next piece — but I’m still in the idea stage so I started prepping #3 for quilting yesterday. Like #1, it has plastic on it — so it can’t be pin basted — my usual method. It would have to be spray basted — but it’s quite a bit larger than #1 so I jumped on the internet for some help and came up with the following plan.

First, I laid down a sheet on the wooden floor in my kitchen. (Yes I know it’s hideous — it was bought years ago for one of my girls. Makes it perfect for this.) I taped down the edges. The intent is for this to catch all of the overspray. When I’m done, I can just throw it in the laundry.

spray basting 1

Then I tape the backing fabric face down onto the sheet.

spray basting 2

And then I lay the batting on top of the backing.

spray basting 3

I fold half of it back . . .

spray basting 4

and I grab this can of 505 Spray and spray the BATTING that’s been folded back. I then fold it back onto the backing making sure that it’s smooth. If there is a wrinkle, I can lift it, move it, and then press it back together. Then I do the same thing with the other side. I fold the batting over at the halfway mark, spray it, and then smooth it back onto the backing fabric.

spray basting 5

Once that’s done, I do the exact same thing with the top — except I still spray the BATTING.

spray basting 6

It took me half an hour to do this, and at the end, my fingers didn’t hurt. I was at the end of a can and it started spraying out white goo — which thankfully didn’t transfer to the quilt. It just stuck to the can. I luckily had another full can to finish the job.

I should consider doing it this way more often. Even better, I realized this morning that I can draw out some intricate shapes on the top this morning without worrying about pins getting in my way. I know you’re supposed to do all of your drawing (if you’re going to do that) before you baste it, but my process is more organic. I add to the piece what it needs as I go along.

Go to Top