Applique and the Stabilizer Snob
I’ve never really addressed applique on my blog. I’ve stated that I do it — I may have even specified that I use a tight zip-zag — but I’ve never really talked about it or why — which seems a great omission given how often I’m asked about it from other quilters.
Some people fuse and then go directly to quilting. I’ve considered this, especially recently. Applique is tedious and is probably the least creative process I do. However, it gives a very neat finish. Raw edge applique without it can get rather messy over time, and I like the completeness that I get with a secured edge. I’ve used a blanket stitch and a satin stitch, but I prefer a tight zigzag — 1.0 mm length & 2.0 mm width (although I vary the width in tight spaces).
Why use stabilizer? I had someone ask me that recently. Years ago, I started using stabilizer and haven’t really questioned why in a long time. The answer is that it gives a professional finish. Yes, there are many layers of fabric which can stabilize the stitch, but in some areas, only two fabrics of cotton are too flimsy. The stitch will look much better if you use a stabilizer.
For years, I’ve been using tearaway stabilizer from embroidery shops. I had one that was soluble for a while but paper-y like a tearway that I really l liked but eventually couldn’t find anymore. When I was making the raven, I used the scraps of all of my old stabilizer. They were all good — except one. We’ll get to that in a minute.
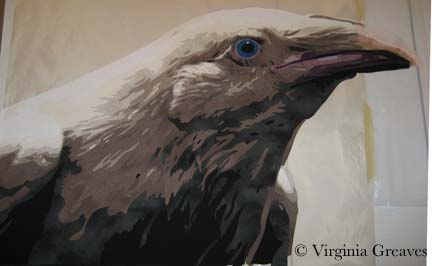
This, by the way, is the beak on my raven as I showed it in my last post. It wasn’t right.
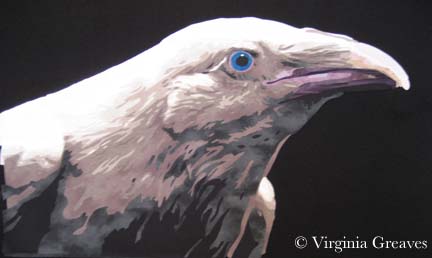
This picture, although taken when my studio was growing dark for the evening, shows how I changed the colors a little.
The raven shows up a little better on my design wall. Whenever I lay something on my design wall, I’m tempted to just lay it on black fabric and call it a day. BUT, my intention in making this piece is part of a story — and I had plans to work on the Tower of London.
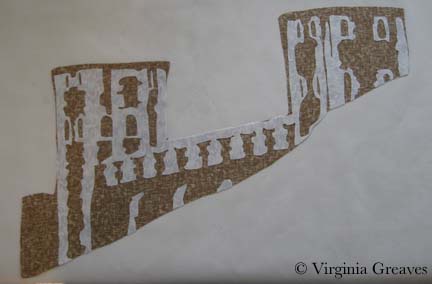
I drew a stylized version of the towers and hoped that my fabric choices would get me where I wanted to go. I had no idea if it would work — but I took a leap of faith. This shows the two right towers with the brown decorated with the white architectural details. It was almost like frosting a cake. I was careful to use a white print that wouldn’t show the brown behind it. I would usually put the lighter value down first to avoid shadowing, but this design was more structurally sound to have the full brown background with the white fabric carefully cut and laid on top.
Then I added the black details.
And finally the rusted copper turrets.
The left towers were constructed in the same way.
With the darker details and turrets added, they make more sense.
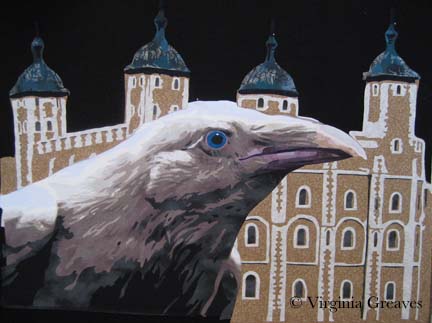
I put the towers on my design wall — and you can clearly see where the raven will sit. I posted this image to my FB Page and was surprised to find EVERYONE wanted me to finish the piece just like this. It does have a fascinating quality to it — but it isn’t the direction that I was working on. I will certainly consider it for another piece.
This shows the raven sitting on the design wall with the towers. Again, the black background makes everything look good.
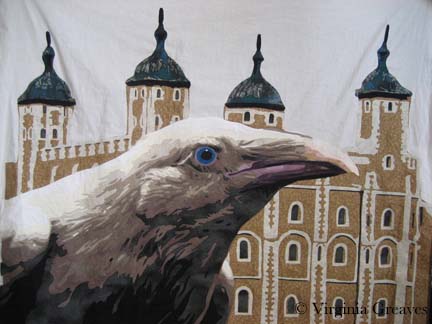
This next photo shows the raven and towers once they were appliqued to muslin. Keep in mind that I had run out of my stash of stabilizer. The fabric stores only carried Pellon, and unwilling to take the time to traipse over to an embroidery store, I decided to try it. I use Pellon’s Wonder-Under all the time — how bad could their stabilizer be?
It was AWFUL. It is much thicker than any other stabilizer I’ve ever had, and it often interfered with my ability to move the fabric nimbly under the needle and get the thread where I intended it to go. It is my hope to never have to use it again. So there — I suppose I’m a stabilizer snob.
Certain in the belief that I had nothing in my stash that would do for the sky, I went to the fabric store and picked out a beautiful blue-gray — only to bring it home and find, in the bright natural light of my studio, that the fluorescents of the store had deceived me. The color was more powdery blue than what I wanted. So I searched my stash and found this funky batik. I love its contribution to the story of the piece. It’s a strange choice, but I’m happy with it. This is what the piece now looks like, fully appliqued and ready to be pinned for quilting.
Next week is Spring Break. I may not be able to begin quilting for a while, but I hope to at least get it pinned tomorrow.
One last thing — Martha Sielman has written a second book in her Art Quilt Portfolio series — People & Portraits. My piece, Celtic Woman, is on page 32. I feel privileged to be included — although I’m not overly happy with the photograph. I’ve always prided myself in taking my own pictures — but I’m missing something in terms of color. The printed picture is not anywhere near as good as what I see on my monitor. I need to start using a white balance card when photographing and re-calibrate my monitor.
I received my complimentary copy a couple of weeks ago. Beyond the thrill of having one of my pieces in publication, it’s a nice compilation of work. Several of my FB friends are included and it’s been fun to read more about their work.

