Posts tagged fabric

Worry Completed
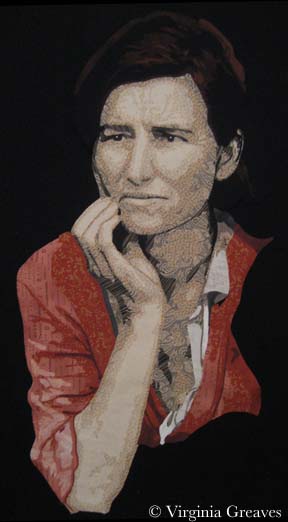
0This week I was intent on finishing my latest piece Worry. I quilted the background and then applied the binding. The hand work is getting harder for me to do. I’m a fairly thin skinned person and piercing my fingers with an extremely sharp needle seem masochistic at best — and my eyes are beginning to struggle to see the tiny stitches. I have only machine applied one binding but I may revisit that on my next piece.
You may have noticed that I missed Wordless Wednesday. That’s because I didn’t think about it until Thursday — and at that point, I felt like it was just too late.
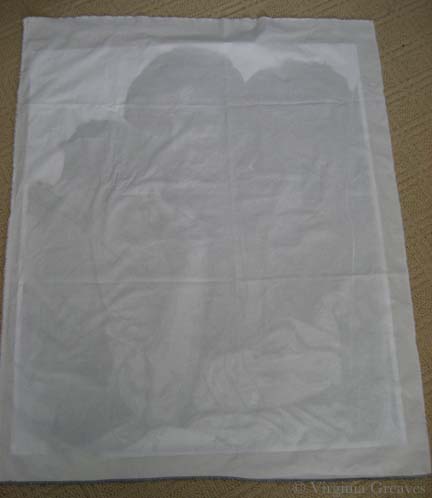
 Yesterday I finished sewing on the sleeve and blocking it — and today it was dry enough for me to take pictures. I took some for the website — but I’ve about decided it’s time I buy a photographic background stand. I have two design walls made from creosote that have black flannel taped to them which I have used for both blocking and a photography background. I started using them for blocking after I moved here when I discovered that you can’t pin into looped carpet — but sadly, blocking it warps the creosote — which wreaks havoc on the photographs if you’re using the same surface as a back drop. I have learned all the tricks in Photoshop Elements to straighten a pic. Once I realized that water was warping it, I kept one for blocking and the other for photography. Sadly, the one I kept for photography has still warped.
So I intend to order a photography stand this week and re-photograph the pieces I’ve done this year. I probably won’t re-do the images on the website — but I’ll have the proper pics for exhibition entries and publication opportunities.

Quilting Gadgets
0Having finally finished the appliqué for the family portrait I’ve been working on, I pinned the piece with batting and backing — and then began to prepare myself mentally to begin quilting.
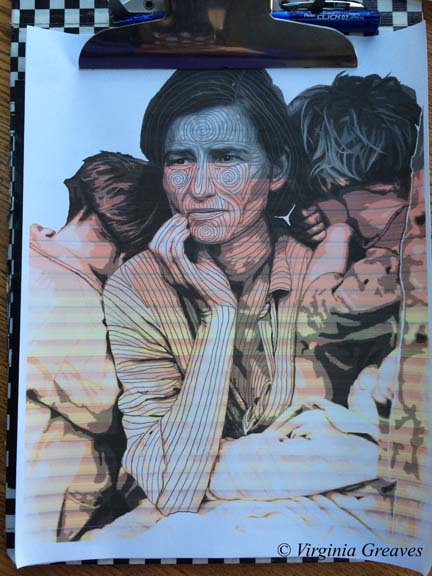
This is always the hardest part for me. I will put it off and find a hundred excuses not to get started. I think that the fear stems from the dislike of UN-sewing — an inevitability of the quilting process. I have, however, discovered that a good way to move me through this stage and get back to the machine is to print off the value painting I made earlier and start drawing quilting ideas on it. If I don’t like the direction of a particular area, all I have to do is erase it. Then when I sit at my machine, the drawing sits beside me and tells me where I need to go.
(Forgive the print — it came out in a pinkish hue because I was running out of black ink.)
I did have a problem when I sat down at my machine though. I have a Viking Designer 1 — and the truth of the matter is that it has given me problems since year 4 (it’s about 13 years old now). I had taken it in to the dealer for a cleaning — and she kept it for MONTHS (did I mention I didn’t have a backup machine?) — and when I FINALLY got it back, the touch screen menu didn’t always do what it was supposed to do. I could always reset it by turning it off and on — and I certainly didn’t want THAT dealer to touch it again (and Viking wouldn’t let me use anyone else) — so I had to wait until sometime after year 5 after she had gone out of business before I let someone look at it again (I still have trust issues with someone having my machine for any length of time).
I thought when I bought it that it was warranted for 20 years — and I considered it a good 20 year investment piece. However, I learned the hard way that the electronics were only covered for 5 years. And did I mention that the cost of replacing the motherboard is about $1,200?
Anyway, I’ve just lived with it — but when I sat down on Thursday to start quilting, it just wouldn’t behave. However, I have another Designer 1 that a friend gave me years ago (after hearing me complain about mine — she thought hers would be kinder to me) — so I took everything and set it up on that machine. I turned it on — and learned that it had grown unhappy over the last few months — watching me sew away on my other machine. That machine’s screen doesn’t work — at all. Not even a little.
I went back to my original machine and finally got it back in business. (And since then, it’s been working really well. It must know that I’ve been looking at other machines on the internet.)
And why all of this drama? Well — I have to come clean here. The truth is that I’ve been quilting with my feed dogs up for years. I KNOW! Crazy as it sounds, when I was first starting out, I was having problems and someone suggested just leaving them up — so I did and it helped and it’s been that way ever since.
 Except when I was quilting my last piece, Golden Moment, it was sooooo heavy and it was hard to move around — so I was persuaded to try Leah Day‘s Ultimate Quilting Kit — a Supreme Slider, Machinger gloves, and Little Genie teflon bobbin washers.
By the time the set came, I had just finished quilting — but I knew the day would come that I’d really enjoy using them — and that day was Thursday.
Except — in order to use the Supreme Slider, the feed dogs have to be down. You don’t want it to accidentally slide out of position (which the feed dogs might do) and start being quilted to the underside of your piece. That would be REALLY bad.
Hence the sewing machine problems. I had lowered the feed dogs to set up the machine only to realize I had a couple of appliqué fixes to make — so I had to raise the feed dogs — which they didn’t want to do.
The sewing machine argument aside — I enjoyed the gadgets. The teflon washer that you drop in the bobbin case really does cut down on the out of control speed spinning that the bobbin can sometimes do when you’re quilting fast. The Machinger gloves help me hold onto the quilt — but they’re going to take some getting used to. (It’s awkward when I have to start a new line and pull the bottom thread to the top with the gloves on — I end up with a lot more thread pulled than I’m used to.) The Slider also helps move the quilt around easily — although I’ll be able to evaluate the drag on the needle better when I get to the edges of the quilt. (I started quilting in the middle which keeps most of the quilt on the table so there’s not much drag at this point.)
Quilting with the feed dogs down does feel a lot different — I can tell that I have a higher chance of messing up the intentionality of the line if I’m not extra careful. I might try decreasing the presser foot tension the next time I sit at the machine.
There’s a learning curve in everything new — but I think that these are good things to learn.
Today, I managed to finish quilting the mom in my piece — except for her hair and clothes.
I am worried about my sewing machine. I don’t know that I’ll ever want to buy another Viking given the customer service problems I’ve had with them — but nor do I relish the thought of learning an entirely new machine.
My friend Rebecca has a Janome 5500 that I may borrow for a while — so I can try another something new.

Applique Beginnings
1Once break was over and the girls returned to school on Tuesday morning, I hit the studio and I’ve been working like crazy ever since.
I finished fusing the baby’s blanket — the last fusing section — and then I moved into fusing the larger pieces onto the muslin to begin appliquéing.
I did have a moment when I was working on the mom that I thought I should have kept her in smaller pieces — her face, her hair, her lower body, her jacket — but I fused whole people together and I was just going to have to live with everything trying to fall off as I started the appliqué process.
I laid my value study on the floor and covered it with muslin, cutting it to fit.
Using the drawing behind as a guide, I laid down the mother and fused her right down onto the muslin on the floor.
I started with her arm but quickly moved into whatever fabric didn’t want to hold onto the fusible the most. I can iron as I go — but squinching (new word?) the fabric under the harp of the machine can wreak havoc on your relationship with your fusible. Bottom line — fusible is a temporary relationship. Everything has to be sewn down.
I do use Wonder Under — and they’ve obviously recently changed the formula. Everyone raves about Misty Fuse — I’m not sure I could get used to something I can’t easily buy and that isn’t already paper backed — but one day I may give it a try. My feelings about Wonder Under vary with the complexity of the project.
Also — I made a command decision on this piece. After having gone to IQF/Houston & realized that I’m one of the few remaining artists that feels the need to cover raw edges — I’ve changed my strategy. A little, anyway. I couldn’t bring myself to get rid of it altogether. As I said, given the size & complexity of my appliqué shapes — if I fused the entire thing down & started to free motion quilt — I would have chaos on my hands. I did, however, compromise with a free motion zigzag. This is my first time with this stitch but given that I free motion quilt with the feed dogs up — it wasn’t much different — it gave me a little more control. And it’s faster — which is the biggest thing.
This is the woman after I finished appliquéing her this morning — from the back.
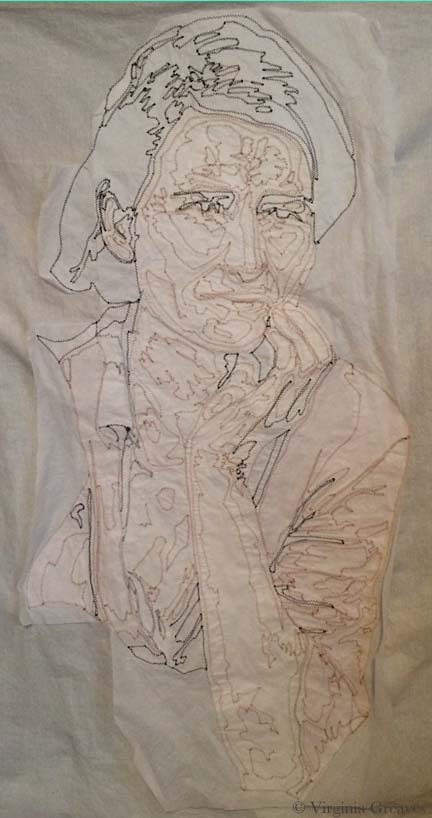
Once she was done, I fused her son to her left. He is also a complete fused piece. I started appliquéing him this morning — and will probably finish him in my next studio time (since it’s Friday, there’s no telling when that will be.)

Stress and Family
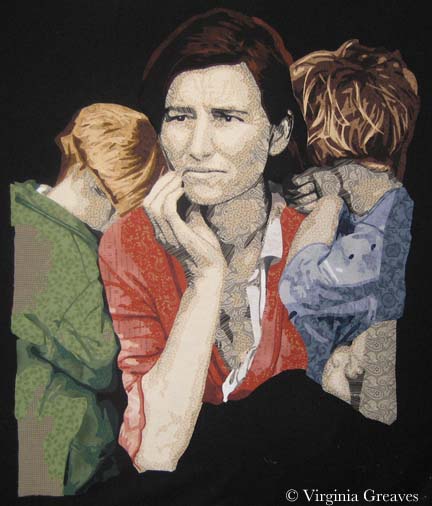
2When I started working on this project, I needed a name for this project’s folder on my computer. In the beginning, it was Depression — since it’s based on a Depression era picture. As I worked on the mother, I began to see it has a reflection of the stress of mothers — so I changed the name of the folder to Stress Project — knowing that that wouldn’t be it’s final name. And as I get closer to Christmas and I see the insanity that is family that comes out during the holidays — this has becomes a difficult project for me to work on — much less talk about.
But — I should share my progress from last week. I had finished the mother and her son & began work on the daughter that is on the mother’s other side. This shows her neck, arm, and fingers curled up.
And her hair. I think it turned out well.
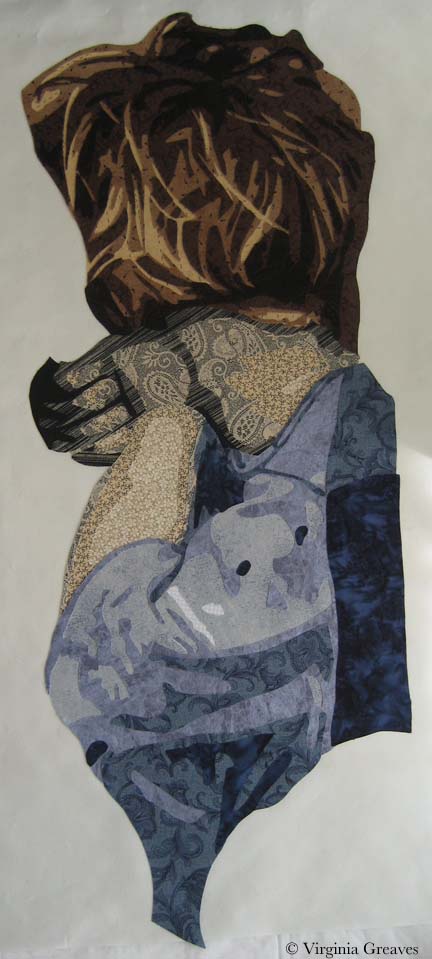
I snuggled her up to her mom. You may noticed that I’ve added some darker tones to the son’s hair. I also changed the fabric just under the mom’s hand — they were previously shirt fabrics but they were too close in tone to her skin so I just changed them to coat fabrics so you could see the back of her hand clearer.
The right hand side of the daughter is an extension that I’m creating because the photograph has something obscuring the view here (I think it’s a pole). I decided to lighten the lower shadow.
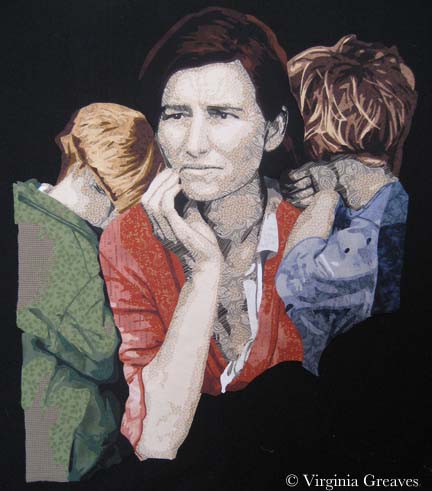
I like it better here. I also did the babies face. I don’t like how her face comes together but have decided that I’ll work on it after I’ve made her blanket. I’ll probably have the blanket wrap over the top of her head.
The blanket will extend across the bottom of the piece.
I think that I’ll continue as much as I can in the studio to try to black out the insanity of the holidays. It gives me a peace that’s hard to explain.

Mama’s Clothes
0I have a dream to finish cutting out all this entire piece before the Christmas break. It’s ambitious but I’m putting the pedal to the metal and seeing what I can get done in the time that I have.
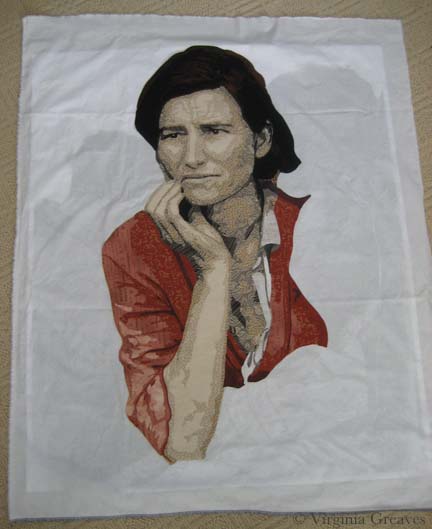
I started this week with her shirt. It’s hard to see hear since it’s white.
Here I’ve completed her jacket and her shirt shows up better. She’s actually hanging on my design board — that’s why the background is black. When I take a picture of this piece on the ironing board, I can’t get high enough above it to take a pick that doesn’t have some distortion. You can see some of that in the pic above.
The only issue I have is that some of darker values of the shirt are blending into her skin. The two pieces under her hand I can easily swap into jacket fabric. The lower pieces on the left will probably become lighter values.
Although it looks red in this picture, the colors are an orange red — more rust colored. I wanted the mother to have a hot color — and then the children will have cool colors. A bright red would have been too cheery — the rust conveys a more worn feeling.
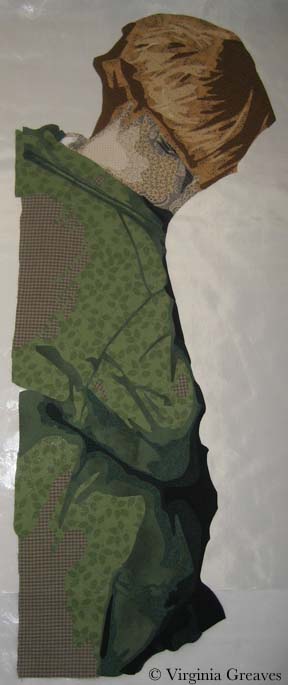
Then I started on the son leaning on her left shoulder. He is turned away from the viewer so you only see the back of his neck.
I did use the same fabrics that I used for the mother. When I made Beach Guardians, the two sisters have the same fabrics. I think it gives a feeling of relationship between the two — unlike the duet piece A Walk in Twilight when I used different fabrics for the two friends.
And this is his hair. I like that he’s more blond relative to the darkness of his mother. He is, however, tucking himself into her side & behind her so I will at some point have to add some darker tone to the crown of his head where his head leans into his mother’s hair.
I was free to make his jacket any color I chose — but really, the smart thing is to let the color wheel have a say in it. Since I chose an orange red for the mother, I chose a green for her son. On her other side, her daughter will have a blue — probably more on the gray side though.
And the baby in her lap — I just don’t know at this point. Today I’ve finished the daughter’s neck, fist, and arm — but her hair will take some time.

Happy Friday
0I just found out that Amelia Earhart has won 1st place in the open division, original design realistic pictorial wall category at the La Conner International Quilt & Fiber Arts Festival. Life has been full of blessings lately. I wish I could see the exhibit but it’s on the opposite coast from me. Hopefully some kind soul will take a pic and send me a copy.
It will hang in the extended exhibit through December at the La Conner Quilt & Textile Museum in La Conner, WA.

Going to Houston
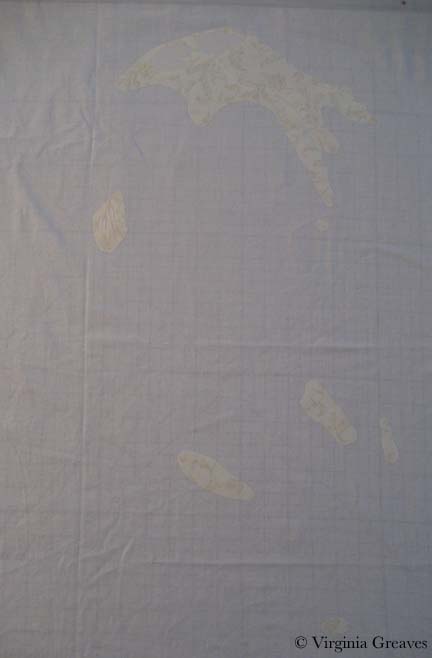
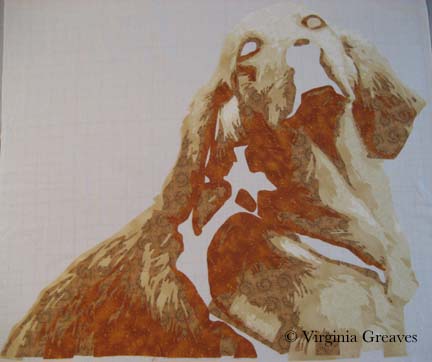
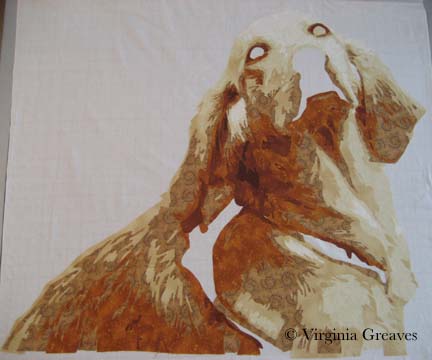
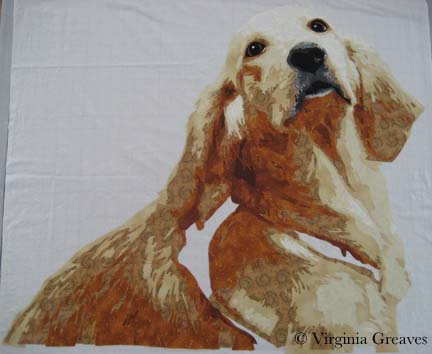
1I have been working away here on my Golden Retriever. This is what she looked like before appliqué and quilting. I have since completed appliquing her and just finished pinning her this morning in preparation for quilting.
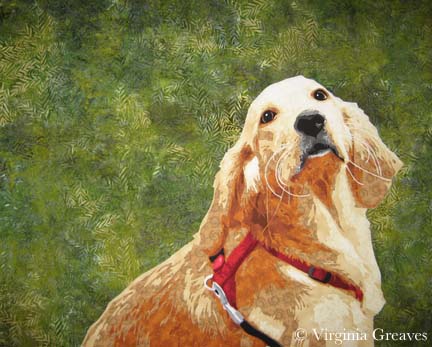 I bought several backgrounds before I settled on this batik. I didn’t want anything busy to distract from the Golden — so piecing a background was out. I also had decided to stick with analogous colors on the color wheel — so I knew yellow green was the correct color choice. The first piece I bought was a lime green that I thought would be perfect, but the minute I brought it into my studio, I knew it was wrong. I also bought a yellow green with some gray in it — which worked, but it didn’t make the Golden sing. It was just too flat. There was a batik at the store I had decided wouldn’t work because it had too much yellow in it — but at home, looking at my other choices, I knew it would work — and it does. Sometimes you have to move out of your own way.
I have also had some exciting news — I’ve been given the honor of being invited into the Winner’s Circle at the International Quilt Festival in Houston this year for my piece Lincoln. I’ve never even been to the show before — but I’ve made my reservations and I’m looking forward to meeting other artists I’ve only met on the internet and feeling honored to be in their presence. When I find out my prize at the end of October, I’ll be sure to share.

Golden
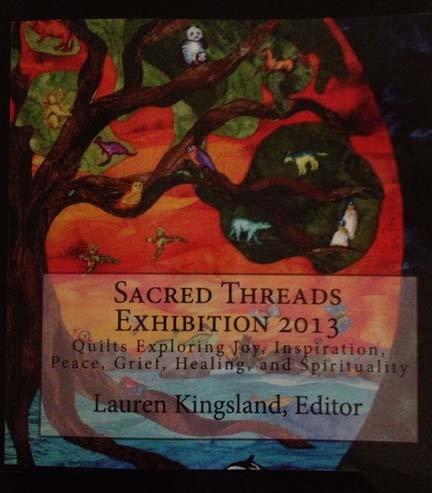
0As I’ve mentioned before, I was lucky enough to have two pieces in the recent Sacred Threads show in Herndon, VA — Beach Guardians and The Bowl Judgments. It’s a biannual show and I haven’t participated in about four years — so I was delighted to find that the show published a book with all of the pieces from the show. Not having the ability to see the show in person, it gave me the chance to enjoy the exhibit from home and read all of the artist’s statements with time to study them alongside the work. You can order a copy of the book here.
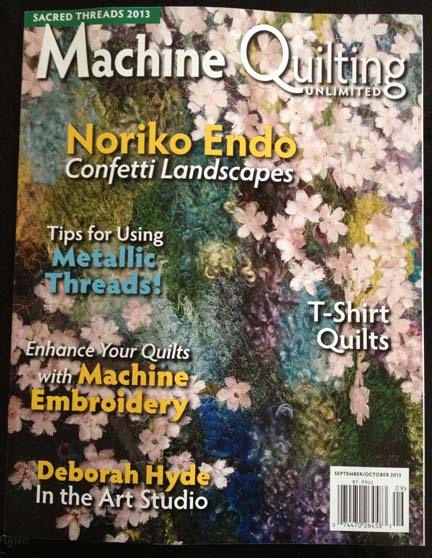
Then a couple of weeks ago, I received a manila envelope in the mail. Inside was this new copy of Machine Quilting Unlimited and nothing else. I don’t have a subscription (although I might have to get one now — it’s really well done) — so I was confused until I saw the little strip at the top that said “Sacred Threads 2013.” I flipped to the article for the exhibit — and Beach Guardians was one of the highlighted pieces.
I was really stunned. I have never had my work included in a magazine before. I felt like I had reached a milestone. My 15 minutes anyway.
I have not been writing much on the blog lately. Part of me thinks that to have a blog, you need to write at least weekly. Another part of me really despises blog writers that fall off subject or write about nothing just to get a post out. I try to prepare something interesting and present it in a large enough piece that you can see progress. If I just showed you one day at a time, the blog would show everything in reverse order and it wouldn’t be nearly as interesting — to me anyway.
Once I had the girls back in school in August, I started thinking about my next piece. I really had no idea what I wanted to do. I started sifting through pics I took in the Spring and came across one that I really liked of a golden retriever. She is looking over her shoulder at her owner and has such a look of love in her eyes. If I found it captivating, maybe someone else would too.
I spent about a week drafting her. I typically bring the pic into Photoshop and reduce it to values only, adding lines of separation between differing objects — like the dog from her harness — or even her eyes and her nose from her fur. Then I spend a lot of time drawing in Photoshop using my Wacom tablet pen. Not only do I clean up the light scatter, I deepen shadows, add shadows to create definition, redraw the eyes, and simplify shapes.
From there, I continue the drafting process by pulling the final pattern into PosteRazor as a BMP file & scaling it to what I wanted. In this program, I can then tile print. Then I take the puzzle pieces, cut off the margins, and tape it back together. Now my pattern is back together — but larger.
Then I outline everything with an ultra thin black Sharpie. It bleeds through to the back giving me the reverse image that I’ll need for WonderUnder templates. I’ll have to go back & re-draw the lines on paper overlap — but it’s otherwise done. And FINALLY, I place a layer of see-through vinyl over the top of the pattern, tape it down, and trace it. I can then sew the vinyl to a piece of muslin (using a teflon foot that won’t stick) to use as my guide when I fuse the pieces down — or I can work on a very large fusing sheet and tape the vinyl pattern over that.
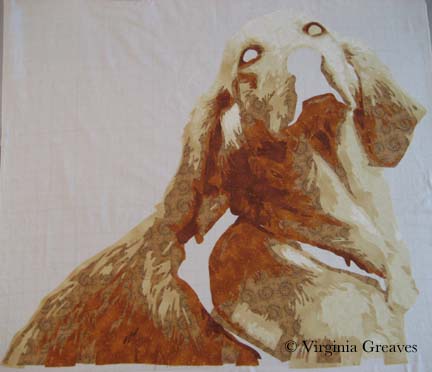
This is the beginning showing the first & second value. The first value is almost impossible to see as it’s white like the muslin background.
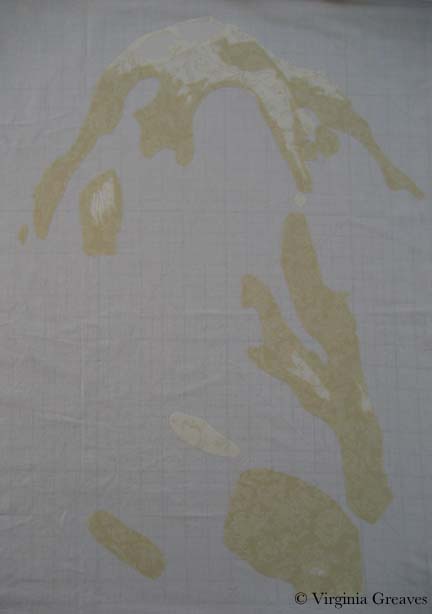
The third value gives you a better idea of the face.
The fourth value shows the outline of the entire dog.
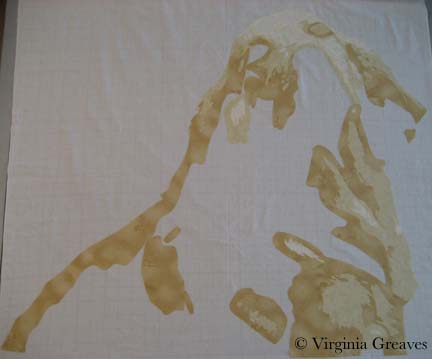
The fifth value begins to give shadows and therefore definition to shapes.
The sixth value goes into an orange. There is only so far you can go with yellow — even cream. The color that shows for this value will depend largely on what is placed next to it. In the pic, it looks a lot more orange than it actually is.
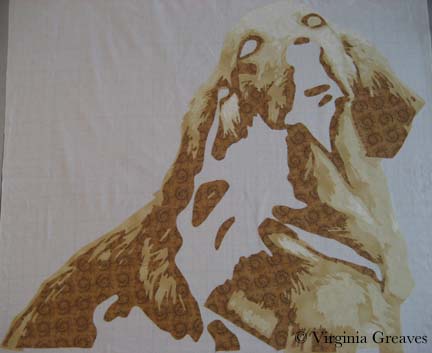
The seventh value gives more depth and tones down the orange.
I debated having an eighth value — I though about just making it black — but between yellow and orange, I had room to move into a dark brown cinnamon. There isn’t a lot of it anyway.
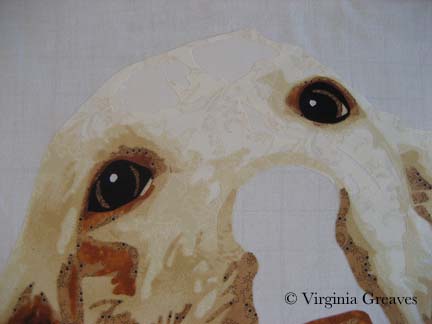
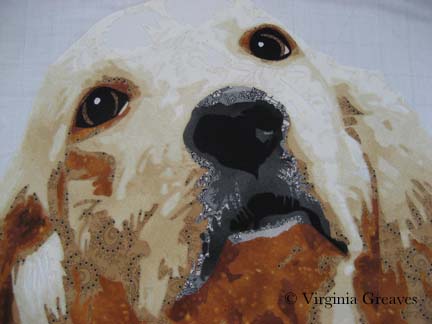
Now the eyes. The pic normally gives me useless information here. I’ve found it best to draw them myself. The pupils are wide — and the irises are brown but has more gray in it than the brown tones in her fur. The outline of her eyes is black. You have to have a deep contrast here to feel the depth of the eye and most dogs can easily take the rich black for that function.
The nose is an experiment — although I’m leaning towards keeping it. You would think that all the fur around the mouth would match her other fur — but it doesn’t. It’s shades of back and gray.
Seeing a full picture of her, I think the nose makes sense. The gray and the black have to work together to give the impression of a snout — which I think they do.
The open patches around her shoulder are for a harness — which I’ll work on today.
I ripped off the orange under her left eye — I found it distracting.
I’m not sure about the light gray at the bottom of the mouth — I’m still considering it.
I made the entire piece without extra around the edges — which I should have done since I put her right on the muslin. Making her this way, I should have fused her to a fusing sheet where I could detach her & place her on a background. I wasn’t thinking through it — I was too excited to get to my favorite part — the cutting! I love the meditative process of fusing the shapes, cutting them out, and layering them until I start to see recognizable shapes.
I’ll have to think around what to do to correct this.

Just the Basics
0My mother is an impressionist oil painter, and when I was young and she went back to college to receive another degree in art, I remember her talking about the bias against realism in the art world. Abstract work was more highly valued — and for a very long time, I’ve disagreed with that opinion. I do like some abstract work, but I tend to be more engaged with realistic work. In fact, I’ve always felt that realism was harder to achieve than many pieces I’ve seen. That’s a huge generalization obviously — but I thought that abstract art was more about serendipitous exploration than intentional exploration.
At this point, I realize that that isn’t true — at least it isn’t true of good abstract art. It’s based on a deep understanding of color theory and how to make it work for you. I also understand why some consider it more difficult than realism. With realism, you have a point of reference from which to work. (It may not be a good point of reference, but that’s a different issue.) With abstract work, you are working entirely with theories and attempting to turn them into something engaging.
I have respect for both points of view. I work primarily in realism because that is what I like to do — but occasionally, I challenge myself to do something different — and that is what I have started here. As part of my art group’s annual exhibit, we were given playing cards to interpret. I had all ready made Jacks Are Wild — but I was given another card that I thought I could play with in a more abstract way — the six of Diamonds.
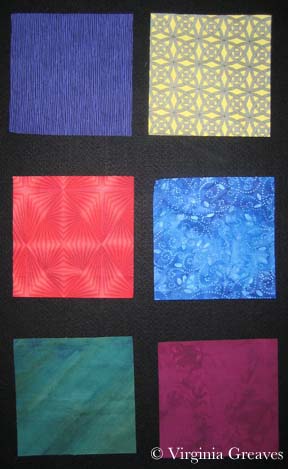
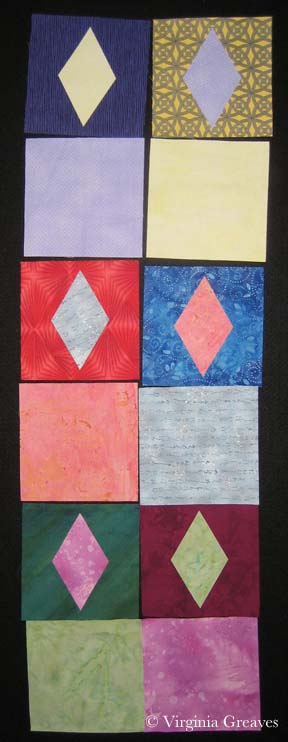
Using my color wheel, I chose six colors — starting with cyan — and then every other color around the wheel: blue, magenta, red, yellow, and green. I then picked out a light and a dark in each of these colors. Below are six 6 1/2″ squares of the dark. I know the yellow screams a little. It has a tight black pattern on it. It will make more sense when it is seen smaller and in the context of the entire piece.
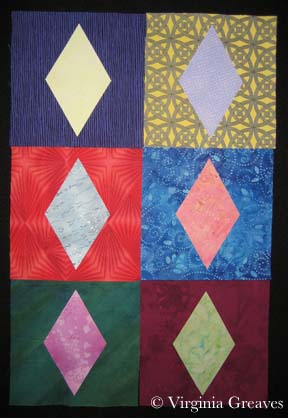
Then I made six diamonds from the light values and placed them on opposite sides of the color wheel — for example, the blue background got the yellow diamond.
Of course, at this point, I know I have to make the piece longer. The challenge requires it to be 36″ long, so I decide to add squares in the light values.
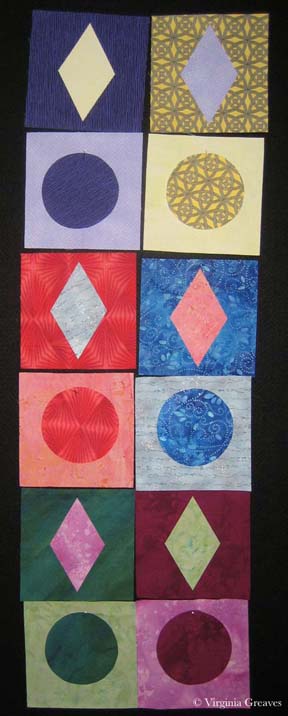
They look awful blank so I decide to add a common shape — a circle — in the dark values — to place on the light colored squares. I used a round container I had in the studio for a template. It was just the right size to fill the space in the squares I had cut.
I am, by the way, appliqueing all of these shapes. I had considered piecing the diamonds onto their backgrounds — but I wasn’t going to attempt to piece a circle — so I decided I would stick with machine appliqué. This is a Wonder Under template you see below.
I have two rows of blocks. This is how they were originally laid out on the design wall, but I decided it was too predictable. I left diamonds next to diamonds and circles next to circles, but I changed the color placements so that each color wasn’t clustered with its cousins.
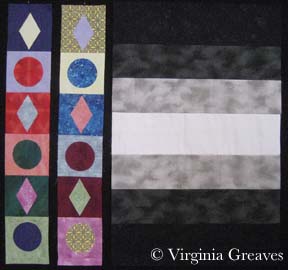
This was very straightforward playing with color theory. Below you can see the two strips of shapes. Not exciting enough on its own though.
I turned to my old pal deconstruction for the next part. I made a background with black, white, and a couple of grays.
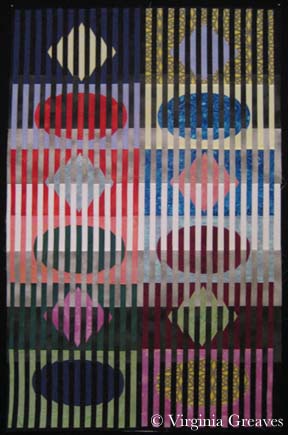
Then I cut the strips of shapes into 1/2″ sections and fused them onto the background.
I’m still working on the appliqué. Even though it’s just shapes and color, does it sing? I definitely think it has a sense of movement.
I don’t know that I’ll ever work exclusively in abstract, but it’s good to dust off my skills and try something new once in a while.

Completing the Raven
0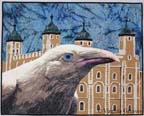 I have finally completed The White Raven. The bird was wonderful — the Tower of London was tedious — but I think in the end that it all came together. It’s ironic that I now have such a creative flow while constructing portraits and my more difficult moments are in the backgrounds.
I used a stacking type of stitch while quilting the raven to give the impression of feathers — it was interesting to see how the white thread changed the character of the darker fabric shades. I am becoming completely reliant on Isacord thread for free motion quilting. I can run my machine at a high speed and the thread is less likely to shred. It’s also available in a huge selection of colors. A thread run before I start quilting is almost a must for me at this point.
The Tower was not as much continuous line quilting as I would have liked. There was a lot of stopping and starting — so it took much longer to do — but hopefully I’ve created the impression of the Tower in a minimalist way. I still wanted the focus to be on the raven.
The background was also difficult because of the Tower peaks. I started in the middle between two towers and echo stitched a wavy line upwards — but once I reached the top, I attempted to echo stitch back down between another set of towers. Any quilter knows that you have to quilt from the inside out — especially if you’re quilting densely. By quilting from a less dense to a more dense area, I created some ripples that could only be resolved by ripping out all of my quilting and starting over in the correct direction — from the more dense outwards to the less dense area.
 At the end, after I had washed it, blocked it, and added the label, I went back and added more quilting in the raven’s eye. It’s the focus of the piece and it did not have enough quilting relative to what was around it. I didn’t want it to sag over time.
The raven isn’t exactly like the original — I had to take liberties with the beak especially — but I think it is definitely reminiscent of the pictures of Mike Yip. His photographs of the white ravens in the Vancouver Islands are really wonderful.
Adding the Tower of London gave the piece whimsy — a story — which I think adds to the visual interest of the piece.
